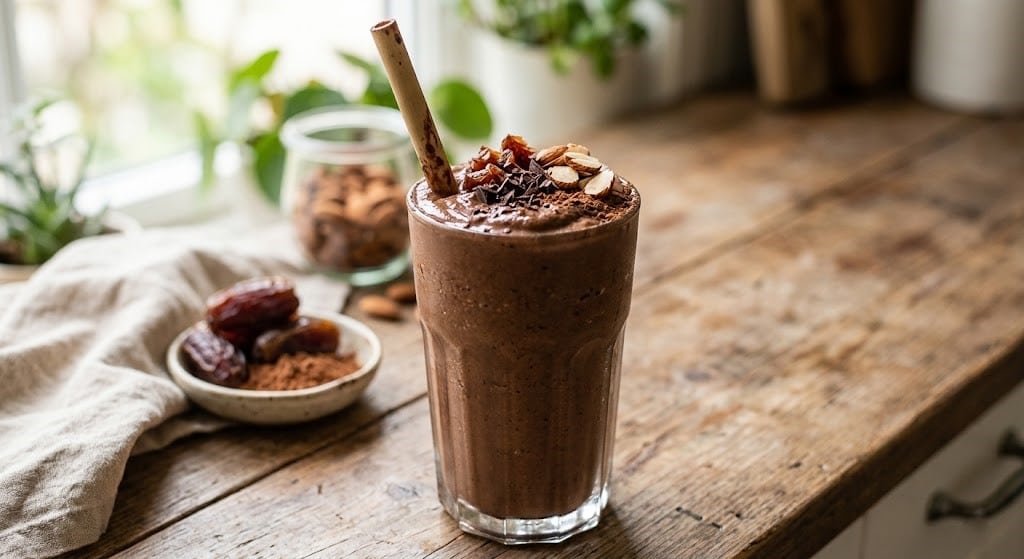
Category: Shakes

  • The Ultimate Homemade Dunkin Mango Pineapple Refresher Recipe

    The Ultimate Homemade Dunkin Mango Pineapple Refresher Recipe


    Editor’s Note


    We spent hours in our kitchen testing this famous Dunkin drink to get the exact same taste. After many tries, we found the perfect balance of sweet mango and tart pineapple. If you want to save your money and enjoy a fresh, cold drink this summer, this guide is exactly what you need. You will forget about buying expensive cafe drinks!


    Are you looking for a cold and delicious fruit drink to beat the summer heat? You are in the perfect place. Today, we are teaching you how to make your very own mango pineapple refresher at home.


    Drinking this makes you feel like you are sitting on a tropical island. The taste is incredibly fresh and perfectly sweet. The best part? It is super easy and very cheap to make in your own kitchen instead of buying it from a store. Let’s look at how to make this perfect summer beverage.


    Trending Customizations: The Secret Menu


    If you look online, people are always changing up this drink to make new flavors. We tested the top trending ideas, and these secret menu variations are truly amazing:


    The “Sabrina’s Daydream” Twist: People are going crazy for this! This twist focuses heavily on the sweet mango flavor, using just a tiny splash of pineapple to balance it out.


    The Mango Pineapple Oat Milk Refresher: If you like your drinks to be creamy, use oat milk instead of water. This is the biggest hit on the secret menu right now!


    The Sparkling Upgrade: If you love fizzy sodas, mix in some sparkling water at the end. It is a fantastic way to stay hydrated.


    What You Need (Simple Ingredients)

    Ingredients for homemade mango pineapple refresher.


    You do not need any fancy tools or hard-to-find items for this recipe. You probably have these simple things in your kitchen right now:


    Green Tea: 1 cup of cold green tea. Dunkin uses green tea in their refreshers to give you a nice boost of energy.


    Mango Puree: 3 big tablespoons. You can make this yourself by blending fresh mango pieces until they are smooth.


    Pineapple Juice: 1/2 cup of cold pineapple juice. Buying 100% pure juice will give you the best flavor.


    Sweetener: 1 to 2 tablespoons of simple syrup. You can also use honey if you prefer.


    Ice: Lots of ice cubes to keep your drink freezing cold.


    Easy Ingredient Substitutes


    Everyone likes different tastes. If you are missing an ingredient, you can easily swap things out:


    The Caffeinated Base


    If you do not like green tea, you can use regular black tea. If you want a drink with zero caffeine for your kids, just replace the tea with fresh coconut water.


    The Fruit Base


    If you cannot find liquid mango puree, just take frozen mango chunks and blend them with a little bit of water. This actually tastes much fresher!


    The Creamy Addition


    If you want your refresher to look milky and thick, add 2 tablespoons of coconut milk right before you drink it.


    Step-by-Step Instructions (The Easy Method)


    Just follow these easy steps and your wonderful drink will be ready in under five minutes.


    Step 1: Brew and Chill the Tea


    First, make your green tea. Let the tea bag sit in hot water for about 3 to 4 minutes, then take it out. Put this tea in the fridge until it is completely cold. If you use hot tea, it will melt all your ice!


    Step 2: Mix the Tropical Fruits


    Grab a large cup or a shaker. Pour in your cold pineapple juice and your fresh mango puree. Stir these two together with a spoon until the color becomes a beautiful yellow-orange.


    Step 3: Combine and Shake


    Now, pour your cold green tea into the fruit mixture. If you have a sweet tooth, add your simple syrup or honey now. Shake or stir it very well.


    Step 4: Pour Over Ice


    Fill your favorite drinking glass all the way to the top with ice cubes. Pour your delicious mixed drink over the ice. You can stick a small piece of pineapple on the edge of the glass to make it look fancy!


    Pro Tips to Perfect Your Refreshe

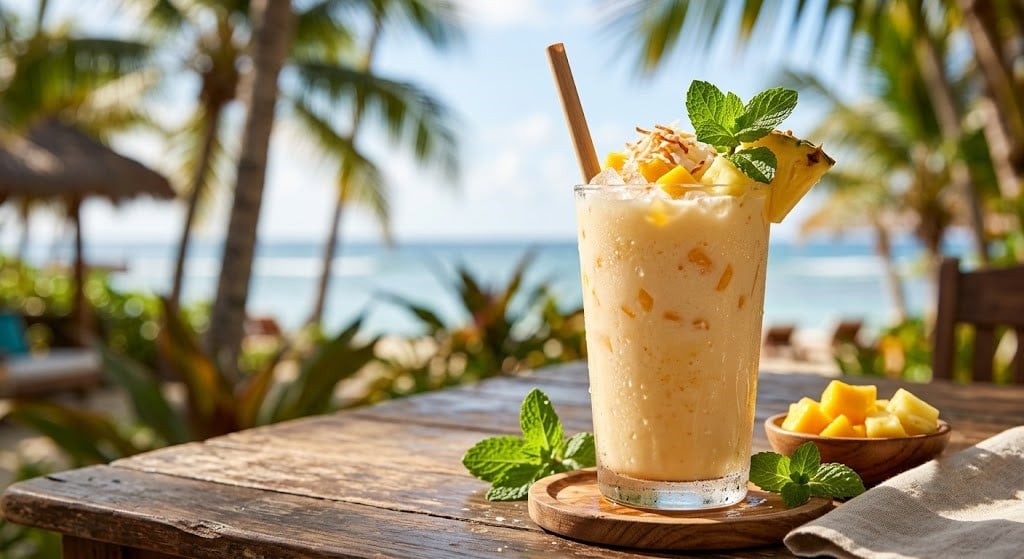
    Clear and creamy variations of mango fruit drink.


    Strain the Puree: If you do not like tiny pieces of fruit floating in your cup, pour your puree through a small strainer before mixing it.


    Make a Big Pitcher: If you are having friends over, just double all the ingredients and make a big jug. It stays totally fresh in the fridge for up to two days.


    Add a Citrus Kick: Squeezing a tiny bit of fresh lemon juice into the glass makes all the fruit flavors pop out even more.


    The “Golden Coconut” Mango Refresher


    If you love creamy, tropical drinks (like the famous Starbucks Pink Drink), this upgrade is for you. Instead of using brewed green tea as your liquid base, swap it entirely for cold, unsweetened coconut milk.

    • How to make it: Pour your homemade mango-pineapple syrup base over ice, and top it off with 1 cup of creamy coconut milk. Stir gently. The drink instantly turns into a beautiful, pastel yellow “golden” milk that tastes exactly like a melted tropical popsicle!
    Creamy coconut mango pineapple refresher drink.


    FAQs


    Can I put coconut milk in this drink?


    Yes, absolutely! If you add 2 big spoonfuls of coconut milk, it tastes exactly like the famous creamy Dunkin variation. It also turns the drink a very pretty pastel color.


    Can I use canned pineapple juice?


    Yes, canned juice works perfectly. Just try to buy the kind that has no added sugar, or else your final drink might be way too sweet.


    How long does this drink stay fresh?


    You can keep the mixed liquid (without ice) in your refrigerator for up to 3 days. When you are ready to drink it, just pour it into a fresh glass of ice.

  • The Ultimate Homemade Brownie Batter Frosty Recipe

    The Ultimate Homemade Brownie Batter Frosty Recipe


    Editor’s Note


    We know the feeling of waiting in a long drive-thru line just to get a cold, thick chocolate treat. That is why we went into the kitchen to make our own version. After trying many different methods, we found the perfect secret to making a rich, thick, and safe-to-eat brownie batter drink right at home. You do not need an ice cream machine, just a simple blender!


    Are you craving a thick, creamy, and super chocolatey drink? You have found the right place! Today, we are making the famous brownie batter frosty right in your own kitchen.


    This homemade version is rich, cold, and tastes exactly like licking the spoon when you bake brownies. The best part? It takes less than five minutes to make.


    Before we jump into our super easy recipe, let us talk about why this specific flavor is taking over the internet.


    We Ranked the Best Frosty Flavors (And Found the Winner)


    If you look online, people love to debate about the best fast-food frosty flavors. People try and rank every single flavor combination. Here is a look at the most popular trending flavors right now:


    The Classics: The Vanilla Frosty and Classic Chocolate Frosty are always loved by everyone.


    The Fruit Mixes: Flavors like the Pop-Tarts Strawberry Vanilla Frosty Fusion and the Strawberry Chocolate Frosty Swirl are great for fruit lovers.


    The Caramel Hits: Drinks like the Caramel Crunch Chocolate Frosty Fusion give a nice sweet crunch.


    The Ultimate Winners: At the very top of everyone’s list are the heavy chocolate desserts. The Brownie Batter Chocolate Frosty Swirl and the Oreo Brownie Twist Chocolate Frosty Fusion almost always win first place!


    Since the brownie batter flavor is the absolute king of desserts, we decided to teach you how to make the best version of it at home.


    Why Make This at Home?


    You might wonder why you should make this yourself instead of buying it. Here are three amazing reasons:


    Save Your Money: Buying fast-food desserts every day gets expensive. Making it at home costs only pennies per glass.


    Safe Ingredients: We use a special trick to make the raw brownie mix completely safe to eat.


    Perfect Thickness: You get to choose exactly how thick you want your drink to be!


    Ingredients You Need

    Ingredients for a homemade brownie batter drink.


    You only need four simple things from your kitchen to make this magic happen.


    Vanilla Ice Cream: 2 big cups of soft vanilla ice cream. Vanilla creates a better creamy base than chocolate ice cream.


    Milk: 1/2 cup of cold milk. Whole milk makes it the creamiest, but any milk will work fine.


    Dry Brownie Mix: 3 big spoons of dry chocolate brownie mix from a box. (Read our safety tip below before using this!)


    Cocoa Powder: 1 small spoon of dark cocoa powder to give it an extra rich color and taste.


    The Loaded Fudge Rim Upgrade


    If you want your homemade frosty to look exactly like a premium, $10 boutique dessert, you need to try the viral fudge rim hack that is currently dominating Pinterest and TikTok.


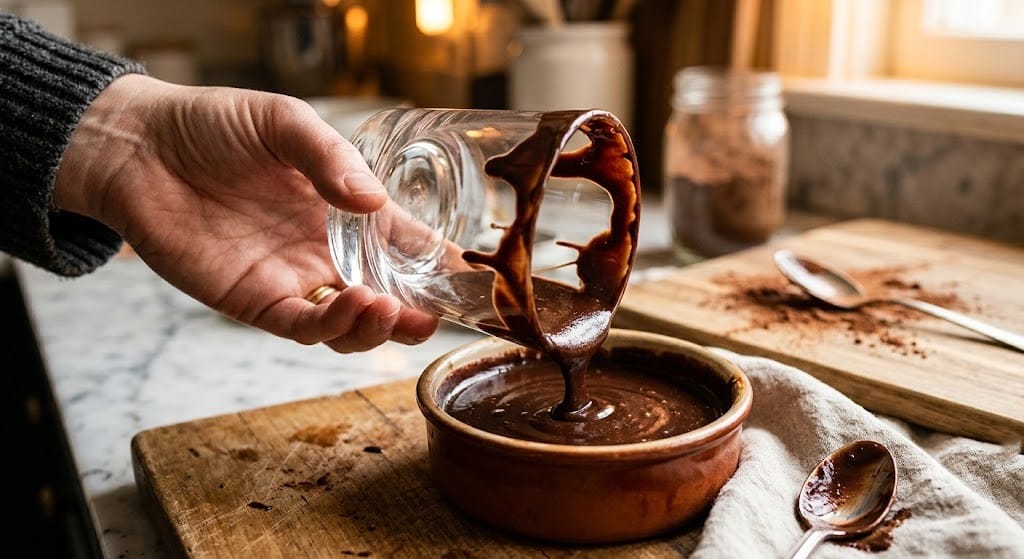
    The biggest problem with thick chocolate frosties is that they can look a bit plain in a regular glass. To fix this, grab a small plate and pour two tablespoons of hot chocolate fudge syrup or melted chocolate ganache onto it. On a second plate, place a handful of finely crushed brownie crumbs and mini chocolate chips.


    Before pouring your blended frosty into the glass, turn the glass upside down. Dip the rim first into the gooey chocolate fudge, and then immediately roll it in the brownie crumbs. Turn the glass right side up, and you will have a gorgeous, thick, double-chocolate border around the top! When you pour the frosty inside, the presentation is absolutely stunning. Plus, you get a bite of real chewy brownie with every single sip.

    Dipping a glass rim into chocolate fudge sauce.


    Important Safety Tip: Heat Your Brownie Mix


    Raw flour in dry boxed mixes can sometimes carry germs. But do not worry, fixing this is super simple!


    Put your dry brownie mix into a glass bowl. Put the bowl in your microwave for about one minute. This simple heat trick kills any bad germs. Let the powder cool down for a minute before you use it. Now it is completely safe to eat!


    Step-by-Step Instructions (The Easy Method)


    Ready to make your dessert? Follow these three easy steps.


    Step 1: Add the Wet Ingredients


    Take your blender cup. First, pour in your half cup of cold milk. Adding the liquid first helps your blender spin much easier. Next, drop in your two big cups of vanilla ice cream.


    Step 2: Add the Magic Chocolate


    Now, take your cooled, safe brownie mix powder and drop it into the blender. Add your small spoon of cocoa powder right on top.


    Step 3: Blend Until Thick


    Put the lid tightly on your blender. Turn it on a low speed first, then move to a medium speed. Blend it for about 30 seconds. Stop the blender and look inside. If it is too thick, add a tiny splash of milk. If it is too thin, add one more scoop of ice cream.


    Amazing Variations to Try

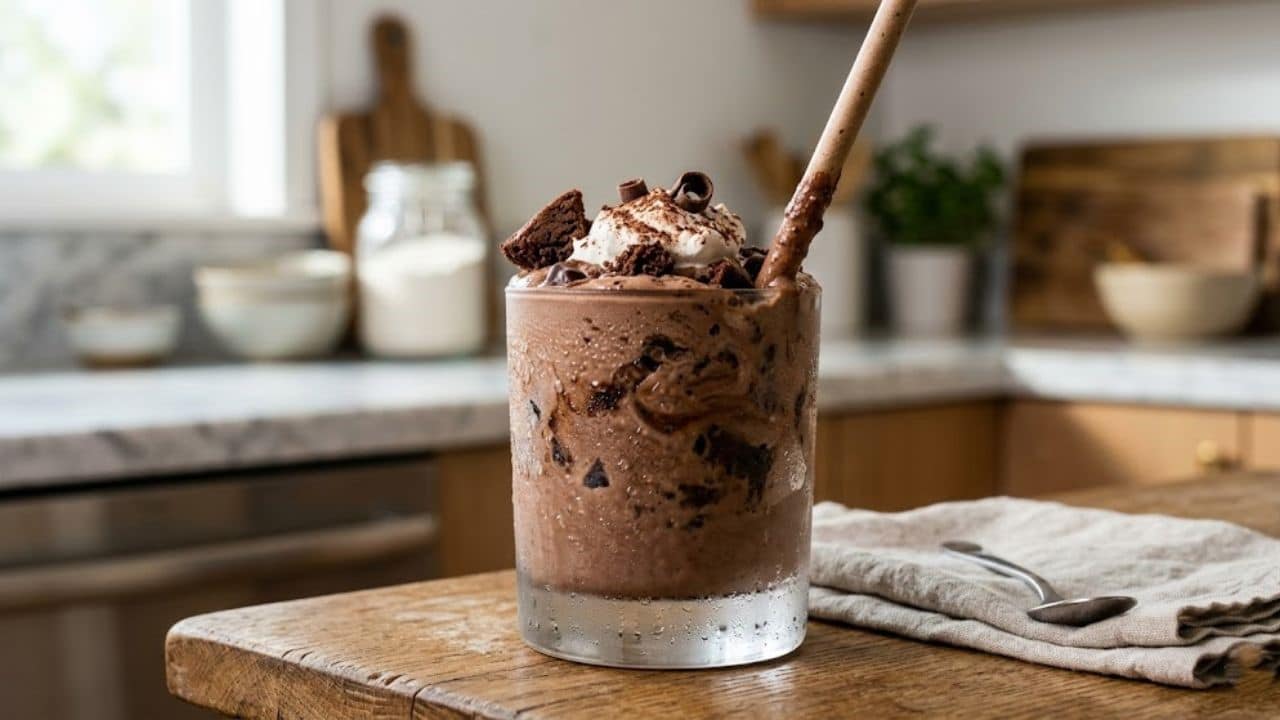
    Chocolate milkshakes with Oreo and caramel toppings.


    Want to make your frosty even better? Here are some fun ideas that are very popular right now:


    The Oreo Brownie Twist


    Crush two Oreo cookies into tiny pieces. Stir them into your cup with a spoon after you finish blending. This gives you a wonderful crunch in every bite.


    The Caramel Swirl


    Take a bottle of sticky caramel syrup. Squeeze it around the inside walls of your empty glass before you pour your drink in. It looks beautiful and tastes like candy!


    The Double Chocolate Crunch


    Drop a handful of mini chocolate chips on top of your finished frosty. This is perfect for true chocolate lovers.


    FAQs


    Can I use chocolate ice cream instead of vanilla?


    Yes, you can! However, using vanilla ice cream lets the true “brownie batter” flavor shine through better. Chocolate ice cream can sometimes hide the brownie taste.


    How do I store leftovers?


    If you make too much, pour the extra into a freezer-safe cup with a tight lid. Put it in your freezer. When you want to drink it later, let it sit on your table for 15 minutes to melt just a little bit.


    Do I need a fancy blender?


    Not at all! Because the ice cream is already soft, any normal kitchen blender will do a great job mixing these simple ingredients.


  • The Viral Dubai Chocolate Milkshake Recipe (With Crunchy Pistachio Kataifi!)

    The Viral Dubai Chocolate Milkshake Recipe (With Crunchy Pistachio Kataifi!)


    Editor’s Note


    Over the last few months, the $20 “Dubai Chocolate Bar” from Fix Dessert Chocolatier broke the internet. Everyone wanted to try that thick milk chocolate filled with sweet pistachio cream and crunchy toasted pastry. However, flying to Dubai or paying huge shipping fees is just not possible for most people. We spent days testing how to turn this viral candy bar into a drinkable dessert. The biggest problem was keeping the pastry crunchy inside a wet milkshake. We finally cracked the code! By toasting the pastry in butter and layering it instead of blending it, we created the ultimate Dubai Chocolate Milkshake. Now you can enjoy this luxurious, billion-dollar taste right in your own kitchen!


    People love the amazing mix of smooth milk chocolate, rich roasted pistachio cream, and the loud crunch of toasted kataifi (a thin, stringy pastry). But sadly, getting your hands on the real chocolate bar is very hard and incredibly expensive.


    What if you could get that exact same gourmet flavor and satisfying crunch in a freezing cold, creamy dessert? Today, we are teaching you how to make the ultimate Dubai Chocolate Milkshake at home. It is incredibly easy, looks like a fancy restaurant dessert, and will completely satisfy your sweet tooth. Let us get started!


    What Exactly is the Dubai Chocolate Trend?


    If you are new to this trend, you might be wondering why everyone is so obsessed with this specific chocolate.

    The original viral treat is made by a company in Dubai. They take a thick shell of high-quality milk chocolate and fill the inside with two special Middle Eastern ingredients. The first is pure, sweetened pistachio cream. The second is “kataifi,” which is a very fine, shredded phyllo dough that gets toasted until it is super crunchy.

    When you bite into it, you get a loud crunch and a burst of nutty, sweet flavor. Our milkshake recipe uses these exact same ingredients to recreate the magic in a cold, drinkable form.


    The Secret to the Crunch: What is Kataifi?


    The biggest mistake people make when trying to recreate this recipe is using the wrong crunch. You cannot use crushed cookies or graham crackers. You need kataifi.

    Kataifi is a shredded pastry dough that looks like very thin noodles. You can easily find it in the frozen section of Middle Eastern grocery stores or order it online. When you cook these thin dough strings in a pan with a little bit of butter, they become perfectly crispy. This is the secret ingredient that makes the Dubai Chocolate Milkshake so special!

    If you love making viral, crispy, and creamy desserts at home, you absolutely have to check out our famous Homemade S’mores McFlurry Recipe next!


    Simple Ingredients You Will Need


    You do not need to be a professional pastry chef to make this luxury shake. Here is everything you need to grab from the store:

    Ingredients needed for a Dubai chocolate milkshake.


    Kataifi Pastry: 1 cup of finely chopped kataifi dough (thawed if frozen).

    Unsalted Butter: 1 tablespoon of butter to toast the pastry perfectly.

    Pistachio Cream: 3 tablespoons of sweet pistachio cream (also called pistachio butter).

    Vanilla Ice Cream: 3 large, generous scoops of premium vanilla bean ice cream.

    Whole Milk: 1/2 cup of very cold whole milk.

    Chocolate Syrup: 2 tablespoons of thick, rich chocolate fudge syrup for coating the glass.

    Dark Chocolate Chips: 1 tablespoon of mini chocolate chips for extra texture.


    Step-by-Step Instructions: The Crunch Layering Method


    Making this milkshake is all about how you build it. If you put the crunchy bits in the blender, they will turn into soggy mush. Follow these exact steps to keep that famous viral crunch!


    Step 1: Chop and Toast the Kataifi


    Take your kataifi dough and use a knife to chop it into very small, bite-sized pieces. Place a small frying pan on your stove over medium heat. Add your 1 tablespoon of butter and let it melt. Add the chopped kataifi to the pan.


    Step 2: Get the Golden Crunch


    Stir the pastry strings constantly with a wooden spoon for about 4 to 5 minutes. Watch it carefully so it does not burn! Once the kataifi turns a beautiful dark golden brown and feels crispy, take the pan off the heat. Stir in 1 tablespoon of the pistachio cream and mix it with the hot pastry. Set it aside to cool.

    Toasting kataifi pastry in a pan until golden brown.


    Step 3: Decorate the Serving Glass


    To make your drink look like it came from a fancy cafe, take a tall, clear glass. Drizzle your thick chocolate syrup all around the inside walls of the glass. Then, take another tablespoon of pistachio cream and smear it along the inside. Place the glass in the freezer for 5 minutes so the syrups stick to the sides.


    Step 4: Blend the Base Perfectly


    Now, grab your blender. Add your 3 huge scoops of vanilla ice cream, the cold whole milk, and the last tablespoon of pistachio cream. Blend everything at high speed for just 20 seconds. You want the milkshake to be very thick, not watery.

    Having trouble getting your blended drinks perfectly thick? Read our expert blending guide in the Dunkin Frozen Hot Chocolate Recipe!


    Step 5: The Famous Layering Technique


    Take your decorated glass out of the freezer. Drop a big spoonful of your crispy, buttery kataifi mix into the very bottom of the glass. Pour half of your thick milkshake over the crunch. Add another layer of crunchy kataifi, then pour the rest of the milkshake.


    Step 6: Garnish and Enjoy!


    Top your magnificent dessert with a huge mountain of whipped cream. Sprinkle the remaining toasted kataifi and the mini dark chocolate chips over the very top. Add a wide straw and a long spoon. Enjoy your luxury Dubai treat instantly!

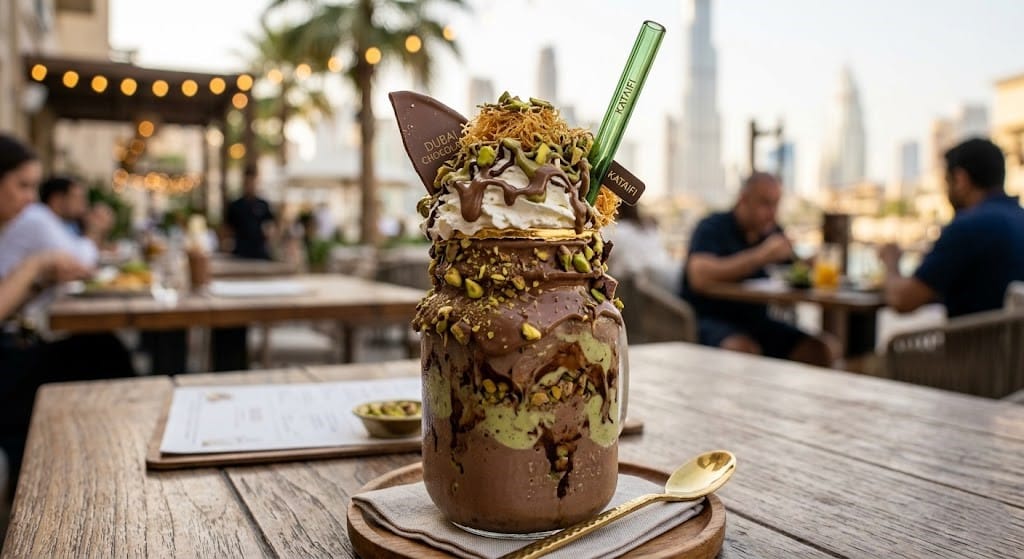
    Layers of milkshake and crunchy pistachio pastry.


    Expert Tips for a Restaurant-Quality Shake


    If you want to ensure your dessert turns out flawless on the first try, keep these professional tips in mind:


    Do Not Skimp on Fat: Always use whole milk and premium full-fat ice cream. Skim milk or water-based ice creams will make the shake icy and thin instead of rich and velvety.


    Cool the Pastry Completely: Never put hot, freshly toasted kataifi into cold ice cream. It will instantly melt your milkshake. Let the crispy strings sit on a cool plate for at least 10 minutes before layering.


    The Spoon is Required: Because this dessert is packed with crunchy textures and thick creams, a regular thin straw will get clogged. Always serve this with a wide boba tea straw and a long dessert spoon.


    Trending Customizations to Try at Home


    Once you master the classic recipe, you can easily change the flavors to create your own viral masterpieces. Here are the most searched variations:


    The Double Dark Chocolate Version


    Instead of vanilla ice cream, use deep, dark chocolate ice cream for the base. The bitterness of the dark chocolate cuts through the extreme sweetness of the pistachio cream, making a perfectly balanced adult dessert.


    The White Chocolate Raspberry Twist


    Starbucks lovers are obsessed with this one! Add a tablespoon of raspberry syrup into the blender with white chocolate ice cream. The bright, fruity flavor mixes incredibly well with the nutty roasted pistachios.


    The Vegan Dubai Shake


    You can easily make this dairy-free! Toast your kataifi in coconut oil instead of butter. Use a thick oat-milk vanilla ice cream and swap the regular milk for creamy cashew milk. Make sure your chocolate syrup is a certified vegan brand!


    Conclusion


    You do not need to spend hundreds of dollars on a plane ticket or expensive international shipping just to taste the internet’s favorite dessert. By toasting some kataifi pastry and blending a thick, rich pistachio base, you can make the ultimate Dubai Chocolate Milkshake right in your own home. It is creamy, crunchy, totally satisfying, and looks absolutely stunning in a glass. Gather your ingredients, start toasting that pastry, and treat yourself to a luxurious gourmet experience today!


    FAQs


    Where can I buy Pistachio Cream?


    Pistachio cream (or sweet pistachio spread) has become very popular lately. You can usually find it at large grocery stores in the jam and peanut butter aisle. If your local store does not carry it, you can easily order a jar online from Amazon or specialty Italian food websites.


    Can I make the crunchy kataifi ahead of time?


    Yes, absolutely! You can chop and toast a large batch of the kataifi pastry in butter. Once it is completely cool, store it in an airtight plastic container at room temperature. It will stay perfectly crunchy for up to 3 days, so you can make milkshakes all weekend long.


    What can I use if I cannot find Kataifi dough anywhere?


    If you simply cannot find kataifi, the best emergency substitute is using regular cornflakes cereal. Put a handful of plain cornflakes in a bag and crush them lightly. Toss the crushed cereal in a pan with melted butter and toast them for a few minutes. It is not the authentic Middle Eastern pastry, but it provides a very similar, satisfying crunch!