Blog

  • The Ultimate Homemade Chick-fil-A Dragonfruit Lemonade Recipe

    The Ultimate Homemade Chick-fil-A Dragonfruit Lemonade Recipe


    Editor’s Note


    We spent hours in the kitchen trying to recreate the beautiful bright pink color and sweet, tropical taste of this famous fast-food drink. After testing many different syrups and fresh fruits, we finally found the perfect combination. This recipe gives you the exact same sweet and sour balance without leaving your house. It is the perfect, refreshing treat for hot summer days, and it looks absolutely amazing in a glass!

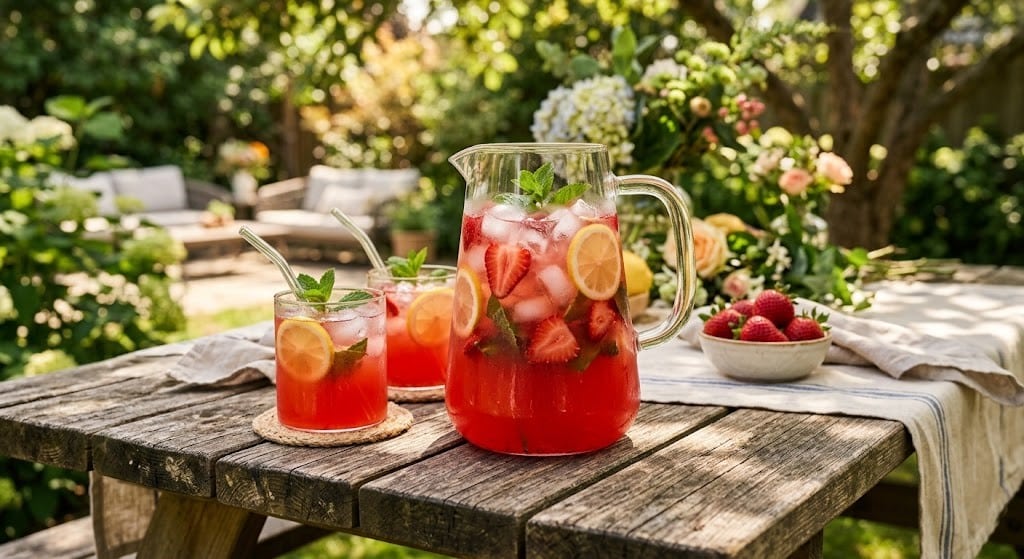
    Cold jar of pink homemade lemonade with a straw.


    Are you looking for a bright, fruity, and cold drink to cool you down this summer? You have come to the right place. Today, we are learning how to make the famous Chick-fil-A dragonfruit lemonade right in your own kitchen.


    This sweet and sour drink is taking over the internet. It is beautiful to look at and even better to taste. The best part is that making it at home is very easy. You do not need any fancy tools or expensive machines.


    In this easy guide, we will show you exactly how to mix this gorgeous pink drink. We will also share some fun ways to change the flavor. Let us get started!


    What is the Chick-fil-A Dragonfruit Lemonade?


    Chick-fil-A is a very popular fast-food restaurant. They are famous for their chicken sandwiches, but their fresh lemonades are just as loved.


    Their dragonfruit lemonade is a special drink that mixes their classic freshly squeezed lemonade with sweet, tropical dragonfruit flavors. Dragonfruit (also called pitaya) has a very mild, sweet taste. It tastes a little bit like a mix between a kiwi and a pear.


    When you mix this sweet pink fruit with sour lemons, you get a perfectly balanced drink. It is not too sour, and it is not too sweet. It is exactly what you need on a warm afternoon.


    Why This Pink Drink is Going Viral Online


    If you look on social media, you will see pictures of this bright pink drink everywhere. People love it for a few simple reasons:

    • The Stunning Color: The bright neon pink color makes it perfect for sharing beautiful photos online.
    • The Fresh Taste: It uses real lemon juice, which tastes much better than artificial fruit sodas.
    • The Tropical Feel: Drinking it makes you feel like you are relaxing on a sunny beach.


    Making this viral drink at home means you can enjoy it anytime you want, and it costs much less than buying it from a drive-thru window.


    Nutritional Breakdown: Calories and Health Facts


    It is always smart to know what is inside your cup. Here is a quick look at the nutrition facts for a standard glass of this tropical lemonade:

    • Calories: A medium glass has about 200 to 250 calories.
    • Vitamins: Because it uses real fruit, it is packed with Vitamin C from the lemons. Vitamin C is great for keeping your body healthy.
    • Sugar: This drink does contain a lot of sugar to balance the sour lemons.


    If you want to make a healthier version, do not worry! We have included a low-sugar option in our trending variations below.


    Simple Ingredients You Need

    Ingredients needed to make homemade fruit lemonade.


    You only need a few basic things to make this delicious drink. You can find all of these items at your local grocery store.

    • Fresh Lemons: You will need about 4 to 5 large, juicy lemons. Do not use the yellow plastic squeeze bottles. Fresh lemons make a huge difference in taste.
    • White Sugar: 1 cup of plain white sugar to sweeten the sour lemon juice.
    • Water: 4 cups of cold, filtered water.
    • Dragonfruit Syrup or Powder: 3 tablespoons of pink dragonfruit syrup. You can also use frozen pink pitaya chunks. This gives the drink its sweet taste and bright pink color.
    • Ice: Lots of clean ice cubes to keep the drink super cold.


    Step-by-Step Instructions (The Easy Method)


    Making this drink is very simple. Just follow these easy steps, and your lemonade will be ready in ten minutes!


    Step 1: Make the Sweet Lemon Water


    First, cut your fresh lemons in half. Squeeze them into a bowl until you have 1 cup of fresh lemon juice. Pick out any little seeds that fall in.

    Next, take a large pitcher. Pour your 1 cup of fresh lemon juice into the pitcher. Add the 1 cup of white sugar and 4 cups of cold water.


    Step 2: Stir Until Smooth


    Take a long wooden spoon and stir the water, sugar, and lemon juice together. Keep stirring for about two minutes. You want to make sure all the sugar melts into the water. Now you have a perfect classic lemonade base.


    Step 3: Add the Pink Magic


    Now it is time for the fun part! Add your 3 tablespoons of dragonfruit syrup (or a handful of blended frozen pink dragonfruit) into the pitcher.

    Stir the liquid again. Watch as the plain yellow lemonade magically turns into a beautiful, bright pink color.


    Step 4: Add Ice and Serve


    Fill your serving glasses all the way to the top with ice cubes. Pour your fresh pink lemonade over the ice. You can put a small slice of lemon on the edge of the glass to make it look extra pretty. Enjoy your cold drink!


    Trending Customizations to Try at Home


    Once you know how to make the basic recipe, you can have fun changing it! Here are three highly searched variations you should try:

    Clear iced lemonade and creamy frosted lemonade variations.


    The Tropical Sunjoy Mix


    Chick-fil-A is famous for its “Sunjoy,” which is half lemonade and half sweet iced tea. To make a Dragonfruit Sunjoy, fill your glass halfway with cold black tea, and fill the rest with your pink dragonfruit lemonade. It is amazing!


    The Frosted Dragonfruit Lemonade


    Do you love ice cream? Put 1 cup of your pink lemonade into a blender. Add 2 big scoops of vanilla ice cream. Blend it until it is thick and smooth. It tastes just like a creamy fruit milkshake.


    The Skinny Sugar-Free Version


    If you are watching your calories, you can make this sugar-free. Replace the white sugar with a natural sweetener like Stevia or Monk Fruit. Make sure to buy a sugar-free dragonfruit syrup. It tastes just as good but has almost zero calories!


    Troubleshooting: How to Fix Common Lemonade Mistakes


    Sometimes, things go wrong in the kitchen. Here is how to fix your drink quickly if it does not taste right:

    • Problem: The drink is way too sour.
      • Fix: You picked some very strong lemons! Just add two extra tablespoons of sugar and a little splash of water. Stir it well.
    • Problem: The drink is too sweet and sticky.
      • Fix: Add the juice of one more fresh lemon and half a cup of cold water. This will cut through the heavy sugar.
    • Problem: The color is very pale, not bright pink.
      • Fix: Add one more spoonful of dragonfruit syrup or powder. Natural fruit colors can sometimes be weak, so adding a little more will fix the color instantly.


    How to Store Your Leftover Lemonade


    If you make a big pitcher and have some leftovers, it is very easy to save it for later.


    Do not put ice inside the large pitcher. Ice will melt and make your drink taste watery. Keep the ice in your drinking glasses only.


    Put a lid on your pitcher and place it in the refrigerator. Your homemade lemonade will stay fresh and delicious for up to five days. When you want a glass, just give the pitcher a quick stir before pouring.


    The Dragonfruit Mango Popping Boba Splash


    Color-blocking drinks are a massive trend on Pinterest and TikTok right now. Combining bright yellow mango popping boba pearls at the bottom of a deep magenta dragonfruit lemonade creates an incredible visual contrast that tastes like a tropical explosion in your mouth.

    Dragonfruit lemonade with mango popping boba.


    What You Need:

    • 1 serving of your standard iced Dragonfruit Lemonade
    • 2 to 3 tablespoons of mango popping boba pearls
    • Fresh mint sprig & lemon wheel (for garnish)
    • A wide boba straw


    How to Make It:

    1. Prep the Base: Scoop 2 to 3 tablespoons of juicy mango popping boba into the bottom of a clear highball glass.
    2. Add Ice: Fill the glass to the top with clear ice cubes, keeping the boba settled at the bottom.
    3. Pour and Enjoy: Slowly pour your vibrant pink dragonfruit lemonade over the ice. Garnish with a fresh mint sprig and a lemon wheel. Drink with a wide straw to get a burst of mango juice in every sip!


    Conclusion


    You do not need to wait in a long drive-thru line to enjoy a premium summer drink. By using fresh lemons and sweet dragonfruit flavor, you can make the ultimate Chick-fil-A copycat lemonade right at home. It is cheap, easy, and absolutely beautiful to serve to your family and friends. Mix up a pitcher today and enjoy the sweet taste of summer!


    FAQs


    Can I use bottled lemon juice instead of fresh lemons?


    You can, but we highly recommend using fresh lemons. Bottled juice often has preservatives that make it taste slightly bitter. Freshly squeezed lemons will give you that true, high-quality restaurant taste.


    Where can I buy dragonfruit syrup or powder?


    You can easily find dragonfruit (pitaya) syrup in the coffee aisle of large grocery stores. You can also buy pink dragonfruit powder or frozen fruit chunks online or at local health food stores.


    Can I make this drink fizzy?


    Yes! If you love sparkling drinks, replace half of the cold water in the recipe with club soda or Sprite. This will give your lemonade a wonderful, bubbly fizz that is perfect for parties.

  • The Ultimate Sparkly Blue Lagoon Mocktail with Edible Glitter

    The Ultimate Sparkly Blue Lagoon Mocktail with Edible Glitter


    Editor’s Note


    At Sip Drafts Lab, safety and flavor accuracy go hand in hand. When developing this shimmering Blue Lagoon mocktail, our mixology team rigorously tested various non-alcoholic blue syrups and food-grade luster dusts to achieve the perfect balance of citrus sweetness and magical sparkle. We strictly advocate for using 100% FDA-approved, mica-based edible dust and never craft glitter to ensure your drink is completely safe for consumption. Follow our tested ratios to create an eye-catching, delicious beverage that mesmerizes your party guests without compromising health standards.


    When planning a party, pool day, or themed celebration, the drinks menu can make or break the atmosphere. Standard lemonades and canned sodas are fine, but if you want to create an unforgettable experience, you need something extraordinary.


    Enter the Blue Lagoon mocktail with edible glitter.


    This electric blue, tropical-flavored beverage takes the iconic classic cocktail and transforms it into a family-friendly, non-alcoholic showstopper. With its vivid turquoise shade, crisp citrus kick, and a swirling galaxy of edible shimmer, this drink instantly captures everyone’s attention.


    Whether you are hosting a summer backyard barbecue, a baby shower, a movie night, or a fantasy-themed birthday party, this sparkling beverage is guaranteed to be the star of the event. Best of all, it requires zero bartending expertise, takes under three minutes to mix, and costs a fraction of what you would pay at a trendy lounge. Let us dive into the simple secrets of making this viral drink right at home!


    Why Shimmering Blue Drinks are Dominating 2026 Trends


    Social media has transformed how we enjoy food and beverages. In 2026, party hosts are prioritizing “interactive” menu items drinks that move, change color, or sparkle when stirred.


    The Blue Lagoon mocktail fits this trend seamlessly. The vibrant blue base mimics tropical ocean waters, while the addition of silver or light blue edible luster dust creates an enchanting, swirling nebula effect inside the glass.

    Because this recipe is entirely alcohol-free, it offers an inclusive option for kids, pregnant women, designated drivers, and anyone choosing a low- or non-alcoholic lifestyle. Everyone gets to hold a gorgeous, sophisticated glass without feeling left out.

    Planning a full party drink menu? Give your guests color options by also serving our popular Sparkly Pink Glitter Mocktail Recipe for Girls Night alongside this blue version!


    Understanding the Sparkle: Selecting Safe Edible Glitter


    Before gathering your liquid ingredients, it is vital to select the correct type of shimmer. The safety of your guests comes first!


    You must never use plastic craft glitter, even if it claims to be non-toxic. Plastic glitter does not digest and poses severe health risks.


    Instead, look for Edible Luster Dust or Brew Dust. These products are explicitly labeled as 100% edible and FDA-compliant. They are typically made from food-grade pearlescent pigments, sugar, and food starch.


    Taste and Texture: High-quality edible luster dust is completely flavorless, odorless, and smooth. It will not make your drink feel gritty or alter its refreshing citrus flavor.


    Color Choice: For a Blue Lagoon, choose Pearl White, Silver, or Electric Blue luster dust. Silver creates a bright galaxy swirl, while electric blue intensifies the rich color of the drink.


    Simple Ingredients You Will Need


    To mix this magical drink, you only need four primary ingredients alongside your edible glitter:

    Ingredients for non alcoholic blue lagoon drink.


    Non-Alcoholic Blue Curaçao Syrup: 1 ounce. Brands like Monin, Torani, or Jordan’s Skinny Mixes offer fantastic non-alcoholic versions. It provides the signature bright blue color and a sweet, orange-peel flavor profile.


    Fresh Lime Juice: 1/2 ounce. Freshly squeezed lime juice cuts through the sweetness of the syrup and adds a zesty punch.


    Clear Lemon-Lime Soda or Sparkling Water: 4 to 5 ounces. Sprite, 7UP, Starry, or plain club soda adds crisp, refreshing bubbles.


    Edible Luster Dust (Silver or Blue): 1/8 teaspoon (a small pinch).


    Fresh Ice Cubes: Enough to fill your serving glass.


    Garnish: Fresh lemon wheels, maraschino cherries, and mint sprigs for styling.


    Step-by-Step Instructions: Mixing the Magic


    Follow these quick steps to build a picture-perfect, shimmering mocktail in seconds.


    Step 1: Prepare Your Glassware


    For the most dramatic visual presentation, use a tall highball glass, a hurricane glass, or a clear stemless wine glass. Fill the glass completely with clean ice cubes.


    Step 2: Add the Citrus & Blue Base


    Pour 1/2 ounce of fresh lime juice over the ice. Next, pour 1 ounce of non-alcoholic Blue Curaçao syrup directly into the bottom of the glass. The heavy syrup will sink slightly, creating a rich blue foundation.


    Step 3: Add the Edible Glitter


    Scoop a tiny pinch (about 1/8 teaspoon) of your edible silver or blue luster dust and drop it directly onto the ice and syrup mixture.


    Step 4: Top with Bubbly Soda


    Slowly pour 4 to 5 ounces of chilled lemon-lime soda or sparkling water over the top. As the carbonated bubbles hit the luster dust and syrup, the shimmer will begin to activate and rise through the glass.


    Step 5: Stir to Activate the Galaxy Effect


    Use a long cocktail spoon or decorative swizzle stick to give the drink a gentle stir from top to bottom. Watch in amazement as the liquid transforms into a swirling, magical ocean vortex!

    Stirring edible glitter inside a blue mocktail.


    Step 6: Garnish and Serve


    Slide a fresh lemon wheel onto the rim, drop a bright red maraschino cherry on top, and add a fresh sprig of mint. Serve immediately with a clear straw!


    2026 Trending Variations: Coconut Foam & Galaxy Ice


    Looking to take this recipe to the next level for your social media channels? Try these viral 2026 twists:

    Blue lagoon mocktail topped with coconut cold foam.


    1. The “Ocean Wave” Blue Lagoon (With Coconut Cold Foam)


    This trend combines the fizzy blue mocktail with a rich, tropical topping.

    • Mix your Blue Lagoon base as instructed above, leaving two inches of space at the top of the glass.
    • In a separate cup, froth 2 tablespoons of heavy cream, 1 tablespoon of coconut milk, and 1 teaspoon of coconut syrup until thick and velvety.
    • Pour the white coconut cold foam over the blue liquid. The white foam floating over the shimmering blue drink resembles ocean waves washing onto a beach!


    2. The Galaxy Glitter Ice Cube Method


    Instead of adding glitter directly to the drink, freeze it inside your ice cubes!

    • Fill an ice cube tray with water or coconut water.
    • Drop a tiny pinch of edible glitter into each compartment and stir.
    • Freeze completely. When you pour clear lemon-lime soda and blue syrup over these special ice cubes, the shimmer slowly releases as the ice melts, giving your guests a slow-release visual show.

    If you love tropical energy drinks with creamy cold foam toppings, do not miss our updated guide on the 7 Brew Ocean Breeze Recipe Customization Guide!


    Conclusion


    Creating a memorable event does not require hours of prep work or expensive ingredients. By combining non-alcoholic Blue Curaçao syrup, zesty lime juice, bubbly soda, and a pinch of safe edible luster dust, you can mix a stunning Blue Lagoon mocktail with edible glitter.

    It is refreshing, completely alcohol-free, budget-friendly, and visually captivating. Gather your ingredients, chill your glassware, and get ready to dazzle your family and friends with the ultimate shimmering drink!


    FAQs


    Does non-alcoholic Blue Curaçao syrup taste like orange?

    Yes! Traditional Blue Curaçao liqueur is flavored with the dried peels of the Laraha citrus fruit (a type of bitter orange). Non-alcoholic Blue Curaçao syrup mimics this exact flavor profile—it tastes like sweet, citrusy orange with a slight floral note, despite its bright blue color.


    How long does the glitter swirl effect last in the glass?

    Because edible luster dust particles are light, carbonation from the soda keeps them suspended and swirling for about 5 to 10 minutes. If the glitter eventually settles to the bottom, simply give the drink a quick stir with a straw to reactivate the shimmering galaxy effect.


    Can I make a large batch of this mocktail in a punch bowl?

    Absolutely! To make a big party batch, combine 1 bottle (750ml) of non-alcoholic Blue Curaçao syrup, 1 cup of fresh lime juice, 2 liters of chilled lemon-lime soda, and 1 teaspoon of edible luster dust in a large punch bowl. Stir gently right before guests serve themselves.

  • The Ultimate 7 Brew Ocean Breeze Recipe: Your Deep-Dive Customization Guide

    The Ultimate 7 Brew Ocean Breeze Recipe: Your Deep-Dive Customization Guide


    Editor’s Note


    7 Brew Coffee is taking over the drive-thru beverage game with its crazy energy drink mixes. We spent the last few weeks ordering and decoding the famous Ocean Breeze flavor from their secret menu. We discovered that many people complain about these drinks being way too sweet, tasting like pure syrup, or losing their fizz too quickly. We tested multiple syrup ratios and soda bases to bring you a perfectly balanced copycat recipe that solves all of these issues right in your home kitchen!


    Are you looking for a major energy boost that tastes like a tropical beach vacation? If you are tired of standard coffee runs or plain canned energy drinks, you are in the right place.


    The Ocean Breeze 7 Brew drink is one of the most high-trending menu items right now. It is bright, full of flavor, and visually stunning with its deep blue and green hues.


    But what exactly goes into this famous blue drink? How can you customize it to fit your diet? In this massive, detailed guide, we will break down everything you need to know about the Ocean Breeze, and we will even teach you how to remake it at home for a fraction of the price.


    Understanding the Blend: What Goes Into a 7 Brew Ocean Breeze? 


    7 Brew Coffee is a wildly popular drive-thru chain famous for its fast service and customizable drinks. Even though their coffee menu is fantastic, it is actually the “7 Energy” drinks that capture everyone’s attention online.  The Ocean Breeze is a premium energy drink blend found on their secret menu. It uses a clean, crisp energy drink base mixed with two specific tropical fruit syrups.

    The primary flavors are sweet blue raspberry and tropical coconut. When mixed together with ice, it creates a refreshing, sweet, and slightly tart beverage that wakes you up instantly.


    The Flavor Profile: What Does It Taste Like?


    If you have never tried it, the best way to describe the Ocean Breeze is like a liquid blue ice pop with a creamy tropical twist.


    The blue raspberry syrup gives the drink a sharp, tangy fruit flavor. Immediately after the tartness hits your tongue, the smooth, rich taste of coconut notes cuts through the sourness.


    Because it uses a carbonated energy base, the tiny bubbles keep the drink feeling very light and crisp. It is a bold, sugary flavor profile that is absolutely perfect for hot summer days.


    Nutritional Breakdown: Caffeine Levels and Calories in an Ocean Breeze. 


    Knowing what is inside your cup is incredibly important for your health. Let us look at the nutritional facts for a standard medium (24-ounce) iced Ocean Breeze drink:


    Caffeine Count: Approximately 150 to 160 milligrams of caffeine. This is roughly equal to two standard shots of espresso. It gives a very strong mental focus boost.


    Calorie Estimate: Around 260 to 310 calories. The calories come almost entirely from the sugar inside the flavor syrups and the regular energy drink base.


    Sugar Content: It is quite high in sugar due to the traditional drink syrups used at the drive-thru stand.

    Because of the high caffeine and sugar levels, this drink is best enjoyed as a morning pick-me-up or a pre-workout energy treat, rather than a casual late-night beverage.


    The Biggest Problems with 7 Brew Energy Drinks (And How to Fix Them)


    While 7 Brew makes fantastic drinks, customers frequently run into three main problems when ordering the Ocean Breeze. Here is our expert advice on how to solve each one easily:


    Problem 1: The Drink is Way Too Sweet

    • The Solution: When ordering at the drive-thru, ask the barista for a “half-sweet” version. If you are making it at home, double the amount of club soda or sugar-free energy liquid to dilute the intense sugar flavor.


    Problem 2: It Loses Its Fizz and Goes Flat Quickly

    • The Solution: Avoid splashing the energy drink into your cup from too high up. Pouring it slowly down the inside wall of the cup keeps the bubbles trapped inside the liquid longer.


    Problem 3: The Ice Melts and Dilutes the Fruit Flavor

    • The Solution: Use large, solid ice cubes instead of crushed ice. Crushed ice melts in under ten minutes, turning your premium blue drink into watery sugar water.


    5 Viral Customization Trends to Try at the Drive-Thru


    One of the coolest things about 7 Brew is that you can modify any drink. Here are the top trending ways people are ordering the Ocean Breeze right now:

    White sweet cream swirling into a blue iced drink.


    The “Galactic” Ocean Breeze


    Ask the barista to add a pump of blackberry syrup to the bottom of the cup. The dark purple blackberry mixes with the blue raspberry to create a cool, outer-space look with a deeper berry taste.


    The Creamy “Ocean Float”


    Request a splash of heavy cream or oat milk on top of your iced drink. The cream floats on top of the blue liquid, making it look like seafoam on an ocean wave. It adds a wonderful velvety texture.


    The Skinny Sugar-Free Breeze


    You can order this 100% sugar-free! Ask for the Sugar-Free 7 Energy base, combined with sugar-free blue raspberry and sugar-free coconut syrups. It cuts the calories down to almost zero.


    The Blender Smooth Breeze


    Ask for your Ocean Breeze to be “Chilled” or blended. Instead of serving it over ice cubes, they will blend the entire mixture into a smooth, snowy energy slushie.


    The Sour Patch Upgrade


    Request the barista to pour a bit of fresh lemonade straight into your energy liquid. The extreme sourness of the lemons combined with the blue raspberry tastes exactly like liquid sour candy.


    The Viral “Mermaid Foam” Ocean Breeze


    Putting sweet cold foam on coffee is great, but putting it on iced energy drinks and fruity sodas is the ultimate 2026 hack. The contrast between the fizzy, tart blue liquid and the thick, creamy coconut foam is out of this world. We call it the “Mermaid Foam” because the white cream cascading into the bright blue drink looks like ocean waves.

    Ocean breeze drink topped with coconut cold foam.


    What You Need:

    • 1 serving of your standard Ocean Breeze base (Blue Raspberry syrup, Coconut syrup, and your choice of 7 Energy, Sprite, or sparkling water).
    • 3 tablespoons of heavy whipping cream.
    • 2 tablespoons of milk.
    • 1 pump of coconut syrup (for the foam).


    How to Make It:

    1. Prep the Drink: Mix your iced Ocean Breeze base in a tall glass, leaving about two inches of space at the top.
    2. Whip the Foam: In a separate small glass, combine the heavy cream, milk, and coconut syrup. Use a handheld milk frother to whip it for 15-20 seconds until it forms a thick, fluffy cloud.
    3. The Pour: Gently pour the coconut cold foam over your iced blue drink. Watch as the creamy foam slowly bleeds into the bright blue liquid. Drink it without a straw to get the foam and fizz in every single sip!


    The Secret Copycat Recipe: Make It at Home


    You do not need to drive to a 7 Brew stand to enjoy this premium beverage. This easy home recipe creates the exact same flavor using popular items you can buy at any local supermarket.

    Ingredients to mix a homemade blue energy drink.


    The Special Ingredients Needed

    • Energy Drink Base: 1 can (12 ounces) of Red Bull Original or Monster Ultra White (for a cleaner taste).
    • Blue Raspberry Syrup: 1 ounce (Torani brand works best).
    • Coconut Syrup: 1 ounce (Torani or Monin brand).
    • Club Soda / Sparkling Water: 2 ounces (This keeps the drink perfectly bubbly and cuts down the heavy sweetness).
    • Ice: Large, clean ice cubes.


    Step-by-Step Instructions

    1. Prep the Glass: Take a large 24-ounce glass and fill it halfway to the top with large, solid ice cubes.
    2. Layer the Syrups: Pour 1 ounce of blue raspberry syrup and 1 ounce of coconut syrup directly over the ice. Watch them pool beautifully at the bottom of the glass.
    3. Add the Energy Base: Open your chilled energy drink can. Slowly pour 12 ounces of the energy drink into the glass.
    4. Add the Fizz Element: Top off the remaining space in the glass with your 2 ounces of club soda.
    5. Stir and Serve: Take a long straw and give the drink a gentle, slow stir from the bottom up. Watch the liquid turn into a gorgeous, oceanic blue color. Enjoy immediately!


    Troubleshooting: Fixing Homemade Energy Drink Mistakes


    Did your home copycat recipe not turn out perfectly? Do not panic. Here is how to fix it instantly:

    • Problem: The colors look muddy and brown, not bright blue.
      • Solution: You accidentally used a yellow-colored energy drink base or a dark juice. You must use a clear or light-straw-colored energy drink (like Red Bull or Monster Ultra White) to preserve the bright neon blue look.
    • Problem: I cannot find blue raspberry syrup anywhere.
      • Solution: You can swap it for Blue Curaçao non-alcoholic cocktail syrup. It has a slightly more orange-citrus undertone, but it provides the exact same stunning blue color.
    • Problem: The coconut flavor is too artificial and tastes like sunscreen.
      • Solution: Drop the artificial coconut syrup and replace it with 2 ounces of real, organic coconut water mixed with a tiny bit of simple syrup.


    7 Brew Ocean Breeze vs. Standard Grocery Energy Cans


    Why should you bother making or buying a mixed energy drink instead of just cracking open a standard can of soda? Let us compare them side-by-side:

    Feature7 Brew Ocean Breeze MixStandard Canned Energy Drink
    Flavor DepthHigh (Complex mix of tart berry and rich coconut)Low (One-dimensional artificial flavor)
    Visual AppealStunning (Vibrant neon blue color)Low (Hidden inside a metal tin can)
    CustomizationInfinite (Can alter cream, sugar, and toppings)None (You get exactly what is in the can)
    Hydration LevelMedium (Includes ice and optional water mixers)Low (Highly concentrated caffeine liquids)


    How to Safely Store Your Custom Ingredients


    If you bought full-size bottles of Torani fruit syrups to make this recipe at home, storage is incredibly easy.

    Keep your syrup bottles in a cool, dark place like your kitchen pantry. You do not need to refrigerate them after opening, as the high sugar content acts as a natural preservative. However, make sure to wipe down the bottle necks with a wet paper towel after every use to stop the caps from getting sticky or stuck.


    Final Thoughts


    The 7 Brew Ocean Breeze is a masterclass in modern beverage design. By pairing the sharp, nostalgic tartness of blue raspberry with the smooth, tropical warmth of coconut, it transforms a basic energy beverage into a premium gourmet cocktail experience. Whether you order it at the drive-thru window or mix it at home, it is the ultimate way to cure your midday energy slump!


    FAQs


    What energy drink base does 7 Brew use?

    7 Brew uses their own private-label energy drink liquid called “7 Energy.” For your homemade copycat version, regular Red Bull or any clear, citrus-flavored energy drink will yield an identical taste profile.


    Is there a coffee version of the Ocean Breeze?

    No, the Ocean Breeze flavor profile is strictly designed for their sparkling energy drink and Italian soda menus. Mixing raspberry and coconut syrup into dairy-based coffee would cause the citrus acids to curdle the milk.


    Can kids drink the 7 Brew Ocean Breeze?

    Because the standard version contains a very high dose of caffeine (150mg+), it is not recommended for children. However, you can ask for it to be made as an “Italian Soda” base instead, which replaces the energy drink with caffeine-free sparkling water!

    Is the Ocean Breeze drink vegan-friendly?

    Yes! The standard recipe uses synthetic fruit syrups and a vegan energy base, meaning it contains zero animal products. Just avoid adding the optional heavy cream topper.

  • How to Make the Ultimate Sparkly Pink Glitter Mocktail for Girls Night

    How to Make the Ultimate Sparkly Pink Glitter Mocktail for Girls Night


    Editor’s Note


    At Sip Drafts Lab, your health and safety are our top priorities. When creating visually stunning party beverages, it is crucial to use the right ingredients. Our culinary team has thoroughly tested this recipe using strictly FDA-approved, 100% food-grade edible luster dust. We never use or recommend craft glitter, as it is highly toxic. This recipe guarantees a perfectly safe, flavorless shimmer that will elevate your party without any health risks. Follow our guide for a flawless and beautiful drink every single time.


    Right now, the internet is absolutely obsessed with aesthetically pleasing, interactive party beverages. The biggest trend dominating TikTok and Pinterest is the sparkly pink glitter mocktail recipe for girls night.


    Imagine handing your best friends a beautifully chilled glass. At first glance, it looks like a standard pink drink. But when they stir it, a mesmerizing, swirling galaxy of pink and silver sparkles comes to life. It feels like absolute magic in a glass.


    The best part? This drink is 100% alcohol-free, making it perfect for everyone to enjoy. It is incredibly budget-friendly, takes less than five minutes to prepare, and looks like it costs twenty dollars at a high-end lounge. In this complete guide, we will show you exactly how to mix this viral beverage, what secret ingredients you need, and how to style it perfectly for your social media photos.


    Why Edible Glitter Drinks are the Ultimate Party Trend


    If you are wondering why everyone is suddenly putting glitter in their drinks, the answer is simple: it is all about the aesthetic experience.


    In 2026, party hosts are looking for ways to create memorable, shareable moments. A shimmering drink provides instant entertainment. Because the edible dust is slightly heavier than the liquid, it settles at the bottom when still. When you swirl the glass, the glitter activates, creating a stunning visual effect that guests love recording on their phones.


    By keeping the drink non-alcoholic, you ensure that every single guest regardless of their dietary preferences or lifestyle choices can participate in the fun.


    If you want to offer your guests a variety of colorful options, check out our complete guide on Easy Non-Alcoholic Glitter Drinks for Parties for blue and gold variations!)


    The Secret to Safe Shimmer: What Edible Glitter to Buy


    Before we start mixing, we need to talk about the most important ingredient: the sparkle.

    Pink edible luster dust for party drinks.


    You cannot use standard craft glitter from a hobby store. Craft glitter is made of plastic and is incredibly dangerous to consume. Instead, you need to purchase Edible Luster Dust (often marketed as Brew Glitter or Edible Drink Dust).


    This product is made from food-grade ingredients like sugar, maltodextrin, and pearlescent mica-based pigments. It is completely tasteless, odorless, and has no gritty texture whatsoever. It simply dissolves into the liquid, leaving only a beautiful shimmer behind. You can easily find pink or rose-gold edible dust online or in the baking section of specialty grocery stores.


    Essential Ingredients for the Perfect Pink Mocktail


    To create a balanced drink that tastes as good as it looks, you will need a few simple, refreshing ingredients:

    Ingredients for a pink mocktail recipe.


    Cranberry Juice: 2 ounces. This provides a vibrant, natural pink base color and a lovely tart flavor.


    Fresh Lime Juice: 1/2 ounce. A quick squeeze of fresh citrus balances the sweetness of the other ingredients.


    Simple Syrup or Grenadine: 1/2 ounce. Grenadine will make the pink color even brighter, but standard simple syrup works just fine for sweetness.


    Clear Lemon-Lime Soda: 3 ounces (like Sprite, 7UP, or a high-quality sparkling water) to add crisp, refreshing bubbles.


    Pink Edible Luster Dust: A tiny pinch (about 1/8th of a teaspoon).


    Fresh Raspberries & Edible Flowers: For an elegant, picture-perfect garnish.


    Step-by-Step Recipe: Mixing the Magic


    Creating this beverage is incredibly simple. You do not need any professional bartending skills to get it right.


    Step 1: Chill Your Glassware


    For the best presentation, use elegant glassware like a coupe glass, a champagne flute, or a stemless wine glass. Place your chosen glasses in the freezer for about ten minutes before your guests arrive so they are perfectly frosty.


    Step 2: Combine the Base Liquids


    In a cocktail shaker or a small mixing jar, pour in your cranberry juice, fresh lime juice, and grenadine (or simple syrup). Add a small handful of ice cubes.


    Step 3: Shake and Strain


    Secure the lid on your shaker and shake vigorously for about 10 seconds to thoroughly chill the ingredients and mix the flavors. Strain this bright pink mixture directly into your chilled serving glass. (Do not pour the used ice into the final glass).


    Step 4: Add the Magic Sparkle


    Take your tiny pinch of pink edible luster dust and drop it straight into the pink liquid.


    Step 5: Top with Fizz and Swirl


    Gently pour your clear lemon-lime soda or sparkling water over the top to fill the glass. Finally, drop in a few fresh raspberries and give the drink a quick, gentle stir with a swizzle stick. Watch as the pink galaxy completely takes over the glass!


    2026 Trending Variations: Cotton Candy & Rose Gold Flavors


    Want to customize this drink for a specific party theme? Try these highly searched variations:

    Pink cotton candy glitter mocktail variation.


    The Cotton Candy Cloud


    Instead of using grenadine, use a pump of cotton candy syrup. Before serving, place a small, fluffy piece of real pink cotton candy on the rim of the glass. When your guests pour the soda over the top, the cotton candy will melt into the drink, adding extra sweetness and drama!


    The Rose Gold Botanical


    If you want a more sophisticated, mature flavor profile, swap the lemon-lime soda for a premium elderflower tonic water. Use rose-gold edible dust instead of bright pink, and garnish the drink with a tiny sprig of fresh rosemary.


    If your guests love tart and sweet combinations, you should also whip up a quick batch of our viral Chick-fil-A Frosted Lemonade Copycat as a dessert drink!)


    Expert Styling Tips for Instagram & TikTok


    If you are making this for a girls’ night, chances are photos will be taken. Here is how to make your drinks look incredibly aesthetic:


    Provide Stirrers: The glitter will eventually settle to the bottom if the drink sits still. Always serve these mocktails with beautiful glass stirrers or decorative cocktail picks so your friends can reactivate the shimmer before every sip.


    Lighting is Crucial: Edible glitter catches the light. Serve these drinks near a bright window, or place a small LED coaster under the glass for a crazy, glowing effect in a dimly lit room.


    Ice Matters: If you are serving this in a taller glass over ice, use clear, square ice cubes rather than cloudy refrigerator ice. It makes the drink look incredibly premium.


    Conclusion


    Hosting an unforgettable girls’ night does not have to be stressful or expensive. By combining simple, tart juices with crisp bubbly soda and a pinch of magical food-grade luster dust, you can create a show-stopping beverage.

    This sparkly pink glitter mocktail recipe for girls night is guaranteed to be the highlight of your evening. It is beautiful, safe, completely alcohol-free, and tastes absolutely delicious. Grab your favorite glasses, put on a great playlist, and get ready to dazzle your friends!


    FAQs


    Can I make a large pitcher of this glitter mocktail ahead of time?

    Yes, you can mix the cranberry juice, lime juice, grenadine, and edible glitter in a large pitcher ahead of time. However, do not add the soda until the very last minute right before serving, otherwise, the drink will lose all of its refreshing fizz.


    Does the edible glitter change the texture of the drink?

    Not at all. High-quality edible luster dust dissolves seamlessly into the liquid. You will not feel any crunch, grit, or strange texture when you drink it. It is purely for visual decoration.


    Can I use this glitter technique with hot beverages?

    Yes! Edible luster dust works beautifully in hot liquids like clear teas or hot apple cider. The heat actually helps the swirling motion, keeping the glitter active for a longer period of time.

  • The Ultimate Creamy Brazilian Lemonade Recipe (Limonada Suíça)

    The Ultimate Creamy Brazilian Lemonade Recipe (Limonada Suíça)


    Editor’s Note


    At Sip Drafts Lab, we focus on delivering recipes that actually work in your home kitchen. The viral Brazilian Lemonade trend is everywhere, but many people complain that their homemade version turns out terribly bitter. Our culinary team tested this recipe multiple times to find the exact blending time required to extract the bright citrus flavor without releasing the bitter oils from the lime peel. We also prioritize safe food handling, so always remember to wash your limes thoroughly with warm water before blending them whole. Follow our specific timing, and you will get a perfectly sweet, creamy, and refreshing drink every single time.


    Right now, the internet is completely obsessed with a magical beverage that is taking over TikTok, Pinterest, and backyard barbecues everywhere. It is called Brazilian Lemonade (also known authentically as Limonada Suíça).


    The best part? You can make an entire pitcher of this luxurious, cafe-style beverage in under five minutes. In this comprehensive guide, we will show you exactly how to master the Brazilian Lemonade recipe, including the secret trick to ensuring your drink never turns out bitter.


    Why is it Called “Lemonade” if it Uses Limes?


    This is the most common question people ask when they see the ingredients for this recipe. Why are we using green limes to make something called lemonade?


    The answer lies in the Portuguese language. In Brazil, the word for lime is “limão.” Because standard yellow lemons are not as common in many parts of South America, limes are the default citrus fruit used for everyday drinks.


    When the popular drink Limonada Suíça was translated into English, it simply became known as Brazilian Lemonade. Do not try to substitute yellow lemons for this recipe! The sharp, slightly floral acidity of green limes is absolutely crucial to balance out the heavy sweetness of the condensed milk.


    If you are looking for a recipe that actually uses real yellow lemons and ice cream, you must check out our viral Chick-fil-A Frosted Lemonade Copycat Recipe!


    The Secret to the Perfect Creamy Texture


    What makes this drink so incredibly satisfying is the thick, frothy layer that develops on top when you pour it.


    This happens because of the sweetened condensed milk. Unlike regular milk or cream, sweetened condensed milk has had most of its water content removed, leaving behind a thick, syrupy, deeply rich dairy product.


    When the acidic lime juice mixes with the sweet condensed milk in a high-speed blender, it emulsifies. This creates a velvety, smooth texture that almost feels like a melted milkshake, while still remaining intensely refreshing and thirst-quenching.


    Simple Ingredients You Will Need


    You only need four basic grocery store ingredients to create this magical beverage. Here is your shopping list:

    Ingredients for creamy limeade recipe.


    Fresh Limes: You need 4 medium-sized, juicy green limes. Look for limes that have smooth, thin skins.It is best to avoid citrus with heavily textured, thick rinds, because they usually contain a larger amount of harsh-tasting white pith. 


    Sweetened Condensed Milk: 1/2 cup. This provides all the sweetness and creaminess you need. You can add more or less depending on your personal sweet tooth.


    Cold Filtered Water: 4 cups. Using cold water helps keep the drink refreshing from the start.


    Ice Cubes: 2 to 3 cups of fresh ice for blending and serving.


    Step-by-Step Instructions: How to Make Brazilian Lemonade


    Making this drink requires a very specific technique. If you do not follow these steps, your drink might become unpleasantly bitter.


    Step 1: Wash and Prep the Limes


    Because we are blending the limes with their skin still on, you must wash them extremely well. Scrub the outside of the limes under warm water to remove any wax or dirt. Cut off the two small ends of each lime and discard them. Then, chop the remaining limes into small wedges (about 8 pieces per lime).


    Step 2: The First Quick Blend


    Place your lime wedges into the blender and pour in the 4 cups of cold filtered water. Vital Step: Secure the cover on your machine and run it on a high setting for a strict 15 to 20 seconds. Do not blend it for a minute! You only want to break the limes apart to release the juice, not liquefy the bitter rind.

    Blending fresh limes and water in a blender.


    Step 3: Strain the Liquid


    Position a fine wire sieve directly above a spacious mixing bowl or your main serving jug.  Pour the blended lime water through the strainer to catch all the leftover skin and pulp. Firmly push down on the leftover fruit mash with the back of a spoon to squeeze out every single drop of flavor. Throw the leftover pulp away.


    Step 4: Add the Creaminess


    Rinse your blender quickly to remove any stuck pieces of lime skin. Pour the strained lime water back into the clean blender. Add the 1/2 cup of sweetened condensed milk and a handful of ice cubes.


    Step 5: The Final Froth


    Blend everything together for another 20 to 30 seconds until the mixture is beautifully creamy, pale green, and very frothy on top.

    Adding condensed milk to fresh lime juice.


    Step 6: Serve Immediately


    Fill tall, clear glasses with fresh ice. Carefully pour your newly whipped, velvety lime mixture right onto the fresh ice cubes.  Garnish the rim with a small lime wheel and serve immediately!


    The Ultimate Rule: How to Avoid a Bitter Taste


    The biggest complaint people have when attempting this recipe at home is that the drink tastes bitter after a while.


    The skin of a lime contains essential oils, and the white part (the pith) contains bitter compounds. When you blend the limes for too long, those bitter compounds overpower the sweet milk.


    To solve this problem completely:

    1. Never blend for more than 20 seconds during the first step.
    2. Drink it fresh. Brazilian Lemonade is not a drink you can make in the morning and leave in the fridge until the evening. As it sits, the oils continue to release bitterness. It is best consumed within 30 minutes of making it.


    2026 Trending Variations: Coconut and Mango


    Want to upgrade this recipe to match the latest Pinterest trends? Try these two amazing flavor twists:


    The Tropical Coconut Limeade (Dairy-Free)


    If you are vegan or lactose intolerant, you can easily make this drink dairy-free! Swap the standard sweetened condensed milk for a can of Sweetened Condensed Coconut Milk. It gives the drink an incredible Piña Colada vibe and is completely dairy-free.


    The Mango Brazilian Lemonade


    Fruit variations are dominating TikTok. During the second blending stage (when you add the condensed milk), drop in 1 cup of frozen mango chunks. The tropical sweetness of the mango pairs flawlessly with the tart lime and rich cream!


    Need a mocktail recipe that looks like a beautiful galaxy? Try our viral Easy Non-Alcoholic Glitter Drinks for Parties!)


    Conclusion


    You do not need to book a flight to South America to experience one of the best tropical drinks in the world. By washing your limes thoroughly, blending them for exactly 20 seconds, and mixing the juice with rich sweetened condensed milk, you can create the ultimate Brazilian Lemonade.


    This creamy limeade is the perfect balance of sweet, sour, and frothy. Grab your blender, pick up some fresh limes, and impress your family with this easy, five-minute summer refreshment!


    FAQs


    Can I peel the limes before blending them?

    Yes! If you are terrified of bitterness or have a blender that is hard to control, you can absolutely peel the limes completely before blending. You will lose a tiny bit of the vibrant zesty flavor that the skin provides, but it guarantees a 100% bitter-free drink.


    Can I make Brazilian Lemonade ahead of time?

    It is highly recommended that you do not make this drink ahead of time. Because the lime oils interact with the dairy, the drink will become progressively more bitter the longer it sits in the refrigerator. Always make it right before you plan to serve it.


    Do I need to add extra sugar?

    Usually, the sweetened condensed milk provides enough sweetness. However, if you prefer your drinks extra sweet, or if your limes were incredibly tart, you can add 2 to 3 tablespoons of standard white sugar during the final blending step.

  • The Ultimate Picklerita Slush Recipe: A Complete Guide to the Viral Pickle Margarita

    The Ultimate Picklerita Slush Recipe: A Complete Guide to the Viral Pickle Margarita


    Editor’s Note


    We know what you are thinking: “Pickle juice in a margarita slushie?” It sounds crazy, but the internet is absolutely obsessed with it. We spent a full week in our kitchen testing different pickle brands, blending methods, and tequila ratios to crack the code. We discovered the exact formula to solve the biggest problem people run into a drink that tastes like straight saltwater or gets way too watery. Follow this detailed guide for a perfectly balanced, tang-tastic frozen treat!


    Are you tired of the same old sweet summer drinks? Do you want something that is cold, incredibly refreshing, and has a sharp, savory kick?


    If you love pickles and you love margaritas, you are in for a massive treat. The Picklerita Slush (also known as the frozen pickle margarita) is taking over social media feeds and backyard pool parties everywhere.


    At first, it might sound like a weird combination. But the sour, salty crunch of pickle brine blends perfectly with the sharp bite of tequila and fresh lime. In this massive, step-by-step guide, we will break down everything you need to know to make the ultimate frozen version at home.


    What Exactly is a Picklerita Slush?


    A Picklerita Slush is a frozen, blended twist on the classic Mexican margarita cocktail. Instead of just using lime juice and triple sec, this recipe introduces cold pickle juice into the blender.


    When you blend it up with plenty of ice, it turns into a beautiful, pale-green slushie. It gives you the perfect balance of salty, sour, and a tiny hint of sweetness. This is the best beverage choice for people who enjoy salty treats or want a sharp, cooling option during a warm day. 


    The Reason Behind the Fame: Why Everyone is Obsessed with Pickle Juice. 


    Pickle juice is no longer just something you throw down the kitchen sink when the jar is empty. It has become a massive culinary trend for several great reasons:


    Natural Electrolytes: Pickle juice is packed with sodium and potassium, making it excellent for hydration on hot days.


    The Perfect Salt Replacement: Traditional margaritas use salt on the rim. Putting pickle juice inside the drink mixes that salty goodness into every single sip.


    The Ultimate Buzz: The strong, sour brine completely hides the harsh burn of cheap tequila, making the drink incredibly smooth to swallow.


    The Secret to Choosing the Best Pickle Brine


    You cannot just grab any random jar of pickles from the grocery store. The type of brine you choose will completely change how your Picklerita Slush tastes. Below are the important details you should keep in mind: 


    Classic Dill Pickle Juice (The Best Choice)


    This is the gold standard for a Picklerita. Dill pickle juice is sour, salty, and garlic-infused. It gives you that authentic, classic pickle punch that cuts through the alcohol beautifully.


    Spicy or Jalapeño Pickle Juice (For a Kick)


    If you love spicy food, look for jars labeled “Hot Dill” or “Jalapeño Pickles.” This adds a wonderful, warm heat to the back of your throat that pairs perfectly with tequila.


    Avoid Sweet or Bread & Butter Pickles


    Warning: Do not use sweet pickle juice! The high sugar content and warm spices (like clove) will make your margarita taste strange and medicinal. Stick to sour dill.


    What You Need: Simple Ingredients list

    Ingredients for a frozen pickle margarita slushie.


    To make a truly great, restaurant-quality slushie, you need to gather these simple kitchen items. You can easily find all of these at your local market:


    Tequila: 2 ounces of Blanco (Silver) tequila. Silver tequila has a clean, agave flavor that does not compete with the pickle brine.


    Pickle Juice: 2 ounces of strained dill pickle juice straight from your favorite jar.


    Real Lime Juice: One ounce of juice pressed straight from fresh green limes.Do not use the green plastic squeeze bottles fresh lime is essential!


    Triple Sec or Orange Liqueur: 1/2 ounce to add a tiny hint of bright sweetness and citrus depth.


    Agave Nectar or Simple Syrup: 1/2 ounce. This stops the drink from being too intensely sour and ties all the flavors together.


    Ice: 2 full cups of clean ice cubes to get that perfect, snowy slushie texture.


    Step-by-Step Instructions (The Foolproof Blending Method)


    Follow these steps precisely. The order in which you blend your ingredients matters if you want to keep your slushie from separating into liquid and ice.


    Step 1: Prep Your Glassware


    Before you turn on the blender, prepare your glass. Take a lime wedge and run it around the rim of a margarita glass or jar. Dip the wet rim into a mix of coarse salt and a little bit of chili powder (or Tajín seasoning). Put the glass in the freezer while you mix the drink.


    Step 2: Load the Liquids First


    Pour your tequila, strained pickle juice, fresh lime juice, triple sec, and agave nectar into the bottom of your high-speed blender cup. Adding the liquids first protects your blender blades and ensures everything mixes evenly.


    Step 3: Add the Ice and Blend


    Dump the 2 cups of ice cubes directly on top of the liquid. Put the lid on tightly. Start your blender on a low speed for 10 seconds to break up the large ice chunks, then flip it to high speed for 30 seconds.


    Step 4: Check the Texture


    Stop the blender and look inside. The mixture should look like a thick, smooth, frozen snow cone with no large ice pieces left. If it is too thick to pour, add a tiny splash of extra pickle juice. If it looks too watery, throw in 3 more ice cubes and blend again.


    Step 5: Pour and Garnish


    Take your frosted, salted glass out of the freezer. Pour the thick Picklerita Slush right into the glass. Garnish the top with a fresh dill pickle spear or a few round pickle chips floating on the snow. Serve with a thick straw!


    5 Trending Picklerita Variations to Try At Home

    Spicy and beer variations of frozen pickle drinks.


    After you learn how to easily make the standard version, it is time to experiment with these high-trending variations that are incredibly popular on social media right now:


    The “Tajín Supreme” Slush


    Instead of standard salt, rim your entire glass with a thick layer of Tajín Clásico seasoning. Drop a few dashes of hot sauce directly into the blender. This gives you a smoky, spicy, Mexican street-food vibe.


    The Corona-Rita Pickle Twist


    Make your slushie slightly thinner. Open a cold, mini bottle of Corona beer (a Coronita) and flip it upside down directly into the frozen slush. The crisp beer slowly mixes with the sour pickle juice as you drink it.


    The Skinny Pickle (Low Calorie)


    Drop the triple sec completely and replace the agave nectar with a few drops of liquid stevia or monk fruit sweetener. This drops the calorie count significantly while keeping all the sour flavor.


    The Virgin Mocktail Picklerita


    Want the fun without the hangover? Replace the tequila and triple sec with 2 ounces of fresh coconut water or club soda. It makes a super hydrating, frozen afternoon treat that kids and adults can both enjoy.


    The Smoky Mezcal Monster


    Swap out the silver tequila for a smoky Mezcal. The deep, earthy, campfire smoke flavor of Mezcal combined with salty dill pickle juice tastes like a high-end cocktail from a hidden speakeasy lounge.


    Troubleshooting: How to Fix Common Slushie Mistakes


    Making a frozen drink can sometimes be tricky. If your slush doesn’t turn out perfect, do not panic! Here is how to fix it instantly:


    Problem: My slushie is separating into water at the bottom and ice at the top.

    Solution: This happens when there isn’t enough sugar or syrup to hold the ice crystals together. Add one extra teaspoon of agave nectar or simple syrup and re-blend. The sugar acts as a binder!


    Problem: It tastes way too salty and hurts my tongue.

    Solution: You likely used a heavily concentrated brine. Pour in an extra half-ounce of fresh lime juice and a tiny splash of water, then blend it up to dilute the saltiness.


    Problem: The texture is chunky, not smooth like a restaurant.

    Solution: Your blender might need a little help. Let the ice melt for just two minutes, or crush your ice cubes in a bag before putting them into the blender so the machine can process them easily.


    Homemade Slushie vs. Restaurant Machine Slushie


    How does a home blender stack up against those big spinning slushie machines you see at bars? Let us look at the facts:

    FeatureHome Blender PickleritaCommercial Slushie Machine
    Preparation TimeUnder 5 minutesRequires hours to freeze the barrel
    Texture ControlHigh (Can add more ice or liquid instantly)Fixed (Machine dictates the thickness)
    FreshnessExtremely High (Fresh lime and real juice)Medium (Often uses premade chemical syrups)
    Clean UpEasy (Just rinse one blender jar)Difficult (Requires draining a massive machine)


    While a commercial machine creates perfectly uniform sugar crystals, your home blender allows you to use much fresher, healthier ingredients with zero artificial preservatives.


    The Spicy Jalapeño Picklerita (Extra Heat)


    If you love a spicy margarita, this variation is specifically designed for you. The earthy, sharp heat of fresh jalapeños cuts through the heavy brine of the pickle juice, creating a perfectly balanced, refreshing bite.


    What You Need:

    • 1 serving of our Picklerita Slush base
    • 2-3 slices of fresh green jalapeño (remove seeds if you prefer less heat)
    • 1/2 ounce of Agave syrup (to balance the spice)
    • A fresh dill sprig for garnish


    How to Make It:

    1. Add your standard Picklerita ingredients, ice, agave syrup, and the fresh jalapeño slices directly into your blender.
    2. Blend on high until the jalapeño is completely pulverized into the slush. You will see tiny beautiful green specks throughout the drink.
    3. Pour into a chilled, salt-rimmed glass. Garnish with a fresh sprig of dill and an extra jalapeño wheel on top.
    Spicy jalapeno pickle slush drink in a glass.


    Final Thoughts


    The Picklerita Slush is the ultimate proof that unexpected flavor combinations can create absolute magic. By balancing the natural salt and sour properties of dill pickle brine with clean silver tequila and fresh lime, you get an extraordinarily refreshing frozen cocktail. It solves the boring summer drink problem instantly!


    FAQs


    Can I reuse the juice from any pickle jar?


    Yes! As long as it is a sour dill or spicy pickle variety, you can use the leftover juice right out of the jar. Just make sure to pour it through a small wire strainer first to remove any stray garlic chunks or dill seeds.


    What is the best tequila brand for this recipe?


    You do not need to spend a fortune on expensive sipping tequila. Look for mid-tier, 100% blue agave silver tequilas like Espolòn, Altos, or Casamigos Blanco. Avoid gold tequilas, as their caramel coloring spoils the clean green look of the drink.


    Can I make a large batch of this ahead of time for a party?


    Because it is a frozen slushie, it will melt if left in a pitcher on the table. However, you can blend a massive batch, pour it into a large zip-top freezer bag, and store it flat in your freezer. When guests arrive, just squeeze the bag to break it up and scoop it into glasses!


    Is pickle juice good for a hangover?


    Strangely enough, yes! Pickle juice is packed with sodium and fluids that help restock your body’s electrolytes. Drinking a little bit of it can actually help reduce the severity of a hangover the next morning.

  • The Ultimate Chick-fil-A Frosted Lemonade Copycat Recipe

    The Ultimate Chick-fil-A Frosted Lemonade Copycat Recipe


    Editor’s Note


    At Sip Drafts Lab, we take our fast-food copycats very seriously. When developing this Chick-fil-A Frosted Lemonade recipe, our culinary team tested various ratios of ice cream to lemon juice. The secret lies in the balance of too much ice cream and it becomes a heavy vanilla shake; too much lemonade and it turns into an icy slush. By using fresh-squeezed lemons and high-quality vanilla bean ice cream, we have perfected the exact creamy, tart, and refreshing texture you get from the restaurant. This recipe is foolproof, completely safe, and rigorously tested for the best flavor.


    The Chick-fil-A Frosted Lemonade is the perfect hybrid drink. It is not quite a milkshake, and it is not just a standard iced lemonade. It is a creamy, dreamy, perfectly tart, and sweet dessert beverage that instantly cools you down.


    What if we told you that you could make this exact same magical beverage right in your own kitchen? You do not need any fancy equipment. With just a standard blender and three simple grocery store ingredients, you can whip up the ultimate Chick-fil-A Frosted Lemonade Copycat in under three minutes. Let us show you the secret to getting that perfect restaurant-quality texture!


    Why This Frozen Drink Broke the Internet


    If you have never had a Frosted Lemonade before, you might be wondering why people are so obsessed with it.


    The magic lies in the contrast. Lemonade on its own is highly acidic, tart, and very sharp. Vanilla ice cream is rich, heavy, and very sweet. When you blend them together, the dairy cuts through the acidity of the lemon, while the citrus cuts through the heaviness of the dairy.


    The result is a bright, refreshing, velvety smooth drink that does not feel too heavy on your stomach. It is the ultimate thirst quencher and dessert rolled into one cup.


    If you love this flavor profile but want something a bit lighter over ice, you absolutely must try our classic Chick-fil-A Sunjoy Copycat Recipe!


    3 Simple Ingredients You Need


    To make this recipe taste authentic, ingredient quality is everything. You only need three things, so make sure they are good!

    Ingredients for homemade frosted lemonade.


    Fresh Lemons: You will need about 1/2 cup of freshly squeezed lemon juice (roughly 3 to 4 large lemons). Please do not use the bottled lemon juice from the baking aisle. It contains preservatives that will make your frosty drink taste bitter and artificial.


    Sugar: 1/3 cup of standard white granulated sugar. This is used to make a quick homemade lemonade base.


    Vanilla Ice Cream: 3 cups of high-quality, full-fat vanilla ice cream. Look for a brand that uses real vanilla beans. Do not use “light” or low-fat ice cream, as the water content will make the final drink too icy.


    Water: 1/2 cup of cold filtered water (to dilute the lemon juice properly).


    Step-by-Step Instructions: Blending the Perfect Texture


    Making this drink requires a two-step process. First, we make a concentrated lemonade, and then we blend it with the ice cream.


    Step 1: Make the Lemonade Concentrate


    Start by juicing your fresh lemons until you have 1/2 cup of liquid. Pour this fresh juice into a pitcher or a large measuring cup. Add the 1/3 cup of white sugar and 1/2 cup of cold water. Stir this mixture vigorously until all the sugar is completely dissolved. You have just made a sweet, strong lemonade concentrate.


    Step 2: The Softening Phase


    Take your vanilla ice cream out of the freezer and let it sit on the kitchen counter for about 5 minutes. You want the edges to soften slightly. This prevents your blender from getting stuck and ensures a smoother, creamier texture without needing to add extra liquid.


    Step 3: Blend to Perfection


    Scoop the 3 cups of slightly softened vanilla ice cream directly into your blender. Pour your fresh lemonade concentrate over the top of the ice cream.

    Blending ice cream and lemonade in a blender.


    Step 4: Pulse, Do Not Liquefy


    This is the most critical step. Do not just turn your blender on high speed and walk away. The heat from the blender blades will melt the ice cream instantly. Instead, use the “pulse” button. Blend in short 3-second bursts until the mixture is thick, smooth, and fully combined.


    Step 5: Serve Immediately


    Pour your freshly blended Frosted Lemonade into a tall, chilled glass. Grab a wide straw and a long spoon, and enjoy your incredibly refreshing summer treat!


    2026 Trending Variations: The Strawberry Frosted Lemonade


    If you want to try the latest viral trend taking over TikTok, you have to upgrade this classic recipe with fresh fruit. The “Strawberry Frosted Lemonade” is a massive hit right now.

    Strawberry frosted lemonade variation with fresh fruit.


    To make this beautiful pink variation, simply add 1/2 cup of fresh or frozen strawberries into the blender during Step 3. The strawberries add a gorgeous natural pink color and a sweet, fruity depth that pairs flawlessly with the tart lemon and creamy vanilla.


    If you love making thick, spoonable treats in your blender, you also need to check out our viral Wendy’s Brownie Batter Frosty Hack!


    Dietary Swaps: How to Make it Keto and Dairy-Free


    One of the best things about making copycat recipes at Sip Drafts Lab is that you can customize them to fit your specific lifestyle.


    For a Keto / Low-Sugar Diet


    Chick-fil-A offers a “Diet Frosted Lemonade,” and you can easily replicate it. Swap the regular white sugar for a keto-friendly sweetener like Monk Fruit or Stevia (adjusting the amount to taste). Then, swap the regular vanilla ice cream for a low-carb, keto-friendly vanilla ice cream brand (like Rebel or Halo Top).


    For a Dairy-Free / Vegan Diet


    Swap the traditional ice cream for a high-quality oat milk or coconut milk vanilla ice cream. Coconut milk ice cream works exceptionally well here because the slight tropical coconut flavor blends perfectly with the fresh citrus!


    Conclusion


    You do not need to wait in a hot car to enjoy the best drink of the summer. By taking five minutes to squeeze some fresh lemons and blend them with rich vanilla ice cream, you can create the ultimate Chick-fil-A Frosted Lemonade Copycat right in your own kitchen.


    It is exactly the right balance of sweet, sour, and creamy. Try making a large batch for your next backyard barbecue or pool party, and watch your guests be amazed by your barista-level skills!


    FAQs


    Can I use store-bought lemonade instead of making my own?


    Yes! If you are in a rush, you can absolutely use 1 cup of a high-quality, pulp-free store-bought lemonade (like Simply Lemonade). Just skip the lemon juice, water, and sugar, and blend 1 cup of the commercial lemonade directly with the 3 cups of ice cream.


    Why did my frosted lemonade turn out watery?


    There are two main reasons this happens: either your ice cream melted before you started blending, or you blended the mixture for too long. Always use the “pulse” function on your blender, and if the drink feels too thin, just add another scoop of hard ice cream and pulse once more.


    Can I store the leftovers in the freezer?


    It is not recommended. If you put the blended frosted lemonade into the freezer, it will freeze completely solid into a hard block. This drink is meant to be enjoyed immediately while it is thick and slushy. 

  • How to Make the Perfect Iced Brown Sugar Oatmilk Shaken Espresso at Home

    How to Make the Perfect Iced Brown Sugar Oatmilk Shaken Espresso at Home


    Editor’s Note


    At Sip Drafts Lab, we test our coffee recipes extensively. When this specific drink broke the internet, we knew we had to reverse-engineer it perfectly. Our team tried over a dozen different oatmilk brands and experimented with various espresso roasts to find the absolute best combination. This recipe is not just a cheap copy; it is a meticulously crafted guide to help you achieve that authentic, frothy, café-quality beverage right in your own kitchen. It is entirely foolproof and guaranteed to satisfy your morning coffee cravings.


    Over the past few years, the Iced Brown Sugar Oatmilk Shaken Espresso has completely taken over the internet. It is, without a doubt, one of the most popular coffee beverages in the world right now. It is sweet, but not too sweet. It is creamy, yet completely dairy-free. And the hint of warm cinnamon makes it taste absolutely incredible year-round.


    What if you could make this exact same drink at home for a fraction of the cost? You do not need to be a professional barista, and you do not even need an expensive espresso machine. In this detailed guide, we are going to show you how to master this viral drink in under five minutes.


    Why is the Brown Sugar Shaken Espresso So Popular?


    Before we jump into the recipe, it is helpful to understand the science behind why this specific drink tastes so much better than a standard iced latte.


    When you make a regular iced latte, you simply pour hot espresso over cold milk and ice. The liquids just sit on top of each other.


    But when you aggressively shake hot espresso with ice and brown sugar syrup, magic happens. The shaking process rapidly cools the coffee down without watering it down too much. More importantly, shaking introduces tiny air bubbles into the espresso, creating a rich, velvety foam on top.


    This aeration process locks the sweet brown sugar flavor directly into the coffee oils. When you finally top it off with creamy oatmilk, it cascades beautifully through the dark espresso, creating that picture-perfect, Pinterest-worthy layered look.


    If you prefer cold fruit drinks in the afternoon, check out our highly-rated Chick-fil-A Sunjoy Copycat Recipe for the ultimate refreshing experience!


    What You Need: Simple Grocery Store Ingredients


    You do not need to hunt down special coffee shop syrups to make this beverage. Everything you need is likely already in your kitchen.

    Ingredients for homemade brown sugar shaken espresso.


    Espresso: You need 2 shots (about 2 ounces) of strong espresso. A blonde roast is highly recommended because it is smoother and pairs perfectly with the oatmilk.


    Dark Brown Sugar: 2 tablespoons. Dark brown sugar contains more molasses than light brown sugar, which gives the drink that signature deep, caramel-like richness.


    Water: 2 tablespoons (to make the quick homemade syrup).


    Cinnamon: A generous pinch of ground cinnamon.


    Oatmilk: 1/2 cup to 3/4 cup of high-quality, creamy oatmilk. Oatly Barista Edition or Chobani Extra Creamy are the best choices for getting that perfect texture.


    Ice: 1 large cup of fresh ice cubes. Do not use crushed ice, or your drink will melt too fast.


    The Secret to the Perfect Brown Sugar Syrup


    Many people make the mistake of just dumping dry brown sugar directly into cold iced coffee. The problem is that sugar will not dissolve in cold liquid. You will end up sucking up gritty sugar crystals through your straw.


    To fix this, we need to create a rapid brown sugar syrup.


    Take a small, microwave-safe bowl. Add your 2 tablespoons of dark brown sugar and 2 tablespoons of water. Microwave this mixture for about 30 seconds. Carefully take it out and stir it vigorously until all the sugar is completely dissolved into a smooth, dark syrup.


    Add your pinch of cinnamon right into this hot syrup. The heat will activate the natural oils in the cinnamon, making the spice flavor much stronger.


    Step-by-Step Recipe: Shaking it Like a Barista


    Now that your syrup is ready, it is time for the fun part. You will need a cocktail shaker or a simple mason jar with a tight-fitting lid.


    Step 1: Brew the Espresso


    Brew two shots of espresso. If you do not have an espresso machine, you can use a Nespresso pod, a Moka pot, or even mix 2 teaspoons of high-quality instant espresso powder with 2 ounces of hot water.


    Step 2: Load the Shaker


    Fill your cocktail shaker or mason jar entirely with fresh, solid ice cubes. Pour your hot brown sugar cinnamon syrup directly over the ice.


    Step 3: Add Coffee and Shake


    Pour your freshly brewed, hot espresso over the ice and syrup. Immediately put the lid on your shaker. Shake the container aggressively for about 15 to 20 seconds. You want to shake it hard enough to create a thick layer of foam on top of the liquid. The outside of the shaker should feel extremely cold to the touch.

    Pouring hot espresso over ice in a shaker.


    Step 4: Pour and Top with Oatmilk


    Take a tall, clear serving glass and fill it with fresh ice. Do not reuse the broken ice from your shaker. Pour the shaken, foamy espresso over the new ice.

    Finally, gently pour your cold oatmilk over the top. Watch as the creamy milk swirls beautifully down into the dark, sweet espresso. Add a final tiny dusting of cinnamon on top for decoration, insert a straw, and enjoy!


    Trending Variations for 2026: Vanilla Sweet Cream Cold Foam


    If you want to take this recipe to the next level, you have to try adding the viral “Cold Foam” hack that is currently dominating TikTok.

    Adding cold foam to iced shaken espresso.


    While the standard recipe uses oatmilk, many people are now topping their shaken espresso with a thick layer of Vanilla Cold Foam.


    To make it, pour 3 tablespoons of heavy whipping cream, 2 tablespoons of milk, and 1 pump of vanilla syrup into a small glass. Use a cheap handheld milk frother to whip the mixture for 20 seconds until it looks like melted ice cream.


    Pour this fluffy, sweet cloud over your finished Iced Brown Sugar Oatmilk Shaken Espresso. It creates a creamy, luxurious dessert-like finish that is absolutely addictive!


    Speaking of creamy desserts, if you love rich chocolate, do not miss our easy Wendy’s Brownie Batter Frosty Hack that takes just 5 minutes to blend!


    Expert Tips to Avoid a Watery Drink


    Making iced coffee at home can sometimes result in a flat, watery mess. Here is how to avoid that:


    Always Use Fresh Ice Twice 


    As mentioned in the recipe, the ice in your shaker will melt slightly and break into tiny chips during the shaking process. If you pour that broken ice into your final glass, your drink will become watery very fast. Always strain the shaken espresso over a brand new cup of solid ice.


    Choose the Right Oatmilk 


    Not all oatmilks are created equal. Some cheaper brands are basically just oat-flavored water. You must look for cartons that say “Barista Blend” or “Extra Creamy.” These have a higher fat content, which prevents the coffee from tasting thin.


    Adjust the Sweetness 


    The beauty of making this at home is full control. If you like your coffee bitter, reduce the brown sugar to just one tablespoon. If you have a massive sweet tooth, add an extra splash of syrup.


    Conclusion


    You do not need to spend five dollars every morning to get your favorite coffee fix. By mastering the simple shaking technique and making a quick microwave syrup, you can whip up the ultimate Iced Brown Sugar Oatmilk Shaken Espresso in just a few minutes.


    The combination of bold espresso, rich molasses, warm cinnamon, and creamy dairy-free oatmilk is truly unmatched. Grab a mason jar, brew some strong coffee, and start shaking your way to a better morning routine!


    FAQs


    Can I make this if I do not have an espresso machine?

    Absolutely. While real espresso is best, you can easily substitute it. Brew half a cup of extra-strong dark roast coffee, or simply dissolve two teaspoons of premium instant espresso powder into two ounces of very hot water.


    Why is my oatmilk separating from the coffee?

    This usually happens if the espresso is too hot when you pour the milk, or if the oatmilk lacks fat. Make sure you shake the espresso with ice thoroughly to cool it down completely before adding the milk. Using a “Barista Edition” oatmilk also stops separation.


    Can I make a large batch of the brown sugar syrup ahead of time?

    Yes! You can boil 1 cup of dark brown sugar, 1 cup of water, and 2 cinnamon sticks in a saucepan for 5 minutes. Let it cool, remove the cinnamon sticks, and store the syrup in a glass jar in the fridge for up to two weeks.

  • How to Make Easy Non-Alcoholic Glitter Drinks for Parties

    How to Make Easy Non-Alcoholic Glitter Drinks for Parties


    Editor’s Note


    At Sip Drafts Lab, we take food safety very seriously. The trend of shimmering, sparkly drinks is taking over the internet, but not all glitter is safe to eat. Before we created these recipes, our team tested multiple brands of edible dust. We only use and recommend FDA-approved, 100% food-grade edible luster dust (commonly used for cake decorating). Never use craft glitter in your beverages. These recipes are perfectly safe, stunningly beautiful, and guaranteed to be the highlight of your next party!


    The best part? You do not need alcohol to make a fancy, beautiful beverage. Creating easy non-alcoholic glitter drinks for parties is simple, incredibly cheap, and safe for guests of all ages, including kids.


    In this complete guide, we will show you the secret to making these drinks, what ingredients to buy, and three viral recipes that take less than five minutes to mix.


    The Secret Ingredient: What is Edible Glitter?


    Before we start mixing drinks, we need to talk about the magic ingredient. To make these drinks, you need something called Edible Luster Dust or Brew Glitter.

    Edible luster dust for making glitter drinks.


    This is not the plastic craft glitter you buy at an art store. Edible glitter is made from food-grade ingredients like sugar, maltodextrin, and mica-based pearlescent pigments. It has absolutely no taste and no texture. When you drink it, you will not feel any grit in your teeth.


    You only need a tiny pinch of this dust to make an entire pitcher of drinks sparkle. You can find edible glitter easily online or in the baking aisle of your local craft and hobby store.


    Recipe 1: The Viral Shimmering Galaxy Lemonade


    This is the most highly searched glitter drink on the internet right now. It uses blue and purple tones to create a drink that looks exactly like outer space. It is tart, sweet, and mesmerizing.


    What You Need:

    • 1 cup of fresh lemonade (store-bought or homemade)
    • 1/2 cup of blue sports drink (like blue Gatorade or Powerade)
    • A tiny pinch of silver or purple edible luster dust
    • Ice cubes
    • Fresh lemon slices for garnish


    How to Make It:

    1. Take a tall, see-through glass and load it all the way to the top with ice cubes. Add a very small pinch (about 1/8th of a teaspoon) of the edible luster dust directly over the ice.
    2. Pour in the blue sports drink until the glass is half full.
    3. Slowly pour the fresh lemonade on top to fill the glass.
    4. Use a long spoon or a straw to stir the drink rapidly. Watch the “galaxy” come to life!


    If you love fresh citrus drinks, you have to try making our highly-rated Chick-fil-A Sunjoy Copycat Recipe for your next afternoon picnic!


    Recipe 2: The Pink Cotton Candy Sparkler


    If you are hosting a princess party, a baby shower, or just love sweet flavors, this bright pink sparkling mocktail is the perfect choice. It is bubbly and incredibly fun.

    Pink cotton candy mocktail with edible glitter.


    What You Need:

    • 1 cup of clear lemon-lime soda (like Sprite or 7-Up)
    • 2 tablespoons of pink cotton candy drink syrup (the Torani version is highly recommended for this). 
    • A pinch of pink or rose-gold edible glitter
    • A small piece of real pink cotton candy for garnish
    • Ice cubes


    How to Make It:

    1. In a small glass, mix the cotton candy syrup with the pink edible glitter. Stir until the glitter is completely mixed into the thick syrup.
    2. Fill your serving glass with ice.
    3. Pour the glittery syrup mixture over the ice.
    4. Slowly top with the cold lemon-lime soda.
    5. Stir gently to combine, and place a fluffy piece of real cotton candy on the rim of the glass right before serving.


    Looking for more vibrant, colorful party drinks? Check out our famous Sonic Twisted Flamingo Recipe to keep the summer vibes going!


    Recipe 3: The Golden Vanilla Cream Soda


    This recipe is slightly richer and looks like swirling liquid gold. It is perfect for evening parties, New Year’s Eve, or fancy dinner gatherings.


    What You Need:

    • 1 cup of a premium brand cream soda, though refreshing ginger ale works wonderfully too. 
    • 1 tablespoon of vanilla syrup
    • A pinch of gold edible luster dust
    • Crushed ice


    How to Make It:

    1. Add the gold edible dust to the bottom of an empty glass.
    2. Pour in the vanilla syrup and mix it with the dust to create a golden paste.
    3. Add your crushed ice to the glass.
    4. Pour the cold cream soda over the ice and stir vigorously. The golden swirls will catch the light beautifully.


    Craving a thicker, richer vanilla and chocolate treat? Our easy Wendy’s Brownie Batter Frosty Hack takes only 5 minutes in a blender!


    Expert Tips for Styling and Serving Glitter Drinks


    If you want to achieve that picture-perfect, viral aesthetic commonly found on TikTok and Pinterest, simply use these easy presentation guidelines: 

    Colorful shimmering non-alcoholic drinks in mason jars.


    Use Clear Glassware 


    Do not serve these drinks in plastic red cups or solid-colored mugs. The whole point of the drink is the visual swirl. Always use clear glasses, mason jars, or clear plastic party cups so the glitter is fully visible.


    Serve with a Stirrer 


    Edible glitter is heavier than water. If the drink sits on a table for 15 minutes, the glitter will eventually sink to the bottom. Always serve these drinks with a colorful straw or a swizzle stick so your guests can stir up the magic before taking a sip.


    Lighting is Everything 


    Glitter needs light to shine! If your party is outdoors in the sun, the drinks will sparkle naturally. If you are indoors, try placing a small LED light coaster under the glasses or serve them near a bright light source.


    Conclusion


    You do not need an expensive bartender or complicated ingredients to host an unforgettable party. By using a simple pinch of food-grade edible luster dust, you can transform basic sodas and lemonades into magical, swirling works of art.

    These easy non-alcoholic glitter drinks for parties are safe, incredibly fun to make, and will leave all your guests asking for your secret recipe. Grab some clear glasses, pick your favorite colors, and get ready to add a little sparkle to your next celebration!


    FAQs


    Does edible glitter change the taste of the drink?

    Not at all! High-quality edible luster dust is completely flavorless and odorless. It will not make your drink taste chalky, sweet, or salty. It is used purely for visual decoration.


    Is edible glitter safe for toddlers and young children?

    Yes, as long as you are using 100% FDA-approved, food-grade edible luster dust, it is completely safe for children to consume. Always check the label before buying to ensure it says “edible” and not just “non-toxic.”


    Can I make a large pitcher of glitter drinks ahead of time?

    Yes, you can mix the liquids and the glitter in a large pitcher before the party. However, because the glitter will settle at the bottom over time, you will need to give the pitcher a very good stir right before pouring it for your guests.

  • How to Make Edible Glitter Mocktails at Home (Easy & Safe Recipes)

    How to Make Edible Glitter Mocktails at Home (Easy & Safe Recipes)


    Editor’s Note 


    As a beverage expert who loves hosting, I know how important it is to serve drinks that not only taste amazing but also look unforgettable. When edible glitter trended on TikTok, I spent weeks testing different brands to ensure they were 100% food-safe. In this guide, I will share my exact secrets for creating mesmerizing, shimmering mocktails that will wow your guests without compromising on health or flavor.


    However, working with glitter in food and drinks requires a bit of knowledge. You cannot just use any sparkle you find at the craft store. In this comprehensive guide, we will cover everything from choosing the safest ingredients to mastering three stunning recipes that outshine any expensive restaurant drink.


    What is Edible Glitter and Is It Safe to Drink?


    This is the most critical question when making shimmering drinks. Yes, edible drink glitter is completely safe to consume, but only if you buy the right kind.


    True edible glitter is usually made from food-grade mica powder, sugar, or pearlescent pigments that the FDA (Food and Drug Administration) has approved for consumption. It passes safely through your digestive system without causing any harm. It has no taste, no texture, and no smell, meaning it will not alter the flavor of your favorite mocktail.


    Warning: Never use products labeled as “non-toxic.” Non-toxic just means it won’t poison you immediately, but it is not meant to be eaten. Always look for the exact words “100% Edible” or “Food-Grade” on the label.


    Where to Buy and How to Choose the Best Glitter


    To get that beautiful, swirling “potion” effect, you need the right texture.


    Avoid large, chunky sugar glitters. These will just sink to the bottom of your glass and look like sand. Instead, look for “luster dust” or “brew glitter.” These are micro-fine powders that float effortlessly in liquids. You can easily find high-quality, FDA-approved edible drink glitters on Amazon, in specialized baking stores, or on dedicated beverage supply websites.


    The Golden Rule: How to Use Edible Glitter in Drinks


    Before we jump into the recipes, you need to know the proper mixing technique. If you just dump the powder on top of an icy drink, it might clump up.

    Food Grade Edible Drink Glitter


    Start Small: You only need a tiny pinch (about 1/8 of a teaspoon) for a single glass. A little goes a very long way.


    Mix with Syrup First: For the absolute best results, mix the dry glitter into a small amount of simple syrup, lemon juice, or warm water first. Stir it into a paste, then add your main liquid.


    Stir Vigorously: Use a long bar spoon and stir vigorously in a circular motion to create a vortex. This activates the swirling effect.


    3 Trending Edible Glitter Mocktail Recipes You Must Try


    Now that you know the basics, let us create some magic. Here are three highly requested, easy-to-make recipes that will make you look like a professional mixologist.


    The Galaxy Lemonade (Blue & Purple Magic)


    This vibrant, space-themed drink is a massive hit at kids’ parties and summer gatherings. It is refreshing, tangy, and looks out of this world.

    Blue Galaxy Lemonade Mocktail


    Ingredients:

    • 1 cup freshly squeezed lemonade
    • 1/4 cup blue raspberry syrup (or blueberry juice)
    • 1/8 teaspoon silver or light blue edible luster dust
    • Ice cubes
    • Lemon slices and fresh mint for garnish


    Step-by-Step Instructions:

    1. In a tall glass, mix your blue raspberry syrup with the silver edible glitter. Stir until the glitter is fully dissolved in the syrup.
    2. Fill the glass to the top with ice cubes.
    3. Slowly pour the fresh lemonade over the ice.
    4. Watch as the clear lemonade mixes with the blue glitter syrup at the bottom, creating a beautiful swirling galaxy effect.
    5. Garnish with a fresh lemon wheel and a sprig of mint before serving.


    Sparkling Rose Gold Sunrise


    Perfect for bridal showers, Valentine’s Day, or a fancy brunch. This drink is elegant, bubbly, and has a luxurious rose-gold shimmer.

    Sparkling Rose Gold Mocktail


    Ingredients:

    • 1/2 cup sparkling apple cider or sparkling white grape juice (chilled)
    • 1/4 cup cranberry juice
    • 1/8 teaspoon rose-gold or pink edible brew glitter
    • A splash of fresh lime juice
    • Fresh raspberries for garnish


    Step-by-Step Instructions:

    1. Take a fancy coupe glass or a champagne flute.
    2. Add the splash of lime juice and the rose-gold edible glitter into the bottom of the glass. Stir them together.
    3. Pour in the cranberry juice and mix well to activate the shimmer.
    4. Top it off gently with the sparkling apple cider. The carbonation from the sparkling cider will keep the glitter dancing beautifully in the glass.
    5. Drop in two fresh raspberries for an elegant finish.


    Midnight Pearlescent Potion


    This dark, mysterious mocktail is highly trending during Halloween or evening events. It has a deep, rich color with a glowing, pearl-like swirl.


    Ingredients:

    • 1/2 cup pomegranate juice
    • 1/2 cup blackberry or dark cherry soda
    • 1/8 teaspoon pearl-white or silver edible glitter
    • 1/2 ounce vanilla syrup
    • Blackberries for garnish


    Step-by-Step Instructions:

    1. In a cocktail shaker, combine the vanilla syrup, pomegranate juice, and the pearl-white edible glitter.
    2. Add a small amount of ice and shake gently for 10 seconds.
    3. Strain the shimmering liquid into a serving glass filled with fresh ice.
    4. Top off the glass with the dark cherry soda.
    5. Stir gently with a bar spoon to combine the layers and watch the pearlescent clouds form. Garnish with a skewer of fresh blackberries.


    Pro Tips for the Perfect Shimmer


    To ensure your drinks look flawless every single time, keep these expert tips in mind:


    Carbonation is Your Friend: Using carbonated liquids (like sodas, sparkling water, or tonic) helps keep the glitter moving. The bubbles constantly push the glitter upwards, maintaining the swirl for much longer.


    Clear Liquids Show It Best: While you can add glitter to dark juices, clear or lightly tinted liquids (like lemonade, Sprite, or white grape juice) show off the sparkle much better.


    Keep a Spoon Handy: Eventually, gravity will win, and the glitter will slowly settle at the bottom. Serve your mocktails with decorative stirrers so guests can give their drink a quick spin to reactivate the magic.


    Conclusion


    Learning how to make edible glitter mocktails at home is an incredibly fun and creative way to upgrade your beverage game. By ensuring you purchase high-quality, FDA-approved luster dust and using the right mixing techniques, you can safely create café-quality, photogenic drinks right in your kitchen.


    Whether you are mixing up a sparkling rose gold treat for brunch or a dark galaxy potion for a themed party, these recipes guarantee a visually stunning experience. So, grab your favorite glasses, pick out a glitter color, and start stirring up some magic!


    FAQs


    Does edible glitter change the taste of my drink? 

    No, high-quality food-grade edible glitter is completely tasteless and odorless. It only adds visual appeal and will not alter the flavor or texture of your mocktail.


    Why is my edible glitter clumping at the top? 

    Clumping usually happens if you dump the powder directly onto a cold liquid. To prevent this, mix the glitter with a tiny bit of warm water or simple syrup first to create a paste, then add your cold drink.


    Will the glitter stay floating forever? 

    No, edible glitter is slightly heavier than liquid, so it will eventually settle at the bottom of the glass after 10 to 15 minutes. Using carbonated drinks helps it float longer, but you can always just give the drink a quick stir to reactivate the swirl.


    Can I use baking glitter or sanding sugar instead? 

    No. Sanding sugar or traditional baking glitters are too heavy and chunky. They will immediately sink to the bottom and dissolve, ruining the visual effect. You specifically need “luster dust” or “brew glitter” for drinks.


    Where can I buy 100% edible drink glitter? 

    You can easily find food-safe, FDA-approved drink glitters online on Amazon, at specialized cake decorating shops, or through brands like Brew Glitter and Fancy Sprinkles.