Category: Smoothie

  • The Ultimate Picklerita Slush Recipe: A Complete Guide to the Viral Pickle Margarita

    The Ultimate Picklerita Slush Recipe: A Complete Guide to the Viral Pickle Margarita


    Editor’s Note


    We know what you are thinking: “Pickle juice in a margarita slushie?” It sounds crazy, but the internet is absolutely obsessed with it. We spent a full week in our kitchen testing different pickle brands, blending methods, and tequila ratios to crack the code. We discovered the exact formula to solve the biggest problem people run into a drink that tastes like straight saltwater or gets way too watery. Follow this detailed guide for a perfectly balanced, tang-tastic frozen treat!


    Are you tired of the same old sweet summer drinks? Do you want something that is cold, incredibly refreshing, and has a sharp, savory kick?


    If you love pickles and you love margaritas, you are in for a massive treat. The Picklerita Slush (also known as the frozen pickle margarita) is taking over social media feeds and backyard pool parties everywhere.


    At first, it might sound like a weird combination. But the sour, salty crunch of pickle brine blends perfectly with the sharp bite of tequila and fresh lime. In this massive, step-by-step guide, we will break down everything you need to know to make the ultimate frozen version at home.


    What Exactly is a Picklerita Slush?


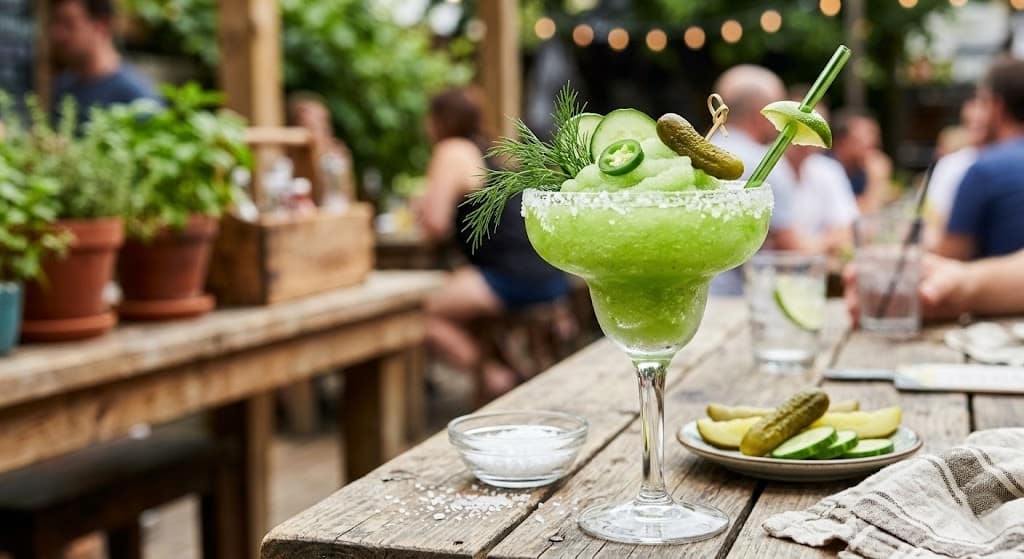
    A Picklerita Slush is a frozen, blended twist on the classic Mexican margarita cocktail. Instead of just using lime juice and triple sec, this recipe introduces cold pickle juice into the blender.


    When you blend it up with plenty of ice, it turns into a beautiful, pale-green slushie. It gives you the perfect balance of salty, sour, and a tiny hint of sweetness. This is the best beverage choice for people who enjoy salty treats or want a sharp, cooling option during a warm day. 


    The Reason Behind the Fame: Why Everyone is Obsessed with Pickle Juice. 


    Pickle juice is no longer just something you throw down the kitchen sink when the jar is empty. It has become a massive culinary trend for several great reasons:


    Natural Electrolytes: Pickle juice is packed with sodium and potassium, making it excellent for hydration on hot days.


    The Perfect Salt Replacement: Traditional margaritas use salt on the rim. Putting pickle juice inside the drink mixes that salty goodness into every single sip.


    The Ultimate Buzz: The strong, sour brine completely hides the harsh burn of cheap tequila, making the drink incredibly smooth to swallow.


    The Secret to Choosing the Best Pickle Brine


    You cannot just grab any random jar of pickles from the grocery store. The type of brine you choose will completely change how your Picklerita Slush tastes. Below are the important details you should keep in mind: 


    Classic Dill Pickle Juice (The Best Choice)


    This is the gold standard for a Picklerita. Dill pickle juice is sour, salty, and garlic-infused. It gives you that authentic, classic pickle punch that cuts through the alcohol beautifully.


    Spicy or Jalapeño Pickle Juice (For a Kick)


    If you love spicy food, look for jars labeled “Hot Dill” or “Jalapeño Pickles.” This adds a wonderful, warm heat to the back of your throat that pairs perfectly with tequila.


    Avoid Sweet or Bread & Butter Pickles


    Warning: Do not use sweet pickle juice! The high sugar content and warm spices (like clove) will make your margarita taste strange and medicinal. Stick to sour dill.


    What You Need: Simple Ingredients list

    Ingredients for a frozen pickle margarita slushie.


    To make a truly great, restaurant-quality slushie, you need to gather these simple kitchen items. You can easily find all of these at your local market:


    Tequila: 2 ounces of Blanco (Silver) tequila. Silver tequila has a clean, agave flavor that does not compete with the pickle brine.


    Pickle Juice: 2 ounces of strained dill pickle juice straight from your favorite jar.


    Real Lime Juice: One ounce of juice pressed straight from fresh green limes.Do not use the green plastic squeeze bottles fresh lime is essential!


    Triple Sec or Orange Liqueur: 1/2 ounce to add a tiny hint of bright sweetness and citrus depth.


    Agave Nectar or Simple Syrup: 1/2 ounce. This stops the drink from being too intensely sour and ties all the flavors together.


    Ice: 2 full cups of clean ice cubes to get that perfect, snowy slushie texture.


    Step-by-Step Instructions (The Foolproof Blending Method)


    Follow these steps precisely. The order in which you blend your ingredients matters if you want to keep your slushie from separating into liquid and ice.


    Step 1: Prep Your Glassware


    Before you turn on the blender, prepare your glass. Take a lime wedge and run it around the rim of a margarita glass or jar. Dip the wet rim into a mix of coarse salt and a little bit of chili powder (or Tajín seasoning). Put the glass in the freezer while you mix the drink.


    Step 2: Load the Liquids First


    Pour your tequila, strained pickle juice, fresh lime juice, triple sec, and agave nectar into the bottom of your high-speed blender cup. Adding the liquids first protects your blender blades and ensures everything mixes evenly.


    Step 3: Add the Ice and Blend


    Dump the 2 cups of ice cubes directly on top of the liquid. Put the lid on tightly. Start your blender on a low speed for 10 seconds to break up the large ice chunks, then flip it to high speed for 30 seconds.


    Step 4: Check the Texture


    Stop the blender and look inside. The mixture should look like a thick, smooth, frozen snow cone with no large ice pieces left. If it is too thick to pour, add a tiny splash of extra pickle juice. If it looks too watery, throw in 3 more ice cubes and blend again.


    Step 5: Pour and Garnish


    Take your frosted, salted glass out of the freezer. Pour the thick Picklerita Slush right into the glass. Garnish the top with a fresh dill pickle spear or a few round pickle chips floating on the snow. Serve with a thick straw!


    5 Trending Picklerita Variations to Try At Home

    Spicy and beer variations of frozen pickle drinks.


    After you learn how to easily make the standard version, it is time to experiment with these high-trending variations that are incredibly popular on social media right now:


    The “Tajín Supreme” Slush


    Instead of standard salt, rim your entire glass with a thick layer of Tajín Clásico seasoning. Drop a few dashes of hot sauce directly into the blender. This gives you a smoky, spicy, Mexican street-food vibe.


    The Corona-Rita Pickle Twist


    Make your slushie slightly thinner. Open a cold, mini bottle of Corona beer (a Coronita) and flip it upside down directly into the frozen slush. The crisp beer slowly mixes with the sour pickle juice as you drink it.


    The Skinny Pickle (Low Calorie)


    Drop the triple sec completely and replace the agave nectar with a few drops of liquid stevia or monk fruit sweetener. This drops the calorie count significantly while keeping all the sour flavor.


    The Virgin Mocktail Picklerita


    Want the fun without the hangover? Replace the tequila and triple sec with 2 ounces of fresh coconut water or club soda. It makes a super hydrating, frozen afternoon treat that kids and adults can both enjoy.


    The Smoky Mezcal Monster


    Swap out the silver tequila for a smoky Mezcal. The deep, earthy, campfire smoke flavor of Mezcal combined with salty dill pickle juice tastes like a high-end cocktail from a hidden speakeasy lounge.


    Troubleshooting: How to Fix Common Slushie Mistakes


    Making a frozen drink can sometimes be tricky. If your slush doesn’t turn out perfect, do not panic! Here is how to fix it instantly:


    Problem: My slushie is separating into water at the bottom and ice at the top.

    Solution: This happens when there isn’t enough sugar or syrup to hold the ice crystals together. Add one extra teaspoon of agave nectar or simple syrup and re-blend. The sugar acts as a binder!


    Problem: It tastes way too salty and hurts my tongue.

    Solution: You likely used a heavily concentrated brine. Pour in an extra half-ounce of fresh lime juice and a tiny splash of water, then blend it up to dilute the saltiness.


    Problem: The texture is chunky, not smooth like a restaurant.

    Solution: Your blender might need a little help. Let the ice melt for just two minutes, or crush your ice cubes in a bag before putting them into the blender so the machine can process them easily.


    Homemade Slushie vs. Restaurant Machine Slushie


    How does a home blender stack up against those big spinning slushie machines you see at bars? Let us look at the facts:

    FeatureHome Blender PickleritaCommercial Slushie Machine
    Preparation TimeUnder 5 minutesRequires hours to freeze the barrel
    Texture ControlHigh (Can add more ice or liquid instantly)Fixed (Machine dictates the thickness)
    FreshnessExtremely High (Fresh lime and real juice)Medium (Often uses premade chemical syrups)
    Clean UpEasy (Just rinse one blender jar)Difficult (Requires draining a massive machine)


    While a commercial machine creates perfectly uniform sugar crystals, your home blender allows you to use much fresher, healthier ingredients with zero artificial preservatives.


    The Spicy Jalapeño Picklerita (Extra Heat)


    If you love a spicy margarita, this variation is specifically designed for you. The earthy, sharp heat of fresh jalapeños cuts through the heavy brine of the pickle juice, creating a perfectly balanced, refreshing bite.


    What You Need:

    • 1 serving of our Picklerita Slush base
    • 2-3 slices of fresh green jalapeño (remove seeds if you prefer less heat)
    • 1/2 ounce of Agave syrup (to balance the spice)
    • A fresh dill sprig for garnish


    How to Make It:

    1. Add your standard Picklerita ingredients, ice, agave syrup, and the fresh jalapeño slices directly into your blender.
    2. Blend on high until the jalapeño is completely pulverized into the slush. You will see tiny beautiful green specks throughout the drink.
    3. Pour into a chilled, salt-rimmed glass. Garnish with a fresh sprig of dill and an extra jalapeño wheel on top.
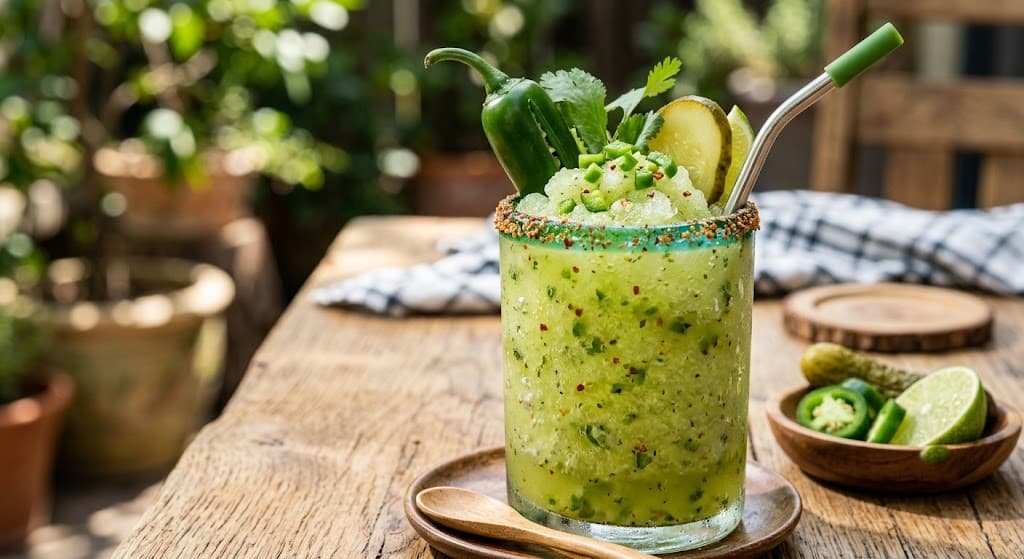
    Spicy jalapeno pickle slush drink in a glass.


    Final Thoughts


    The Picklerita Slush is the ultimate proof that unexpected flavor combinations can create absolute magic. By balancing the natural salt and sour properties of dill pickle brine with clean silver tequila and fresh lime, you get an extraordinarily refreshing frozen cocktail. It solves the boring summer drink problem instantly!


    FAQs


    Can I reuse the juice from any pickle jar?


    Yes! As long as it is a sour dill or spicy pickle variety, you can use the leftover juice right out of the jar. Just make sure to pour it through a small wire strainer first to remove any stray garlic chunks or dill seeds.


    What is the best tequila brand for this recipe?


    You do not need to spend a fortune on expensive sipping tequila. Look for mid-tier, 100% blue agave silver tequilas like Espolòn, Altos, or Casamigos Blanco. Avoid gold tequilas, as their caramel coloring spoils the clean green look of the drink.


    Can I make a large batch of this ahead of time for a party?


    Because it is a frozen slushie, it will melt if left in a pitcher on the table. However, you can blend a massive batch, pour it into a large zip-top freezer bag, and store it flat in your freezer. When guests arrive, just squeeze the bag to break it up and scoop it into glasses!


    Is pickle juice good for a hangover?


    Strangely enough, yes! Pickle juice is packed with sodium and fluids that help restock your body’s electrolytes. Drinking a little bit of it can actually help reduce the severity of a hangover the next morning.
  • The Ultimate Sonic Twisted Flamingo Recipe (Viral Secret Menu Hack!)

    The Ultimate Sonic Twisted Flamingo Recipe (Viral Secret Menu Hack!)


    Editor’s Note


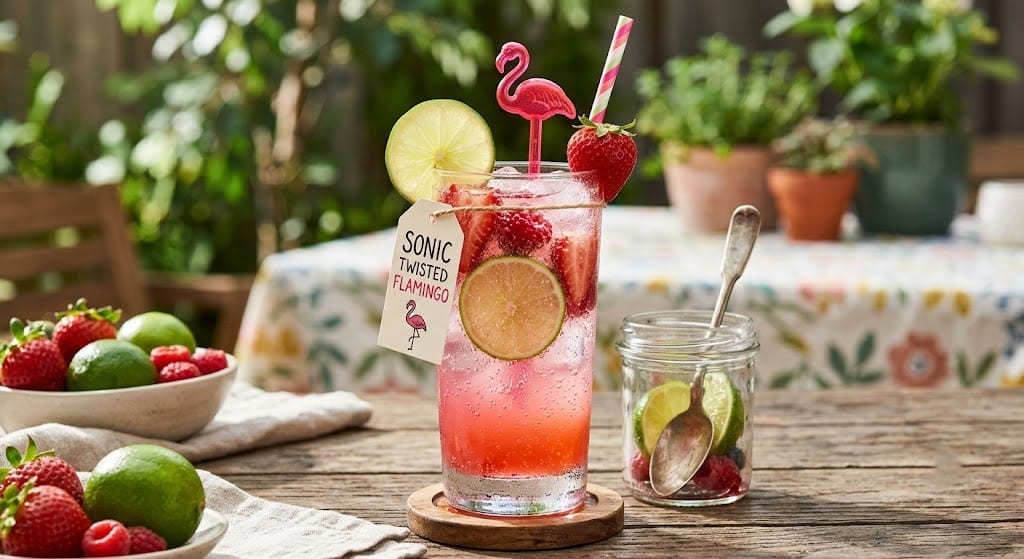
    Ordering off the secret menu can sometimes lead to awkward moments at the drive-thru. Not every employee knows the exact flavor ratios for the famous Twisted Flamingo. Sometimes it comes out too sweet, and other times it just tastes like plain soda. At Sip Drafts Lab, we wanted a consistent, perfect drink every single time. After running multiple tests in our kitchen with different syrups, we found the ultimate golden ratio. By perfectly balancing sweet cherry, smooth vanilla, and a squeeze of fresh lime, we created the ultimate refreshing summer beverage. Follow our easy guide to mix this gorgeous pink drink at home without the drive-thru hassle!

    Sonic Drive-In is famous around the world for having millions of different drink combinations. While their regular menu is great, their secret menu is where the real magic happens. Right now, the “Sonic Twisted Flamingo” is one of the most highly searched secret drinks on the internet. It is bright pink, incredibly refreshing, and has a unique flavor profile that screams summer vacation.


    Unfortunately, buying custom sodas every single day can quickly empty your wallet. The good news is that you can easily recreate this beautiful, sweet, and tangy drink right in your own kitchen for just a few cents. Let us show you exactly how to become your own master flavor mixer!


    What Exactly is the Sonic Twisted Flamingo?


    If you are new to the world of custom sodas, you might be wondering what flavors are actually inside this famous pink cup.


    The Twisted Flamingo is a beautiful twist on a classic cherry limeade. It uses a crisp lemon-lime soda base (like Sprite). Then, it is mixed with a generous splash of sweet cherry syrup, a pump of smooth vanilla syrup, and a squeeze of real, fresh lime juice.


    The vanilla completely transforms the drink. It softens the sharp bite of the lime and blends with the cherry to create a flavor that tastes exactly like a melted popsicle. It is sweet, tart, bubbly, and absolutely delicious.


    Why Making It at Home is the Best Option


    There are two major problems with ordering secret menu items at a fast-food restaurant.


    First, not every worker knows the recipe. If you ask for a “Twisted Flamingo,” you might get a blank stare. You usually have to explain the exact syrups to them. Second, large custom drinks can cost over four dollars!


    By buying a few basic syrups at your local grocery store, you can make dozens of these drinks at home. You can also control the exact amount of sugar, ensuring your drink is never too sweet or too sour.


    If you love making magical, colorful Sonic drinks at home, you have to try our viral Sonic Unicorn Slush Copycat Recipe next!


    Simple Ingredients You Will Need


    You do not need any fancy bartender equipment to make this bubbly treat. Just grab these simple items from your pantry or local supermarket:

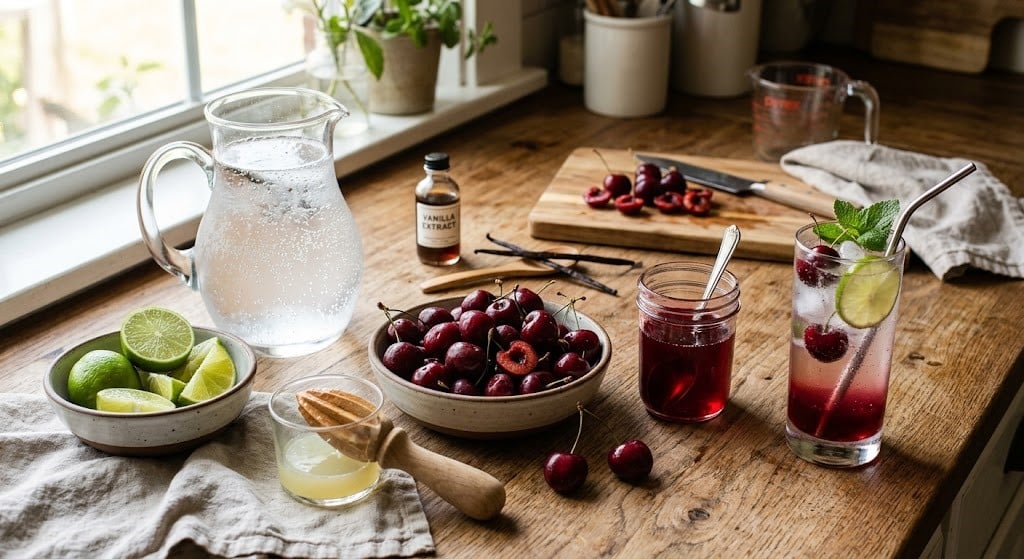
    Ingredients for making a homemade cherry vanilla lime soda.


    Lemon-Lime Soda: 1.5 cups of cold Sprite, 7-Up, or Starry. This provides the crisp, fizzy base.


    Cherry Syrup: 2 tablespoons of high-quality cherry flavoring syrup (Torani or Monin brand works best).


    Vanilla Syrup: 1 tablespoon of classic vanilla coffee syrup. This is the secret ingredient that makes it “twisted.”


    Fresh Lime: 1 wedge of a fresh lime for squeezing, plus an extra slice for garnish.


    Ice: 2 cups of special pebble ice or crushed ice.


    Step-by-Step Instructions: The Perfect Mix


    Mixing a custom soda is all about the order of ingredients. Follow these exact steps to make sure your syrups blend perfectly with the soda without losing all the bubbles.


    Step 1: Prepare the Perfect Ice


    The ice you use actually matters! Sonic is famous for its soft, chewable “pebble ice.” If you do not have a pebble ice maker, simply put regular ice cubes in a zip-top bag and gently smash them with a rolling pin. Fill a tall, clear serving glass completely to the top with this crushed ice.


    Step 2: Add the Flavor Syrups


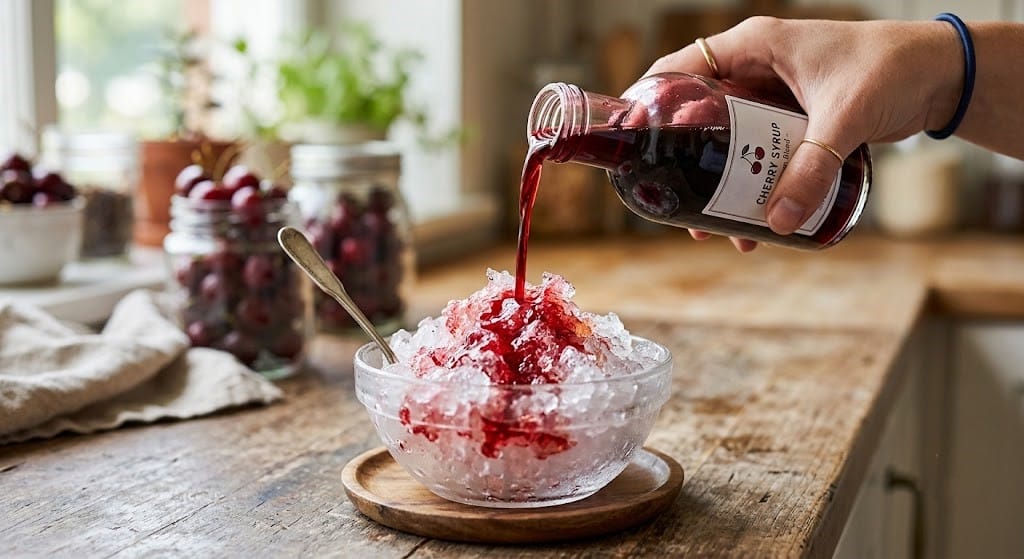
    Pour your 2 tablespoons of cherry syrup and 1 tablespoon of vanilla syrup directly over the crushed ice. Pouring the heavy syrups first helps them distribute evenly when the soda is added later.

    Pouring cherry syrup over crushed ice.


    Step 3: Squeeze the Fresh Lime


    Take your fresh lime wedge and squeeze the sour juice right on top of the syrups. The fresh citrus juice is crucial because it cuts through the heavy sweetness of the cherry and vanilla.


    Step 4: Pour the Fizzy Base


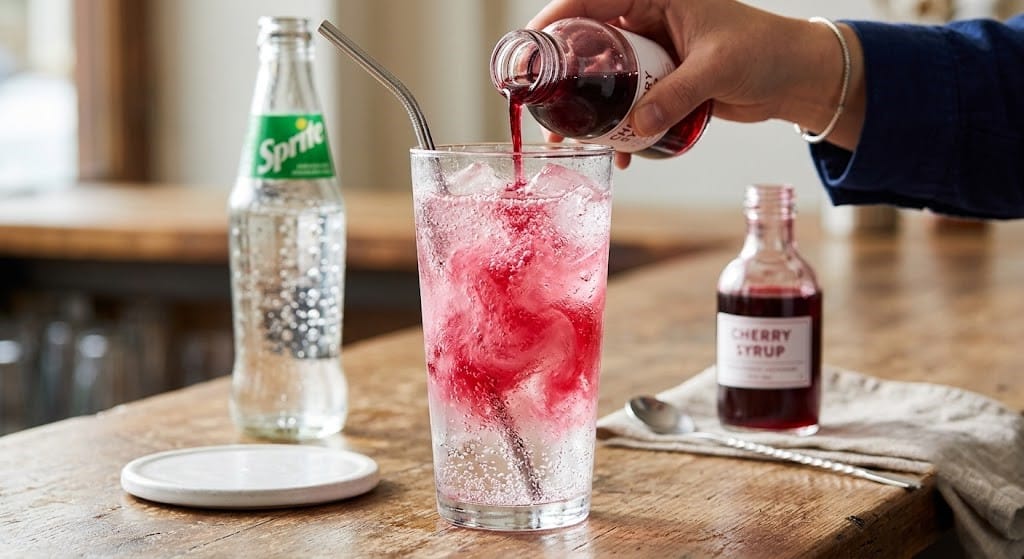
    Take your ice-cold lemon-lime soda and slowly pour it into the glass. Watch as the clear soda hits the red cherry syrup and turns the entire drink into a gorgeous, vibrant pink color!

    Fizzy Sprite mixing with cherry syrup to make pink soda.


    Step 5: The Gentle Stir


    Do not shake the drink! Shaking will instantly destroy all the carbonation. Instead, take a long spoon or a straw and gently stir the drink from the bottom up two or three times. Garnish the rim of your glass with a fresh lime wheel and serve immediately.


    The “Dirty Soda” Upgrade: A 2026 Trending Hack


    If you want to take your Twisted Flamingo to the absolute next level, you need to try the viral “Dirty Soda” trend that is exploding across TikTok and Pinterest right now.


    A dirty soda is a regular flavored soda that has a splash of heavy cream or coconut creamer added to it.

    To upgrade your Twisted Flamingo, simply pour 2 tablespoons of sweet cream or coconut milk over the top of your finished drink right before serving. The rich, white cream slowly swirls down into the bright pink soda, creating a stunning visual effect and a taste that is just like a creamy fruit float!

    Looking for more energy and wild flavor combinations? Check out our ultimate guide to the Best Dutch Bros Rebel Flavors to make at home!


    Troubleshooting Common Soda Mistakes


    If your homemade drink does not taste quite like the fast-food version, check these quick expert fixes:


    Problem: The drink is entirely flat and has no fizz.

    • The Fix: You likely stirred it too aggressively or used warm soda. Always use ice-cold Sprite straight from the fridge, and only stir gently once or twice.


    Problem: It tastes way like cough medicine.

    • The Fix: Cheap cherry syrups can sometimes taste artificial. Always use premium brands like Torani, and make sure you do not skip the fresh lime juice. The lime is what makes it taste like a real fruit drink instead of medicine.


    Conclusion


    You do not need to deal with confusing drive-thru menus to enjoy a premium, refreshing summer beverage. By combining crisp lemon-lime soda, sweet cherry, smooth vanilla, and a hint of fresh lime, you can create the ultimate Sonic Twisted Flamingo right on your kitchen counter. It is bubbly, beautifully pink, and perfectly balanced. Grab your favorite glass, fill it with crushed ice, and mix up this delicious tropical treat today!


    FAQs


    Does the Twisted Flamingo have any caffeine?


    No! Because this recipe uses a lemon-lime soda base like Sprite or 7-Up, it is completely caffeine-free. This makes it a wonderfully safe and fun summer drink for children or for sipping late at night.


    Can I make a sugar-free or diet version of this drink?


    Yes, it is very easy to make this a low-calorie treat. Simply swap the regular soda for Diet Sprite or Zero Sugar Starry. Then, purchase the sugar-free versions of both the Torani cherry and vanilla syrups. It will look and taste identical but with zero guilt!


    How do I order this correctly at the Sonic drive-thru?


    If you are on a road trip and want to buy one at the restaurant, do not just ask for a “Twisted Flamingo.” Instead, clearly tell the speaker: “I would like a large Sprite with cherry syrup, vanilla syrup, and a squeeze of real lime.” They will get it right every single time!

  • The Ultimate Sonic Unicorn Slush Copycat Recipe (Secret Menu Revealed!)

    The Ultimate Sonic Unicorn Slush Copycat Recipe (Secret Menu Revealed!)


    Editor’s Note


    Navigating hidden fast-food menus often feels like a frustrating guessing game. If the drive-thru worker does not know the exact recipe, you end up with a confusing, expensive mess. The viral Sonic Unicorn Slush is one of the most requested secret drinks, famous for its magical pink and blue layers topped with crunchy rainbow candy. However, making it at home usually ends in disaster because the colors mix together into an ugly, muddy purple! At Sip Drafts Lab, we solved this exact problem. We discovered the perfect ice-to-syrup ratio to keep the vibrant neon colors completely separated. Follow our foolproof layering guide to create this stunning, Pinterest-perfect magical treat right in your own kitchen!


    Are you ready to bring a little bit of colorful magic into your day? Your search for the perfect recipe ends right here. Today, we are going to learn how to make the legendary, highly-searched Sonic Unicorn Slush right at home.


    Recently, the colorful “unicorn style” craze has absolutely dominated online food communities. From colorful coffees to sparkly cakes, everyone loves food that looks bright, fun, and totally magical. Sonic Drive-In is already famous for having the best icy slushies in the world. When fans started mixing different neon syrups together, the secret menu Unicorn Slush was born!


    What is the Secret Sonic Unicorn Slush?


    If you are new to the fast-food secret menu world, you might be wondering what exactly goes into a Unicorn Slush.


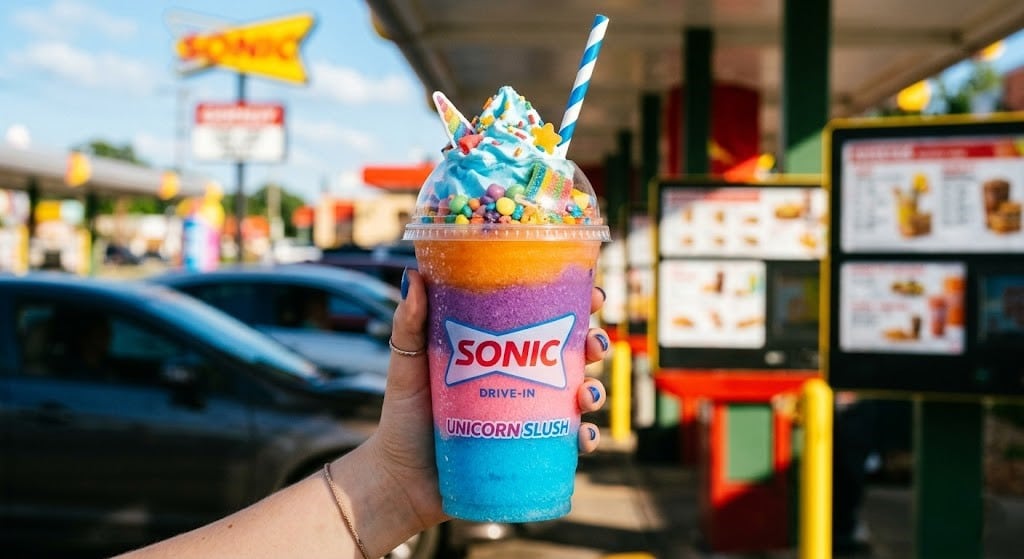
    Because it is not an official menu item, the recipe can change depending on who makes it. However, the most viral, highly-rated version on TikTok features two distinct layers:

    1. A bright neon blue layer made from tart Blue Coconut or Blue Raspberry syrup.
    2. A vibrant pink layer made from sweet Strawberry or Cherry syrup.
    3. A generous topping of crunchy Rainbow Nerds candy that provides an amazing texture contrast to the smooth ice.


    When you sip it, you get a rush of sweet berry flavors, a hint of tropical coconut, and a fun, sour candy crunch. It is the absolute ultimate summer cooling drink!


    The Science of Slush: How to Stop Colors from Mixing


    The biggest problem people face when making this drink at home is that the beautiful pink and blue colors instantly melt together and turn brown or dark purple. This completely ruins the fun unicorn aesthetic!


    The Sip Drafts Lab Pro Trick: The secret to keeping the layers separate is the thickness of the ice. You cannot just pour liquid syrups over regular ice cubes. You must blend the ice and the flavors into a thick, snow-like consistency before putting them in the glass. Thick frozen slush acts like a wall, preventing the two colors from bleeding into each other.


    If you love mixing bright, beautiful colored drinks at home, you absolutely have to check out our complete guide on The Best Dutch Bros Rebel Flavors right now!


    Simple Ingredients to Create the Magic


    You only need a few cheap, easy-to-find ingredients to set up your own magical slushie station at home.

    Ingredients needed for a homemade unicorn slushie.


    Lemon-Lime Soda: 1 cup of cold Sprite or 7-Up. This provides the sweet, fizzy liquid base that makes the slush taste authentic.


    Neon Blue Flavoring: Two tablespoons of either blue raspberry or blue coconut syrup (the Torani brand is an excellent choice). 


    Pink Strawberry Syrup:
    2 tablespoons of pink strawberry or cherry syrup.


    Crushed Ice: 4 cups of clean, fresh ice cubes.


    Rainbow Nerds Candy: 2 tablespoons of colorful Nerds candy for the ultimate magical topping.


    Step-by-Step Instructions: The Layering Masterclass


    Since we are making two different colored layers, we need to do this in two quick batches. Follow these exact steps to get that perfect, Instagram-worthy separation.


    Step 1: Chill Your Glass


    Before you start blending, take a tall, clear glass and put it directly into the freezer. A frosty glass keeps the slush from melting while you build the layers.


    Step 2: Blend the Neon Blue Layer


    In your blender jar, add 2 cups of ice, 1/2 cup of cold Sprite, and the 2 tablespoons of Blue Raspberry syrup. Blend this on high speed for 30 seconds until it looks exactly like smooth, thick blue snow. Pour this blue slush into a bowl and place it in the freezer for a minute while you make the next color.

    Blending bright blue raspberry slush in a blender.


    Step 3: Clean and Blend the Pink Layer


    Rinse your blender pitcher quickly with water so the colors do not mix. Now, add the remaining 2 cups of ice, 1/2 cup of Sprite, and the 2 tablespoons of Pink Strawberry syrup. Blend on high speed until you have a thick pink snow.


    Step 4: Build the Unicorn Layers


    Grab your ice-cold drinking glass from the freezer.  Spoon the blue slush into the bottom half of the glass. Use the back of your spoon to pack it down slightly and make it flat. Next, carefully spoon the pink slush directly on top of the blue layer. Because the slush is thick, the colors will sit beautifully on top of each other!


    Step 5: Add the Candy Crunch


    For the final magical touch, sprinkle a heavy handful of Rainbow Nerds candy all over the top of the pink slush. Serve immediately with a wide straw and a long spoon!

    Sprinkling rainbow candy on a pink and blue slush.


    Trending 2026 Customizations to Try at Home


    The best part about being your own at-home barista is that you can upgrade the recipe using the latest viral internet trends. Here are the most highly searched variations to try next:


    The Cotton Candy Cloud Twist


    Do you want your drink to look even more magical? Before adding the slush, use a spoon to smear a little bit of white marshmallow fluff around the inside walls of your glass. It creates beautiful white “clouds” floating in the colorful sky!


    The Popping Boba Upgrade


    Instead of using hard Nerds candy, drop a scoop of strawberry popping boba into the bottom of the glass before adding the blue slush. When you drink through a wide straw, the boba pearls burst in your mouth with fresh fruit juice.

    Looking for another amazing tropical fruit blend that uses real frozen fruit? Our famous Mango Monsoon Tropical Smoothie Recipe is the perfect healthy treat!


    The Galactic Sour Sparkle


    If you prefer sour flavors over sweet ones, swap the regular Sprite for a sour lemonade. Add a pinch of edible food glitter into the blender while making the layers. Your slush will literally sparkle in the sunlight like a galaxy!


    Conclusion


    You do not need to feel anxious at the drive-thru window or spend a lot of money to enjoy the internet’s most beautiful secret menu drink. By blending your ice and syrups into thick, separated layers, you can easily create the ultimate Sonic Unicorn Slush right in your own kitchen. It is incredibly refreshing, packed with sweet berry flavors, and finished with the perfect candy crunch. Grab your blender, mix up these magical neon colors, and treat yourself to a fast-food favorite today!


    FAQs


    Does the Sonic Unicorn Slush have caffeine in it?


    No! Because this copycat recipe uses caffeine-free lemon-lime soda (like Sprite or 7-Up) and fruit syrups, it is 100% caffeine-free. This makes it a fantastic, safe, and fun summer dessert for kids.


    Can I make a sugar-free version of this slush?


    Absolutely! You can easily make this a zero-sugar treat. Simply use Diet Sprite or Zero Sugar 7-Up as your liquid base, and purchase sugar-free versions of the blue raspberry and strawberry syrups. You can skip the Nerds candy or top it with fresh berries instead!

  • The Ultimate Sonic Unicorn Drink Recipe (Secret Menu Rainbow Slush!)

    The Ultimate Sonic Unicorn Drink Recipe (Secret Menu Rainbow Slush!)


    Editor’s Note


    Walking into Sonic Drive-In and trying to order a secret menu item can be intimidating, especially when the barista has no idea what you are talking about! The famous “Unicorn Drink” went viral on TikTok, but because it is not on the official menu, getting it right is a gamble. We bought dozens of different syrups and tested different slush bases all week in our kitchen. We finally cracked the exact layering code! By using a clear lemon-lime base and carefully layering bright cherry, blue coconut, and vanilla, you can create that stunning, magical rainbow effect at home. Follow this detailed guide to get the perfect icy treat without ever leaving your house!


    Are you ready to add a little bit of magic to your summer beverage lineup? You have definitely landed in the perfect place today. We are going to learn exactly how to make the viral, internet-famous Sonic Unicorn Drink right in your own kitchen.


    When this bright, multi-colored beverage first exploded across social media, people were driving miles to their nearest Sonic just to take a picture of it. It looks like a beautiful, sweet rainbow in a cup, making it the ultimate photogenic treat for kids and adults alike.

    The amazing news is that you do not need to spend five dollars on a single cup or memorize complicated drive-thru instructions. With some crushed ice, a lemon-lime soda, and a few basic fruit syrups, you can whip up this stunning masterpiece at home in just three minutes. Let us dive into this colorful masterclass!


    What Exactly is the Sonic Unicorn Drink?


    If you have never seen this drink before, you might be wondering what flavors actually make up a “unicorn.”

    Unlike the heavy, creamy Starbucks Frappuccinos, the Sonic version is incredibly light, fruity, and deeply refreshing. It is a custom “Slush” or iced drink made by combining a clear soda base (usually Sprite or 7-Up) with three very distinct, brightly colored flavor shots.

    The traditional viral recipe uses a base of sweet vanilla syrup, bright blue coconut syrup, and vibrant red cherry syrup. When these colors are poured over pebble ice, they slowly bleed together to create beautiful layers of pink, purple, and neon blue.

    If you love making bright, neon-colored energy drinks at home to save money, you absolutely must read our complete Dutch Bros Rebel Flavors Guide!


    Why You Should Make the Unicorn Slush at Home


    There are several huge benefits to becoming your own barista and mixing this fun beverage on your own kitchen counter:


    You Control the Sugar: Fast-food drinks are packed with an unbelievable amount of liquid sugar. When you make it yourself, you can use sugar-free soda and sugar-free syrups.


    Save Your Money: Buying a custom large slush with three extra syrup pumps can cost over six dollars at the drive-thru. Making it at home costs less than fifty cents per cup!


    No Disappointments: There is nothing worse than ordering a secret menu drink and getting handed a muddy, brown, over-mixed liquid. You can control the beautiful layers perfectly at home.


    Simple Ingredients You Will Need


    To build your own magical rainbow drink, you only need four simple grocery store items. You can find these easily in the beverage aisle.

    Ingredients needed for a secret menu unicorn slush.


    Lemon-Lime Soda Base: 1 cold can of Sprite, 7-Up, or any clear citrus soda. (You can also use sparkling water if you want a lighter, less sweet drink).


    Sonic’s Signature Ice: 2 cups of crushed “pebble” ice. Small ice is crucial for holding the colors in place.


    Blue Coconut Syrup: 1 tablespoon of Torani or Monin Blue Coconut syrup.


    Cherry Syrup: 1 tablespoon of bright red cherry syrup (Grenadine works perfectly too).


    Vanilla Syrup: 1/2 tablespoon of classic vanilla coffee syrup to give it that famous ice-cream-like finish.


    Step-by-Step Instructions: The Magical Layering Method


    The secret to a beautiful Unicorn drink is all in the pouring technique. If you dump everything in at once, the colors will mix into a dark gray mess. Follow these exact layering steps!


    Step 1: Prepare the Pebble Ice


    Take a large, clear 16-ounce glass. It must be clear so you can see the colors! Fill the glass entirely to the brim with your crushed pebble ice.


    Step 2: Create the Vanilla Soda Base


    In a separate small measuring cup, mix your cold clear lemon-lime soda with the 1/2 tablespoon of vanilla syrup. Pour this sweet vanilla soda over the ice until the glass is about three-quarters of the way full.


    Step 3: Add the Blue Coconut Layer


    Now, take your 1 tablespoon of bright Blue Coconut syrup. Slowly and gently drizzle it directly over the ice on one side of the glass. Because it is heavy, it will slowly sink down and color the bottom half of the drink neon blue.

    Pouring blue coconut syrup over crushed ice.


    Step 4: Add the Red Cherry Layer


    Take your 1 tablespoon of red cherry syrup. Slowly pour it over the ice on the opposite side of the glass. As the red syrup hits the blue syrup in the middle, it will create a stunning magical purple stripe!


    Step 5: Garnish and Serve


    Do not stir the drink! Let the beautiful layers sit exactly as they are. Add a couple of colorful gummy candies on top or a bright curly straw. Serve it immediately and let the drinker mix it up with their straw as they sip.

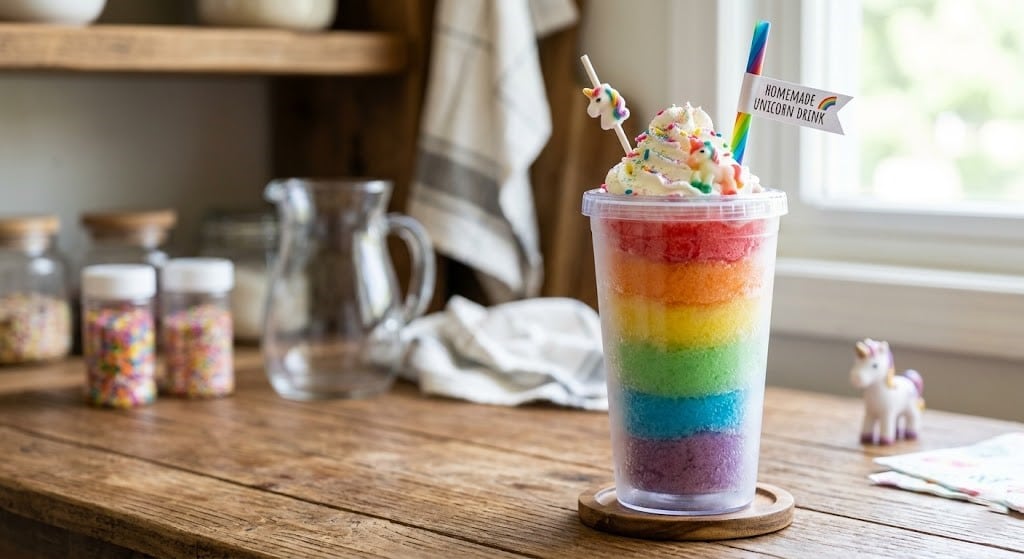
    Beautifully layered unicorn slushie drink in hand.


    How to Get the Perfect “Sonic Style” Ice at Home


    Every fast-food fan knows that Sonic is famous for one specific thing: their “Good Ice.” Also known as nugget ice or pebble ice, it is soft, chewable, and holds onto fruit syrups perfectly.


    If you do not own a fancy two-hundred-dollar nugget ice machine, do not panic! You can make it easily. Take regular ice cubes, put them in a thick plastic zip-top bag, wrap the bag in a kitchen towel, and gently smash them with a wooden rolling pin. Stop hitting them when the ice turns into small, uniform, chewable pebbles.

    Want another incredibly fun, thick, and satisfying homemade treat? You have to try blending up our famous Mango Monsoon Tropical Smoothie this weekend!


    Trending Customizations to Try Today


    The beauty of a secret menu drink is that you can always invent new variations. Here are the top highly-searched upgrades you can make to your Unicorn Slush:


    The Creamy Unicorn Float


    This is a massive trend on TikTok right now. Instead of filling the glass to the very top with soda, leave some room. Drop a large scoop of premium vanilla bean ice cream right on top of the rainbow ice. It melts into the fruit syrups and tastes exactly like a melted popsicle!


    The Sugar-Free Magic Slush


    If you are on a low-carb or keto diet, you can still enjoy the magic. Swap the regular Sprite for a Zero-Sugar Sprite or plain lime sparkling water. Use Torani’s line of Sugar-Free Blue Raspberry and Sugar-Free Cherry syrups. You get all the fun colors with absolutely zero guilt!


    The Sour Patch Twist


    Kids absolutely love this variation. Add a tiny squeeze of fresh sour lemon juice to the clear soda base before pouring. Then, top the final drink with a handful of sour gummy candies. The extreme sour flavor balances out the heavy vanilla sweetness perfectly.


    Conclusion


    You do not need to hunt down a barista who knows the secret menu to enjoy the internet’s favorite colorful beverage. By using crushed pebble ice, a clear citrus soda, and carefully pouring your blue and red syrups, you can create a masterpiece right at home. The homemade Sonic Unicorn Drink is cheap, gorgeous, completely customizable, and tastes like an absolute dream. Grab your glasses, smash some ice, and bring a little bit of magic to your afternoon today!


    FAQs


    Does the Sonic Unicorn Drink have any caffeine in it?


    No, the classic version of this drink is 100% caffeine-free! Because the base is made with Sprite or 7-Up, which do not contain caffeine, it is a completely safe and fun beverage to serve to young kids in the afternoon.


    Can I blend this drink in a blender instead of using crushed ice?


    Yes, absolutely! If you want a true “Slush” texture instead of an iced drink, simply put the ice, soda, and vanilla syrup in a blender and pulse it until smooth. Pour the white slush into a cup, and then slowly drizzle the blue and red syrups over the top so they bleed down the sides.


    Where can I buy Blue Coconut syrup?


    You can easily find large bottles of Blue Coconut or Blue Raspberry syrup in the coffee and tea aisle of most major grocery stores. If you cannot find it locally, you can order brands like Torani or Monin directly online for very cheap.

  • The Best Copycat Tropical Smoothie Cafe Mango Monsoon Recipe (Secret Menu Guide!) 

    The Best Copycat Tropical Smoothie Cafe Mango Monsoon Recipe (Secret Menu Guide!) 


    Editor’s Note


    At Sip Drafts Lab, we know how frustrating it is when your favorite cafe drink gets removed from the main menu or changes its recipe. The Mango Monsoon from Tropical Smoothie Cafe was a legendary crowd favorite, mixing sweet mango with tropical passion fruit. Most online recipes tell you to just use regular orange juice, but that completely ruins the authentic taste! We spent the week blending different batches to crack the code. We discovered that combining frozen mangoes with a specific guava-passion fruit nectar and a touch of raw turbinado sugar creates the exact thick, tropical explosion you get at the drive-thru. Here is our tested, foolproof guide to making it at home in under five minutes.


    The best part about making this recipe at home is that you can control exactly what goes into your body. No artificial syrups, no mystery chemical preservatives, and no paying five to seven dollars at the counter. With a few simple grocery store ingredients, you can whip up a large, restaurant-quality smoothie that tastes identical to the real thing. Let us jump straight into the details!


    Is the Mango Monsoon Still on the Tropical Smoothie Menu?


    This is one of the highest-searched questions on Google regarding this drink. Millions of customers drive up to the window every day hoping to order it.


    To put it simply, its availability changes based on where you live. The Mango Monsoon has been moved to the “Seasonal” or “Secret Menu” in many locations across the country. Because cafes constantly change their menu to introduce new holiday flavors or limited-edition items, classic fruit blends sometimes get put on the back burner.

    But you do not have to drive around town searching for a cafe that still makes it. By learning this simple copycat recipe, you can bring the secret menu straight to your kitchen counter whenever the craving hits.


    The Hidden Technique: Why Liquids Belong at the Bottom. 


    Before we talk about the ingredients, we need to discuss the physics of your blender. This is a common problem that trips up almost every beginner smoothie maker.


    The Golden Rule of Blending: Always pour your liquid base into the blender pitcher before adding your heavy, frozen fruits.


    When you put the liquids at the bottom, it creates a fast whirlpool effect around the metal blades. This pulls the heavy, frozen chunks down smoothly without getting the machine stuck. If you put the frozen fruit in first, your blades will just spin in empty air, overheat the motor, and melt your ice cream or fruit into a watery soup.


    If you love thick, blended café drinks but want something richer and more chocolatey for the weekend, you have to try our viral Viral Dubai Chocolate Milkshake Recipe right now!


    Simple Ingredients for the Perfect Tropical Blend


    To get that authentic, velvety texture and bright tropical punch, you need five basic ingredients. You can find all of these easily at your local supermarket.

    Ingredients gathered for a homemade mango monsoon smoothie.


    Frozen Mango Chunks: 1 and 1/2 cups of frozen mangoes. Using frozen fruit instead of fresh fruit is the secret to making the smoothie thick and icy without watering it down with extra ice cubes.


    Passion Fruit or Guava Nectar: 1/2 cup of tropical nectar. Brand names like Goya work perfectly here. It introduces a special, tropical twist that elevates it beyond ordinary mango drinks. 


    Pineapple Chunks: 1/2 cup of frozen or fresh pineapple chunks to add a beautiful, bright tartness.


    Turbinado Sugar: 1 tablespoon of raw turbinado sugar. Tropical Smoothie Cafe uses this coarse, unrefined brown sugar to sweeten their drinks. It gives a deep, rich sweetness that regular white sugar cannot match.


    Non-Fat Vanilla Yogurt: 1/4 cup of thick vanilla yogurt. This helps emulsify the fruit and gives the smoothie a smooth, velvety finish.


    Step-by-Step Instructions: The Perfect Vortex Blend


    Achieving that signature commercial smoothie consistency requires the right blending method. Use this straightforward method for a perfect outcome. 


    Step 1: Prep Your Blender Jar


    Check that your blender jar is fully clean and completely moisture-free. Take your serving glass and place it in the freezer right now so it stays frosty cold when you pour the drink inside.


    Step 2: Add the Liquid Base and Sweetener


    Pour your 1/2 cup of passion fruit or guava nectar into the bottom of the blender. Add the 1/4 cup of vanilla yogurt and your 1 tablespoon of raw turbinado sugar directly into the liquid.


    Step 3: Layer the Frozen Fruits


    Carefully drop your 1 and 1/2 cups of frozen mango chunks and 1/2 cup of pineapple chunks on top of the liquid layer. Do not add any extra ice yet!

    Layering liquids before fruit inside a blender pitcher.


    Step 4: High-Speed Vortex Blending


    Secure the lid tightly on your blender. Start the machine on low speed for 10 seconds to break up the large chunks, then flip it to maximum high speed for 30 to 45 seconds. You should see a thick swirl forming in the center of the jar.


    Step 5: Adjust and Pour


    Stop the blender and check the thickness with a spoon. If it is too thick to move, add 1 extra tablespoon of nectar. If it is too thin, toss in 2 or 3 ice cubes and blend for another 10 seconds. Pour the vibrant yellow smoothie into your chilled glass and enjoy!


    How to Get That Famous Thick Cafe Texture


    Have you ever made a smoothie at home only for it to separate into a layer of water at the bottom and foam at the top after five minutes? Here is how professional cafes solve that issue:


    Skip the Ice Cubes: Ice cubes are made of water. As they blend, they turn into tiny shards that melt rapidly, leaving you with a watery mess. Rely on frozen fruits to provide 90% of the cold texture.


    Use a High-Power Blender: Cheap, low-wattage blenders cannot crush frozen fruit fast enough. The friction from long blending times creates heat, which melts the fruit. Blend on maximum speed for a short amount of time.


    The Power of Yogurt: The proteins in the vanilla yogurt act as a natural binder. They hold the fruit pulp and liquids together so they never separate in your glass.


    Trending Healthy Boosts to Try Today


    The absolute best part of being your own barista is customizing the recipe to fit your personal health goals. Here are three highly searched health modifications you can add to the blender:

    Green, high-protein, and classic mango smoothie variations.


    The High-Protein Fitness Boost


    If you are drinking this as a post-workout recovery meal, add 1 scoop of unflavored or vanilla whey protein powder into Step 2. This adds around 20 to 25 grams of clean protein without changing the beautiful tropical flavor profile.


    The Green Monsoon Detox


    Want to sneaky-pack some vitamins into your diet? Throw a large handful of fresh baby spinach or kale into the blender. The smoothie will turn a bright green color, but the powerful sweetness of the mango will completely hide the taste of the vegetables!


    The Low-Sugar Weight Loss Swap


    If you are watching your sugar intake, completely remove the turbinado sugar. Replace it with a single packet of monk fruit sweetener or a teaspoon of raw honey. You can also swap the vanilla yogurt for plain, unsweetened Greek yogurt to cut down on extra calories.

    If you are looking for another quick, easy, and satisfying dessert copycat to treat your kids after school, don’t miss our highly rated Homemade S’mores McFlurry Recipe Guide!


    Conclusion


    You don’t need to drive out to the commercial strip or wait for a seasonal menu change to enjoy a world-class tropical treat. By understanding the physics of layering your liquids first, using frozen mangoes, and adding a touch of real tropical nectar, you can blend up a perfect Mango Monsoon copycat right at home. It is thick, healthy, affordable, and incredibly delicious. Pull out your blender, toss in your tropical ingredients, and enjoy an instant taste of paradise today!


    FAQs


    Can I use fresh mangoes instead of frozen ones?


    Yes, you can use fresh mangoes, but you will need to add about 1 full cup of solid ice cubes to the blender to get the cold, thick texture. Please keep in mind that adding ice will make the final flavor a bit more watered down compared to using frozen fruit.


    What can I use if I cannot find passion fruit or guava nectar?


    If your local grocery store does not carry tropical nectars in the international aisle, the best everyday substitute is a high-quality peach nectar or a 100% tropical fruit juice blend. Avoid using heavy orange juice, as the strong citrus flavor will completely overpower the delicate mango.


    How long does this smoothie stay fresh in the fridge?


    Smoothies are always best enjoyed immediately after blending. If you have leftovers, you can store them in a closed mason jar in the fridge for up to 12 hours. However, it will lose its icy texture and become completely liquid, so give it a quick stir or a 5-second re-blend with an ice cube before drinking.

  • The Ultimate Homemade S’mores McFlurry Recipe (No Ice Cream Machine Needed!)

    The Ultimate Homemade S’mores McFlurry Recipe (No Ice Cream Machine Needed!)


    Editor’s Note


    When McDonald’s first released the S’mores McFlurry, it instantly became the ultimate summer dessert. However, recreating it at home is tricky. Most people just throw dry marshmallows into ice cream, which turn into hard, freezing rocks that hurt your teeth! We spent the whole weekend testing different methods. We found that using a mix of toasted marshmallow syrup and crushed graham crackers creates the exact creamy, campfire flavor without the hard chunks. Follow our exact guide to get a perfectly blended, soft-serve dessert in just five minutes.

    The Ultimate Homemade S’mores McFlurry Recipe (No Ice Cream Machine Needed!)


    Do you love the taste of a warm campfire treat but also crave freezing cold ice cream? You have come to the perfect place. Today, we are going to learn how to make the famous McDonald’s S’mores McFlurry right in your own kitchen.


    When this amazing dessert hit the fast-food menu, it sold out everywhere. People loved the mix of creamy vanilla, crunchy graham crackers, and rich chocolate. Sadly, it was only a limited-time item, and fans have been begging for its return ever since.


    The good news is that you do not have to wait for McDonald’s to bring it back. You also do not need an expensive commercial ice cream machine to make it. With a few simple ingredients and a clever mixing trick, you can enjoy this thick, sweet treat anytime you want. Let us get started!


    Why Did McDonald’s Discontinue the S’mores McFlurry?


    If this dessert was so popular, why did it leave the menu? This is one of the most highly searched questions on Google.

    McDonald’s often creates special seasonal items to keep their menu exciting. The S’mores flavor was designed as a “Summer Only” promotion. The ingredients, like special chocolate chunks and marshmallow syrup, took up extra space in the kitchen.

    When summer ended, they removed it to make room for fall and winter flavors. But because it is so easy to make at home, you can easily enjoy this summer classic all year long!


    Simple Ingredients You Need for This Campfire Treat


    You only need five basic ingredients to recreate this masterpiece. You probably already have most of these in your pantry right now!

    Ingredients for a homemade S'mores McFlurry.


    Vanilla Ice Cream: 2 big scoops of high-quality vanilla ice cream. Let it sit on the counter for 5 minutes so it gets a little bit soft.

    Graham Crackers: 1 full sheet of honey graham crackers. This gives the McFlurry its signature pie-crust crunch.

    Chocolate Chunks: 2 tablespoons of semi-sweet chocolate chunks or mini chocolate chips.

    Marshmallow Fluff (The Secret Ingredient!): 1 big tablespoon of marshmallow creme (fluff). Do not use regular mini marshmallows, because they will freeze hard as rocks in the cold ice cream!

    Whole Milk: Just 1 tablespoon of cold milk to help everything blend smoothly.

     If you are serving this dessert at a party and need a great cold drink to go with it, check out our amazing Dunkin Frozen Hot Chocolate Copycat Recipe!


    Step-by-Step Instructions: How to Make a S’mores McFlurry


    Making a McFlurry at home is all about the mixing technique. You want it to be thick enough to eat with a spoon, not thin like a milkshake. Follow these exact steps for the best texture.


    Step 1: Crush the Graham Crackers


    Put your graham cracker sheet into a small plastic zip-top bag. Use a rolling pin or the bottom of a heavy cup to smash the cracker. You want small, crunchy pieces, not fine dust.


    Step 2: Soften the Ice Cream


    Put your 2 big scoops of vanilla ice cream into a large metal or glass mixing bowl. Add your 1 tablespoon of cold milk. Use a strong metal spoon to mash and stir the ice cream until it looks like a thick, smooth soft-serve.


    Step 3: Add the S’mores Flavors


    Now, add your crushed graham crackers, chocolate chunks, and the sticky marshmallow fluff right on top of the soft ice cream.


    Step 4: The Fold and Swirl Technique


    Do not use a blender! A blender will turn your dessert into soup. Instead, use your spoon to gently fold the ingredients into the ice cream. Swirl it around 5 or 6 times so there are thick ribbons of marshmallow and chocolate in every single bite.


    Step 5: Freeze and Serve


    Spoon your thick mixture into a tall cup. If it got a little too soft while mixing, put the cup in the freezer for exactly 5 minutes to firm up. Serve it immediately with a long spoon!


    Pro Tips for the Perfect McFlurry Texture


    Many homemade desserts melt way too fast. Here is how you can solve common ice cream problems like a pro:


    Chill Your Bowl: Before you start making your dessert, put your empty mixing bowl and your serving cup into the freezer for 15 minutes. A freezing cold bowl stops the ice cream from melting while you stir in the toppings.


    Toasted Flavor Trick: If you want an authentic campfire flavor, use a kitchen torch to carefully toast the marshmallow fluff on a piece of foil for 10 seconds before adding it to your ice cream.


    Avoid Over-mixing: The more you stir, the thinner the ice cream gets. Only stir until the toppings are just mixed in.


    Trending Customizations to Try Today


    The best part about being your own fast-food chef is that you can upgrade the recipe. Here are three highly searched variations to try next:

    Peanut butter and double chocolate S'mores McFlurry variations.


    The Peanut Butter S’mores Swirl


    Peanut butter and chocolate are a perfect match. Drizzle one tablespoon of warm, melted peanut butter over the top of your finished dessert. It adds an amazing salty and savory flavor that cuts through the sweet sugar.


    The Double Chocolate S’mores


    If you are a serious chocoholic, swap the vanilla ice cream for rich chocolate ice cream. Add a squirt of hot fudge syrup instead of regular chocolate chunks for a deeply rich, brownie-like experience.


    The Caramel Sea Salt Crunch


    Pour a thick ribbon of sticky caramel sauce inside the serving cup before you spoon the ice cream in. Add a tiny pinch of coarse sea salt on top for a fancy, gourmet coffeehouse vibe.

    Looking for a weird, savory, and sour drink to balance out all this sweetness? You have to try our viral Sonic Pickle Slush Copycat Recipe!


    Conclusion


    You do not need to wait for a special summer menu to enjoy the ultimate campfire dessert. By using soft vanilla ice cream, crunchy graham crackers, and sticky marshmallow fluff, you can whip up a perfect S’mores McFlurry right at home. It is thick, creamy, and completely packed with chocolatey goodness. Grab your spoon, mix up this easy treat, and enjoy a delicious fast-food favorite today!


    FAQs


    Can I use a blender to make a McFlurry?


    We highly recommend not using a blender. Blenders spin too fast and generate heat, which turns the ice cream into a thin, watery milkshake. The secret to a McFlurry is using a spoon to hand-mix the ingredients so it stays thick.


    What kind of vanilla ice cream is best?


    For the most authentic fast-food taste, buy a tub of “Vanilla Bean” or “French Vanilla” ice cream. Look for a brand that is very creamy and high in fat. Cheap, icy ice creams will not mix well with the marshmallow fluff.


    Can I save my leftover McFlurry in the freezer?


    Yes! If you cannot finish your dessert, cover the top of your cup tightly with plastic wrap and place it in the freezer. When you are ready to eat it again, let it sit on the kitchen counter for 10 minutes to soften up before eating.