Blog

  • The Ultimate Pineapple Dragonfruit Lemonade Recipe (Step-by-Step Guide)

    The Ultimate Pineapple Dragonfruit Lemonade Recipe (Step-by-Step Guide)


    Editor’s Note


    We spent weeks testing this recipe in our kitchen. We tried different types of sugar, different blending methods, and tested it on our family and friends. We found the exact mix to fix the biggest problem people have: drinks that are too sour or too sweet. If you follow this guide, you will make a cafe-quality drink at home for a fraction of the cost.


    Say Goodbye to Boring Summer Drinks


    Do you ever get tired of drinking plain water on a hot day? Or maybe you are spending too much money buying fancy fruit drinks at the coffee shop?


    You are not alone. Many people struggle to find a drink that is refreshing, healthy, and easy to make at home.


    That is the problem we are solving today. This tropical drink is the exact solution you need. It is bright, fruity, and looks amazing. Best of all, you know exactly what goes into it!


    What is Pineapple Dragonfruit Lemonade?


    This drink is exactly what it sounds like. It is a beautiful mix of three amazing fruits.


    First, you have classic lemonade. It gives that nice, sour kick. Then, you add sweet pineapple juice. Finally, you mix in dragonfruit (also known as pitaya).


    The dragonfruit gives the drink a magic touch. It turns the liquid into a stunning, bright pink color. Every sip feels like you are sitting on a sunny beach! 


    Why This Recipe Works Perfectly


    You might be asking, “Why is this the best recipe?” It all comes down to balance.


    The Perfect Sweet and Sour Mix: The sour lemons balance the super sweet pineapple.


    No Weird Chemicals: Store-bought drinks have fake colors. We use real pink dragonfruit for natural color.


    Budget-Friendly: Buying the fruits once will make enough drinks for a whole week.

    Total Control: You control the sugar. You have the power to turn this into a super nutritious drink. 


    The Tools You Will Need


    You do not need fancy chef tools.Most of these simple items are already sitting in your house: 


    A Blender: To make the dragonfruit smooth.

    A Citrus Squeezer: To get all the juice from your lemons.

    A Fine Mesh Strainer: If you want to remove the tiny fruit seeds.

    A Large Pitcher: To hold all your yummy lemonade.

    A Long Spoon: For mixing it all together.


    Deep Dive: The Ingredients

    Raw ingredients for making dragonfruit lemonade.


    Let us look closely at what you need to buy. Getting the right ingredients is the secret to success.


    The Lemons


    You need 1 cup of fresh lemon juice. This usually takes about 5 to 6 medium lemons. Always buy lemons that feel heavy. Heavy lemons have the most juice inside.


    The Pineapple


    You need 2 cups of pineapple juice. You can buy 100% pure pineapple juice in a can or bottle. If you have extra time, you can blend fresh pineapple chunks until they are liquid.


    The Dragonfruit (The Most Important Part!)


    You need 1 cup of diced dragonfruit. 


    Important Note: Make sure to choose the fruit with bright pink flesh inside.If you buy white dragonfruit, your drink will not turn pink! You can buy it fresh in the produce aisle, or frozen in bags.


    The Sweetener


    You need about 1/2 cup to 1 cup of sweetener. We love using simple syrup (sugar melted in water) because it mixes easily. But you can use honey, maple syrup, or stevia.


    Water and Ice


    You need 4 cups of clean, cold water. And of course, lots of ice to keep the drink freezing cold.


    The Creamy Coconut Cloud Layer


    Instead of mixing everything together, pour your sweet pineapple dragonfruit lemonade into the glass first. In a separate small jar, take 3 tablespoons of full-fat coconut milk and a teaspoon of vanilla syrup. Froth it with a handheld milk foamer for 15 seconds until it turns into a thick, velvety white foam. Gently pour this coconut foam over the top of your pink drink. It creates a stunning pink-and-white layered effect that looks like a luxury $8 boutique beverage!

    Viral layered coconut milk cloud dragonfruit lemonade.


    How to Pick the Best Fresh Fruits


    If you are buying fresh fruit, here is how to pick the best ones at the store:


    For Lemons: Give them a gentle squeeze. They should give a little bit. If they are rock hard, they will not have much juice.


    For Dragonfruit: Look for bright pink skin. The leaves on the outside should be green, not dry and brown.


    Step-by-Step Instructions (The Foolproof Method)


    Follow these easy steps. Do not skip any! This is how we get the perfect flavor every time.


    Step 1: Prep the Dragonfruit Puree


    Put your 1 cup of dragonfruit into your blender. Add 1/2 cup of water. Run your blender at full speed for about half a minute. It should look like a bright pink smoothie.

    Pro-Tip: Pour this puree through your strainer into a bowl. This catches the little black seeds. You can leave the seeds in if you like how they look!


    Step 2: Extract the Lemon Juice


    Before cutting your lemons, roll them on the table with your hand. Press down firmly. This breaks the insides and gives you way more juice. Cut them and squeeze until you have 1 full cup of juice.


    Step 3: Mix the Base Flavors


    Take your large pitcher. Pour in 1 cup of fresh lemon juice. Next, pour in the 2 cups of sweet pineapple juice. Finally, add your bright pink dragonfruit puree. Stir it with a long spoon.

    Mixing pink dragonfruit and pineapple juice in pitcher.


    Step 4: Add Water and Sweeten


    Pour your 4 cups of cold water into the pitcher. Now, slowly add your sweetener. Add a little bit, stir it, and taste it. Keep adding until it is perfect for you. Everyone likes different levels of sweetness!


    Step 5: Chill and Serve


    Put the pitcher in the fridge for at least 30 minutes. When you are ready, fill glasses to the very top with ice. Empty the chilled mixture into your glasses filled with ice cubes. 


    10 Fun Variations to Try at Home

    Different types of tropical summer mocktails.


    Want to mix things up? Try these amazing ideas. This is how you make the recipe your own!


    The Fizzy Sparkler


    Swap the 4 cups of flat water for sparkling water or Sprite. This step adds lots of exciting bubbles to your beverage. 


    The Tropical Slushie


    Put all the ingredients into a blender with 3 cups of ice. Keep blending the mixture until it turns into a dense, frozen treat. Kids love this!


    The Coconut Twist


    Take out one cup of regular water and pour in one cup of fresh coconut water instead. It adds a great beachy flavor.


    The Minty Refresher


    Add 10 fresh mint leaves to the pitcher. Let it sit in the fridge. It tastes incredibly fresh.


    The Spicy Lemonade


    Add a few thin slices of jalapeno pepper to your glass. It sounds crazy, but the sweet and spicy mix is amazing!


    The Berry Blast


    Blend a handful of strawberries with your dragonfruit. It adds more fruit flavor and keeps the red color.


    The Adult Party Drink


    Add one shot of vodka or white rum to your glass before adding the lemonade. Perfect for summer BBQs.


    The Tea Mix (Arnold Palmer Style)


    Mix half lemonade and half cold black tea in your glass.


    The Super Healthy Version


    Use zero sugar. Sweeten the whole pitcher with a few drops of liquid Stevia instead.


    The Fancy Garnish


    Make it look like a restaurant drink. Cut a star shape out of a pineapple slice and put it on the edge of the glass.


    How to Store Leftovers Safely


    If you do not drink it all, do not throw it away!


    Keep the pitcher in the refrigerator. Put a lid on it, or cover the top tightly with plastic wrap. This stops it from smelling like other food in the fridge.


    It will stay fresh for up to 4 days. Before you pour a new glass, stir it very well. The fruit juices will naturally sink to the bottom overnight.


    Can I Make This Ahead of Time?


    Yes! If you are having a party tomorrow, you can do the hard work today.


    Squeeze the lemons and blend the dragonfruit the day before. Keep them in separate jars in the fridge. When your guests arrive, just mix everything in the pitcher with water and ice. It only takes one minute!


    Fixing Common Mistakes


    Did something go wrong? Do not panic. Here is how to fix it:


    Problem: It is too sour!

    Solution: You need more balance. Add 2 extra tablespoons of sugar or honey and stir well.


    Problem: It is too sweet!

    Solution: Squeeze half a fresh lemon directly into the pitcher. You can also add half a cup of extra water.


    Problem: The color is yellow, not pink!

    Solution: You accidentally bought white dragonfruit. The taste is still great! Next time, check the label carefully for “Pink” or “Red” dragonfruit.


    FAQs


    What does dragonfruit actually taste like?

    It is very mild. Many food lovers describe its flavor as a sweet mix of kiwi and soft pear. It is not overly sweet or sour.


    Can I use bottled lemon juice?

    You can, but we do not recommend it. Bottled juice often has a bitter, chemical aftertaste. Fresh lemons make a huge difference!


    Is this recipe healthy?

    Yes! It is packed with Vitamin C from the lemons and pineapple. Dragonfruit is full of antioxidants. To make it even healthier, use a natural sugar substitute.


    Where can I buy pink dragonfruit?

    Most big grocery stores sell it in the frozen fruit section. Asian supermarkets almost always have it fresh in the produce section.

  • The Best Copycat Tropical Smoothie Cafe Mango Monsoon Recipe (Secret Menu Guide!) 

    The Best Copycat Tropical Smoothie Cafe Mango Monsoon Recipe (Secret Menu Guide!) 


    Editor’s Note


    At Sip Drafts Lab, we know how frustrating it is when your favorite cafe drink gets removed from the main menu or changes its recipe. The Mango Monsoon from Tropical Smoothie Cafe was a legendary crowd favorite, mixing sweet mango with tropical passion fruit. Most online recipes tell you to just use regular orange juice, but that completely ruins the authentic taste! We spent the week blending different batches to crack the code. We discovered that combining frozen mangoes with a specific guava-passion fruit nectar and a touch of raw turbinado sugar creates the exact thick, tropical explosion you get at the drive-thru. Here is our tested, foolproof guide to making it at home in under five minutes.


    The best part about making this recipe at home is that you can control exactly what goes into your body. No artificial syrups, no mystery chemical preservatives, and no paying five to seven dollars at the counter. With a few simple grocery store ingredients, you can whip up a large, restaurant-quality smoothie that tastes identical to the real thing. Let us jump straight into the details!


    Is the Mango Monsoon Still on the Tropical Smoothie Menu?


    This is one of the highest-searched questions on Google regarding this drink. Millions of customers drive up to the window every day hoping to order it.


    To put it simply, its availability changes based on where you live. The Mango Monsoon has been moved to the “Seasonal” or “Secret Menu” in many locations across the country. Because cafes constantly change their menu to introduce new holiday flavors or limited-edition items, classic fruit blends sometimes get put on the back burner.

    But you do not have to drive around town searching for a cafe that still makes it. By learning this simple copycat recipe, you can bring the secret menu straight to your kitchen counter whenever the craving hits.


    The Hidden Technique: Why Liquids Belong at the Bottom. 


    Before we talk about the ingredients, we need to discuss the physics of your blender. This is a common problem that trips up almost every beginner smoothie maker.


    The Golden Rule of Blending: Always pour your liquid base into the blender pitcher before adding your heavy, frozen fruits.


    When you put the liquids at the bottom, it creates a fast whirlpool effect around the metal blades. This pulls the heavy, frozen chunks down smoothly without getting the machine stuck. If you put the frozen fruit in first, your blades will just spin in empty air, overheat the motor, and melt your ice cream or fruit into a watery soup.


    If you love thick, blended café drinks but want something richer and more chocolatey for the weekend, you have to try our viral Viral Dubai Chocolate Milkshake Recipe right now!


    Simple Ingredients for the Perfect Tropical Blend


    To get that authentic, velvety texture and bright tropical punch, you need five basic ingredients. You can find all of these easily at your local supermarket.

    Ingredients gathered for a homemade mango monsoon smoothie.


    Frozen Mango Chunks: 1 and 1/2 cups of frozen mangoes. Using frozen fruit instead of fresh fruit is the secret to making the smoothie thick and icy without watering it down with extra ice cubes.


    Passion Fruit or Guava Nectar: 1/2 cup of tropical nectar. Brand names like Goya work perfectly here. It introduces a special, tropical twist that elevates it beyond ordinary mango drinks. 


    Pineapple Chunks: 1/2 cup of frozen or fresh pineapple chunks to add a beautiful, bright tartness.


    Turbinado Sugar: 1 tablespoon of raw turbinado sugar. Tropical Smoothie Cafe uses this coarse, unrefined brown sugar to sweeten their drinks. It gives a deep, rich sweetness that regular white sugar cannot match.


    Non-Fat Vanilla Yogurt: 1/4 cup of thick vanilla yogurt. This helps emulsify the fruit and gives the smoothie a smooth, velvety finish.


    Step-by-Step Instructions: The Perfect Vortex Blend


    Achieving that signature commercial smoothie consistency requires the right blending method. Use this straightforward method for a perfect outcome. 


    Step 1: Prep Your Blender Jar


    Check that your blender jar is fully clean and completely moisture-free. Take your serving glass and place it in the freezer right now so it stays frosty cold when you pour the drink inside.


    Step 2: Add the Liquid Base and Sweetener


    Pour your 1/2 cup of passion fruit or guava nectar into the bottom of the blender. Add the 1/4 cup of vanilla yogurt and your 1 tablespoon of raw turbinado sugar directly into the liquid.


    Step 3: Layer the Frozen Fruits


    Carefully drop your 1 and 1/2 cups of frozen mango chunks and 1/2 cup of pineapple chunks on top of the liquid layer. Do not add any extra ice yet!

    Layering liquids before fruit inside a blender pitcher.


    Step 4: High-Speed Vortex Blending


    Secure the lid tightly on your blender. Start the machine on low speed for 10 seconds to break up the large chunks, then flip it to maximum high speed for 30 to 45 seconds. You should see a thick swirl forming in the center of the jar.


    Step 5: Adjust and Pour


    Stop the blender and check the thickness with a spoon. If it is too thick to move, add 1 extra tablespoon of nectar. If it is too thin, toss in 2 or 3 ice cubes and blend for another 10 seconds. Pour the vibrant yellow smoothie into your chilled glass and enjoy!


    How to Get That Famous Thick Cafe Texture


    Have you ever made a smoothie at home only for it to separate into a layer of water at the bottom and foam at the top after five minutes? Here is how professional cafes solve that issue:


    Skip the Ice Cubes: Ice cubes are made of water. As they blend, they turn into tiny shards that melt rapidly, leaving you with a watery mess. Rely on frozen fruits to provide 90% of the cold texture.


    Use a High-Power Blender: Cheap, low-wattage blenders cannot crush frozen fruit fast enough. The friction from long blending times creates heat, which melts the fruit. Blend on maximum speed for a short amount of time.


    The Power of Yogurt: The proteins in the vanilla yogurt act as a natural binder. They hold the fruit pulp and liquids together so they never separate in your glass.


    Trending Healthy Boosts to Try Today


    The absolute best part of being your own barista is customizing the recipe to fit your personal health goals. Here are three highly searched health modifications you can add to the blender:

    Green, high-protein, and classic mango smoothie variations.


    The High-Protein Fitness Boost


    If you are drinking this as a post-workout recovery meal, add 1 scoop of unflavored or vanilla whey protein powder into Step 2. This adds around 20 to 25 grams of clean protein without changing the beautiful tropical flavor profile.


    The Green Monsoon Detox


    Want to sneaky-pack some vitamins into your diet? Throw a large handful of fresh baby spinach or kale into the blender. The smoothie will turn a bright green color, but the powerful sweetness of the mango will completely hide the taste of the vegetables!


    The Low-Sugar Weight Loss Swap


    If you are watching your sugar intake, completely remove the turbinado sugar. Replace it with a single packet of monk fruit sweetener or a teaspoon of raw honey. You can also swap the vanilla yogurt for plain, unsweetened Greek yogurt to cut down on extra calories.

    If you are looking for another quick, easy, and satisfying dessert copycat to treat your kids after school, don’t miss our highly rated Homemade S’mores McFlurry Recipe Guide!


    Conclusion


    You don’t need to drive out to the commercial strip or wait for a seasonal menu change to enjoy a world-class tropical treat. By understanding the physics of layering your liquids first, using frozen mangoes, and adding a touch of real tropical nectar, you can blend up a perfect Mango Monsoon copycat right at home. It is thick, healthy, affordable, and incredibly delicious. Pull out your blender, toss in your tropical ingredients, and enjoy an instant taste of paradise today!


    FAQs


    Can I use fresh mangoes instead of frozen ones?


    Yes, you can use fresh mangoes, but you will need to add about 1 full cup of solid ice cubes to the blender to get the cold, thick texture. Please keep in mind that adding ice will make the final flavor a bit more watered down compared to using frozen fruit.


    What can I use if I cannot find passion fruit or guava nectar?


    If your local grocery store does not carry tropical nectars in the international aisle, the best everyday substitute is a high-quality peach nectar or a 100% tropical fruit juice blend. Avoid using heavy orange juice, as the strong citrus flavor will completely overpower the delicate mango.


    How long does this smoothie stay fresh in the fridge?


    Smoothies are always best enjoyed immediately after blending. If you have leftovers, you can store them in a closed mason jar in the fridge for up to 12 hours. However, it will lose its icy texture and become completely liquid, so give it a quick stir or a 5-second re-blend with an ice cube before drinking.

  • The Viral Dubai Chocolate Milkshake Recipe (With Crunchy Pistachio Kataifi!)

    The Viral Dubai Chocolate Milkshake Recipe (With Crunchy Pistachio Kataifi!)


    Editor’s Note


    Over the last few months, the $20 “Dubai Chocolate Bar” from Fix Dessert Chocolatier broke the internet. Everyone wanted to try that thick milk chocolate filled with sweet pistachio cream and crunchy toasted pastry. However, flying to Dubai or paying huge shipping fees is just not possible for most people. We spent days testing how to turn this viral candy bar into a drinkable dessert. The biggest problem was keeping the pastry crunchy inside a wet milkshake. We finally cracked the code! By toasting the pastry in butter and layering it instead of blending it, we created the ultimate Dubai Chocolate Milkshake. Now you can enjoy this luxurious, billion-dollar taste right in your own kitchen!


    People love the amazing mix of smooth milk chocolate, rich roasted pistachio cream, and the loud crunch of toasted kataifi (a thin, stringy pastry). But sadly, getting your hands on the real chocolate bar is very hard and incredibly expensive.


    What if you could get that exact same gourmet flavor and satisfying crunch in a freezing cold, creamy dessert? Today, we are teaching you how to make the ultimate Dubai Chocolate Milkshake at home. It is incredibly easy, looks like a fancy restaurant dessert, and will completely satisfy your sweet tooth. Let us get started!


    What Exactly is the Dubai Chocolate Trend?


    If you are new to this trend, you might be wondering why everyone is so obsessed with this specific chocolate.

    The original viral treat is made by a company in Dubai. They take a thick shell of high-quality milk chocolate and fill the inside with two special Middle Eastern ingredients. The first is pure, sweetened pistachio cream. The second is “kataifi,” which is a very fine, shredded phyllo dough that gets toasted until it is super crunchy.

    When you bite into it, you get a loud crunch and a burst of nutty, sweet flavor. Our milkshake recipe uses these exact same ingredients to recreate the magic in a cold, drinkable form.


    The Secret to the Crunch: What is Kataifi?


    The biggest mistake people make when trying to recreate this recipe is using the wrong crunch. You cannot use crushed cookies or graham crackers. You need kataifi.

    Kataifi is a shredded pastry dough that looks like very thin noodles. You can easily find it in the frozen section of Middle Eastern grocery stores or order it online. When you cook these thin dough strings in a pan with a little bit of butter, they become perfectly crispy. This is the secret ingredient that makes the Dubai Chocolate Milkshake so special!

    If you love making viral, crispy, and creamy desserts at home, you absolutely have to check out our famous Homemade S’mores McFlurry Recipe next!


    Simple Ingredients You Will Need


    You do not need to be a professional pastry chef to make this luxury shake. Here is everything you need to grab from the store:

    Ingredients needed for a Dubai chocolate milkshake.


    Kataifi Pastry: 1 cup of finely chopped kataifi dough (thawed if frozen).

    Unsalted Butter: 1 tablespoon of butter to toast the pastry perfectly.

    Pistachio Cream: 3 tablespoons of sweet pistachio cream (also called pistachio butter).

    Vanilla Ice Cream: 3 large, generous scoops of premium vanilla bean ice cream.

    Whole Milk: 1/2 cup of very cold whole milk.

    Chocolate Syrup: 2 tablespoons of thick, rich chocolate fudge syrup for coating the glass.

    Dark Chocolate Chips: 1 tablespoon of mini chocolate chips for extra texture.


    Step-by-Step Instructions: The Crunch Layering Method


    Making this milkshake is all about how you build it. If you put the crunchy bits in the blender, they will turn into soggy mush. Follow these exact steps to keep that famous viral crunch!


    Step 1: Chop and Toast the Kataifi


    Take your kataifi dough and use a knife to chop it into very small, bite-sized pieces. Place a small frying pan on your stove over medium heat. Add your 1 tablespoon of butter and let it melt. Add the chopped kataifi to the pan.


    Step 2: Get the Golden Crunch


    Stir the pastry strings constantly with a wooden spoon for about 4 to 5 minutes. Watch it carefully so it does not burn! Once the kataifi turns a beautiful dark golden brown and feels crispy, take the pan off the heat. Stir in 1 tablespoon of the pistachio cream and mix it with the hot pastry. Set it aside to cool.

    Toasting kataifi pastry in a pan until golden brown.


    Step 3: Decorate the Serving Glass


    To make your drink look like it came from a fancy cafe, take a tall, clear glass. Drizzle your thick chocolate syrup all around the inside walls of the glass. Then, take another tablespoon of pistachio cream and smear it along the inside. Place the glass in the freezer for 5 minutes so the syrups stick to the sides.


    Step 4: Blend the Base Perfectly


    Now, grab your blender. Add your 3 huge scoops of vanilla ice cream, the cold whole milk, and the last tablespoon of pistachio cream. Blend everything at high speed for just 20 seconds. You want the milkshake to be very thick, not watery.

    Having trouble getting your blended drinks perfectly thick? Read our expert blending guide in the Dunkin Frozen Hot Chocolate Recipe!


    Step 5: The Famous Layering Technique


    Take your decorated glass out of the freezer. Drop a big spoonful of your crispy, buttery kataifi mix into the very bottom of the glass. Pour half of your thick milkshake over the crunch. Add another layer of crunchy kataifi, then pour the rest of the milkshake.


    Step 6: Garnish and Enjoy!


    Top your magnificent dessert with a huge mountain of whipped cream. Sprinkle the remaining toasted kataifi and the mini dark chocolate chips over the very top. Add a wide straw and a long spoon. Enjoy your luxury Dubai treat instantly!

    Layers of milkshake and crunchy pistachio pastry.


    Expert Tips for a Restaurant-Quality Shake


    If you want to ensure your dessert turns out flawless on the first try, keep these professional tips in mind:


    Do Not Skimp on Fat: Always use whole milk and premium full-fat ice cream. Skim milk or water-based ice creams will make the shake icy and thin instead of rich and velvety.


    Cool the Pastry Completely: Never put hot, freshly toasted kataifi into cold ice cream. It will instantly melt your milkshake. Let the crispy strings sit on a cool plate for at least 10 minutes before layering.


    The Spoon is Required: Because this dessert is packed with crunchy textures and thick creams, a regular thin straw will get clogged. Always serve this with a wide boba tea straw and a long dessert spoon.


    Trending Customizations to Try at Home


    Once you master the classic recipe, you can easily change the flavors to create your own viral masterpieces. Here are the most searched variations:


    The Double Dark Chocolate Version


    Instead of vanilla ice cream, use deep, dark chocolate ice cream for the base. The bitterness of the dark chocolate cuts through the extreme sweetness of the pistachio cream, making a perfectly balanced adult dessert.


    The White Chocolate Raspberry Twist


    Starbucks lovers are obsessed with this one! Add a tablespoon of raspberry syrup into the blender with white chocolate ice cream. The bright, fruity flavor mixes incredibly well with the nutty roasted pistachios.


    The Vegan Dubai Shake


    You can easily make this dairy-free! Toast your kataifi in coconut oil instead of butter. Use a thick oat-milk vanilla ice cream and swap the regular milk for creamy cashew milk. Make sure your chocolate syrup is a certified vegan brand!


    Conclusion


    You do not need to spend hundreds of dollars on a plane ticket or expensive international shipping just to taste the internet’s favorite dessert. By toasting some kataifi pastry and blending a thick, rich pistachio base, you can make the ultimate Dubai Chocolate Milkshake right in your own home. It is creamy, crunchy, totally satisfying, and looks absolutely stunning in a glass. Gather your ingredients, start toasting that pastry, and treat yourself to a luxurious gourmet experience today!


    FAQs


    Where can I buy Pistachio Cream?


    Pistachio cream (or sweet pistachio spread) has become very popular lately. You can usually find it at large grocery stores in the jam and peanut butter aisle. If your local store does not carry it, you can easily order a jar online from Amazon or specialty Italian food websites.


    Can I make the crunchy kataifi ahead of time?


    Yes, absolutely! You can chop and toast a large batch of the kataifi pastry in butter. Once it is completely cool, store it in an airtight plastic container at room temperature. It will stay perfectly crunchy for up to 3 days, so you can make milkshakes all weekend long.


    What can I use if I cannot find Kataifi dough anywhere?


    If you simply cannot find kataifi, the best emergency substitute is using regular cornflakes cereal. Put a handful of plain cornflakes in a bag and crush them lightly. Toss the crushed cereal in a pan with melted butter and toast them for a few minutes. It is not the authentic Middle Eastern pastry, but it provides a very similar, satisfying crunch!

  • The Ultimate Starbucks Raspberry Syrup Copycat Recipe (Since They Discontinued It!)

    The Ultimate Starbucks Raspberry Syrup Copycat Recipe (Since They Discontinued It!)


    Editor’s Note


    When Starbucks completely removed their iconic raspberry syrup from the menu in 2023, millions of fans were heartbroken. We bought several expensive store-bought syrups online, but they all tasted like fake, sticky candy. It was clear that we needed to figure out a genuine alternative. After testing different simmering methods in our kitchen, we discovered that using real, frozen raspberries with a hint of lemon juice perfectly recreates that bright, tart, and sweet cafe flavor. Plus, making it at home means absolutely no artificial red dyes! Follow this foolproof guide to bring your favorite discontinued drinks back to life.

    The Ultimate Starbucks Raspberry Syrup Copycat Recipe (Since They Discontinued It!)


    Did your heart break when you tried to order your favorite pink drink, only to hear that the syrup was gone forever? You have definitely landed on the perfect guide for this. Today, we are going to learn how to easily make the famous Starbucks Raspberry Syrup right in your own kitchen.


    For years, this bright pink syrup was a secret weapon on the coffeehouse menu. People added it to iced teas, white mochas, and even Frappuccinos to create beautiful, fruity, and refreshing beverages.


    When the company decided to discontinue it globally, fans panicked. But the wonderful news is that you do not need to buy expensive, fake-tasting bottles from the store. You can make a rich, perfectly sweet, and natural raspberry syrup at home in just 15 minutes. Let us dive into this complete, step-by-step masterclass!


    Why Did Starbucks Discontinue the Raspberry Syrup?


    This is one of the most searched questions on the internet right now. Why would a massive coffee company get rid of such a popular item?


    In the spring of 2023, Starbucks made a huge business decision to simplify their menu. They wanted to make room for new seasonal flavors, like lavender and macadamia nut. To make space on the counter, they had to remove older items. Sadly, the classic raspberry syrup was cut from the list.


    However, many baristas admit that making the syrup at home with real fruit actually tastes much better than the commercial version, which relied heavily on artificial flavors.


    Fresh vs. Frozen Raspberries: Which is Better?


    When making fruit syrups at home, users always ask if they have to spend a lot of money on fresh berries. The simple answer is no!


    In fact, frozen raspberries are actually better for making syrup. Fruits are frozen at their peak ripeness, meaning they hold onto all their natural sweet juices. As they thaw and cook down in the pot, they release a beautiful, deep red color and strong flavor much faster than fresh berries. Plus, a bag of frozen berries is usually much cheaper at the grocery store.


    Simple Ingredients You Need


    You only need four simple, everyday pantry ingredients to make this magic cafe syrup at home.

    Ingredients needed for homemade fruit syrup.


    Raspberries: 1 and 1/2 cups of raspberries (frozen or fresh).

    White Granulated Sugar: 1 cup of plain white sugar. This creates the thick syrup texture and preserves the fruit.

    Filtered Water: 1 cup of clean water to balance the sugar.

    Lemon Juice: 1 tablespoon of freshly squeezed lemon juice. This is the secret ingredient! The sour lemon brightens the tart berry flavor and helps the syrup stay fresh longer in your fridge.

    If you love making bright, sweet, and sour homemade drinks, you absolutely must try our viral Popeyes Pickle Lemonade Copycat Recipe for your next summer party!


    Step-by-Step Instructions: The Simmer Method


    Making syrup at home is incredibly easy. Just follow these steps to get a perfectly smooth, clear, and rich liquid without any annoying seeds.


    Step 1: Combine the Base Ingredients


    Take a medium-sized metal saucepan. Pour in your 1 cup of water, 1 cup of white sugar, and your 1 and 1/2 cups of raspberries. Put the pan on your stove and turn the heat to medium-high.


    Step 2: Boil and Smash


    Keep mixing the contents slowly while the temperature rises in the pot. Once the liquid starts to bubble and boil, turn the heat down to low. Take a wooden spoon or a potato masher and gently smash the soft raspberries against the side of the pot. Doing this step ensures every drop of that sweet, vibrant berry liquid is fully released. 


    Step 3: Simmer and Thicken


    Let the mixture simmer quietly on low heat for 10 to 12 minutes. The liquid will slowly reduce and become slightly thick. Stir it every few minutes so the sugar does not burn on the bottom of the pan.


    Step 4: Add the Lemon and Cool


    Turn off the stove heat. Stir in your 1 tablespoon of fresh lemon juice. Move the pot off the hot burner and let the hot syrup sit for 15 minutes to cool down safely.


    Step 5: The Crucial Filtering Process


    You do not want hard seeds in your morning coffee! Place a fine mesh strainer (or a cheesecloth) over a clean glass jar or bottle. Carefully pour the cooled syrup through the strainer. Use the back of a spoon to press the fruit pulp against the mesh to squeeze out every last drop of syrup. Throw away the leftover seeds.

    Straining homemade raspberry syrup into a glass mason jar.


    Trending Starbucks Secret Menu Drinks to Make


    Now that you have a jar of magical ruby-red syrup in your fridge, it is time to become a master barista. Here are the most highly searched secret menu drinks you can recreate:

    Raspberry iced tea and raspberry white mocha drinks.


    The Classic Raspberry Iced Black Tea


    This was the ultimate summer thirst quencher. Simply brew a tall glass of strong black tea, add a handful of ice, and stir in two tablespoons of your homemade raspberry syrup. It is sweet, fruity, and highly refreshing.


    The Raspberry White Chocolate Mocha


    If you love hot, cozy drinks, this is a masterpiece. Add one tablespoon of raspberry syrup to your regular white chocolate mocha. The tart berries cut through the heavy, rich white chocolate perfectly.

    Speaking of rich chocolate drinks, if you want another amazing cafe treat, check out our foolproof Dunkin Frozen Hot Chocolate Recipe right now!


    The Cotton Candy Frappuccino


    This is a favorite for kids! Blend vanilla bean ice cream, a little milk, lots of ice, and two tablespoons of this raspberry syrup. It magically tastes exactly like carnival cotton candy!


    Pro Tips for Storing Your Syrup


    Since this homemade recipe uses real fruit and zero artificial preservatives, you must store it correctly so it does not spoil.

    • Always keep the syrup in an airtight glass jar or a sealed squeeze bottle.
    • Store it immediately in the refrigerator.
    • If kept cold, this fresh fruit syrup will stay completely fresh and delicious for up to 3 weeks.
    • If you make too much, you can pour the syrup into an ice cube tray and freeze it for up to 3 months!


    Conclusion


    You do not have to accept that your favorite coffeehouse flavors are gone forever. By boiling down real raspberries, water, and sugar, you can easily create the ultimate Starbucks Raspberry Syrup copycat right in your own kitchen. It is cheaper, healthier, completely free of artificial red dyes, and it tastes a million times better than commercial brands. Brew your favorite coffee or tea, mix in this beautiful ruby syrup, and enjoy a premium cafe experience at home today!


    FAQs


    Can I use a sugar substitute to make a sugar-free raspberry syrup?


    Yes, you can! You can replace the white sugar with an equal amount of granulated Stevia or Monk Fruit sweetener. However, please note that artificial sweeteners do not thicken the same way real sugar does, so your final syrup will be a little bit more watery.


    Why is my syrup a dark purple color instead of bright neon pink?


    Starbucks used artificial food coloring (and sometimes grape juice extract) to make their syrup perfectly neon pink. Because you are using 100% natural real fruit, your syrup will naturally be a darker, deeper ruby red color. It is completely normal and much healthier!


    Can I pour this hot syrup into a plastic bottle?


    No, never pour boiling or hot syrup into plastic containers. The heat can easily melt the plastic or release harmful chemicals into your food. Always let the syrup cool down, or use a strong glass mason jar for safe storage.

  • The Ultimate Homemade S’mores McFlurry Recipe (No Ice Cream Machine Needed!)

    The Ultimate Homemade S’mores McFlurry Recipe (No Ice Cream Machine Needed!)


    Editor’s Note


    When McDonald’s first released the S’mores McFlurry, it instantly became the ultimate summer dessert. However, recreating it at home is tricky. Most people just throw dry marshmallows into ice cream, which turn into hard, freezing rocks that hurt your teeth! We spent the whole weekend testing different methods. We found that using a mix of toasted marshmallow syrup and crushed graham crackers creates the exact creamy, campfire flavor without the hard chunks. Follow our exact guide to get a perfectly blended, soft-serve dessert in just five minutes.

    The Ultimate Homemade S’mores McFlurry Recipe (No Ice Cream Machine Needed!)


    Do you love the taste of a warm campfire treat but also crave freezing cold ice cream? You have come to the perfect place. Today, we are going to learn how to make the famous McDonald’s S’mores McFlurry right in your own kitchen.


    When this amazing dessert hit the fast-food menu, it sold out everywhere. People loved the mix of creamy vanilla, crunchy graham crackers, and rich chocolate. Sadly, it was only a limited-time item, and fans have been begging for its return ever since.


    The good news is that you do not have to wait for McDonald’s to bring it back. You also do not need an expensive commercial ice cream machine to make it. With a few simple ingredients and a clever mixing trick, you can enjoy this thick, sweet treat anytime you want. Let us get started!


    Why Did McDonald’s Discontinue the S’mores McFlurry?


    If this dessert was so popular, why did it leave the menu? This is one of the most highly searched questions on Google.

    McDonald’s often creates special seasonal items to keep their menu exciting. The S’mores flavor was designed as a “Summer Only” promotion. The ingredients, like special chocolate chunks and marshmallow syrup, took up extra space in the kitchen.

    When summer ended, they removed it to make room for fall and winter flavors. But because it is so easy to make at home, you can easily enjoy this summer classic all year long!


    Simple Ingredients You Need for This Campfire Treat


    You only need five basic ingredients to recreate this masterpiece. You probably already have most of these in your pantry right now!

    Ingredients for a homemade S'mores McFlurry.


    Vanilla Ice Cream: 2 big scoops of high-quality vanilla ice cream. Let it sit on the counter for 5 minutes so it gets a little bit soft.

    Graham Crackers: 1 full sheet of honey graham crackers. This gives the McFlurry its signature pie-crust crunch.

    Chocolate Chunks: 2 tablespoons of semi-sweet chocolate chunks or mini chocolate chips.

    Marshmallow Fluff (The Secret Ingredient!): 1 big tablespoon of marshmallow creme (fluff). Do not use regular mini marshmallows, because they will freeze hard as rocks in the cold ice cream!

    Whole Milk: Just 1 tablespoon of cold milk to help everything blend smoothly.

     If you are serving this dessert at a party and need a great cold drink to go with it, check out our amazing Dunkin Frozen Hot Chocolate Copycat Recipe!


    Step-by-Step Instructions: How to Make a S’mores McFlurry


    Making a McFlurry at home is all about the mixing technique. You want it to be thick enough to eat with a spoon, not thin like a milkshake. Follow these exact steps for the best texture.


    Step 1: Crush the Graham Crackers


    Put your graham cracker sheet into a small plastic zip-top bag. Use a rolling pin or the bottom of a heavy cup to smash the cracker. You want small, crunchy pieces, not fine dust.


    Step 2: Soften the Ice Cream


    Put your 2 big scoops of vanilla ice cream into a large metal or glass mixing bowl. Add your 1 tablespoon of cold milk. Use a strong metal spoon to mash and stir the ice cream until it looks like a thick, smooth soft-serve.


    Step 3: Add the S’mores Flavors


    Now, add your crushed graham crackers, chocolate chunks, and the sticky marshmallow fluff right on top of the soft ice cream.


    Step 4: The Fold and Swirl Technique


    Do not use a blender! A blender will turn your dessert into soup. Instead, use your spoon to gently fold the ingredients into the ice cream. Swirl it around 5 or 6 times so there are thick ribbons of marshmallow and chocolate in every single bite.


    Step 5: Freeze and Serve


    Spoon your thick mixture into a tall cup. If it got a little too soft while mixing, put the cup in the freezer for exactly 5 minutes to firm up. Serve it immediately with a long spoon!


    Pro Tips for the Perfect McFlurry Texture


    Many homemade desserts melt way too fast. Here is how you can solve common ice cream problems like a pro:


    Chill Your Bowl: Before you start making your dessert, put your empty mixing bowl and your serving cup into the freezer for 15 minutes. A freezing cold bowl stops the ice cream from melting while you stir in the toppings.


    Toasted Flavor Trick: If you want an authentic campfire flavor, use a kitchen torch to carefully toast the marshmallow fluff on a piece of foil for 10 seconds before adding it to your ice cream.


    Avoid Over-mixing: The more you stir, the thinner the ice cream gets. Only stir until the toppings are just mixed in.


    Trending Customizations to Try Today


    The best part about being your own fast-food chef is that you can upgrade the recipe. Here are three highly searched variations to try next:

    Peanut butter and double chocolate S'mores McFlurry variations.


    The Peanut Butter S’mores Swirl


    Peanut butter and chocolate are a perfect match. Drizzle one tablespoon of warm, melted peanut butter over the top of your finished dessert. It adds an amazing salty and savory flavor that cuts through the sweet sugar.


    The Double Chocolate S’mores


    If you are a serious chocoholic, swap the vanilla ice cream for rich chocolate ice cream. Add a squirt of hot fudge syrup instead of regular chocolate chunks for a deeply rich, brownie-like experience.


    The Caramel Sea Salt Crunch


    Pour a thick ribbon of sticky caramel sauce inside the serving cup before you spoon the ice cream in. Add a tiny pinch of coarse sea salt on top for a fancy, gourmet coffeehouse vibe.

    Looking for a weird, savory, and sour drink to balance out all this sweetness? You have to try our viral Sonic Pickle Slush Copycat Recipe!


    Conclusion


    You do not need to wait for a special summer menu to enjoy the ultimate campfire dessert. By using soft vanilla ice cream, crunchy graham crackers, and sticky marshmallow fluff, you can whip up a perfect S’mores McFlurry right at home. It is thick, creamy, and completely packed with chocolatey goodness. Grab your spoon, mix up this easy treat, and enjoy a delicious fast-food favorite today!


    FAQs


    Can I use a blender to make a McFlurry?


    We highly recommend not using a blender. Blenders spin too fast and generate heat, which turns the ice cream into a thin, watery milkshake. The secret to a McFlurry is using a spoon to hand-mix the ingredients so it stays thick.


    What kind of vanilla ice cream is best?


    For the most authentic fast-food taste, buy a tub of “Vanilla Bean” or “French Vanilla” ice cream. Look for a brand that is very creamy and high in fat. Cheap, icy ice creams will not mix well with the marshmallow fluff.


    Can I save my leftover McFlurry in the freezer?


    Yes! If you cannot finish your dessert, cover the top of your cup tightly with plastic wrap and place it in the freezer. When you are ready to eat it again, let it sit on the kitchen counter for 10 minutes to soften up before eating.

  • The Ultimate Dunkin Frozen Hot Chocolate Copycat Recipe (Super Creamy!)

    The Ultimate Dunkin Frozen Hot Chocolate Copycat Recipe (Super Creamy!)


    Editor’s Note


    Many homemade frozen hot chocolate recipes end up tasting like watery chocolate ice cubes that separate after two minutes. We spent the last week blending, testing, and tasting different milk-to-cocoa ratios to solve this exact issue. We managed to perfectly match that signature smooth, luxurious Dunkin’ consistency by chilling our liquid cocoa mix beforehand and utilizing a smart thickening ingredient. Follow our step-by-step guide to get a perfectly smooth, restaurant-quality frozen treat that stays thick down to the very last sip!


    Are you craving the rich, icy, and chocolatey goodness of Dunkin’s signature winter-meets-summer drink? You are in the absolute perfect spot. Today, we are learning how to make a flawless homemade Dunkin Frozen Hot Chocolate right in your own kitchen.


    When the weather gets warm, standing in a long drive-thru line or spending four to five dollars every day on a single beverage can become frustrating. Plus, sometimes you just want to enjoy a decadent sweet treat late at night when the cafes are already closed.


    The great news is that you do not need a commercial blending machine or secret commercial powders to achieve that signature cafe consistency. With a few basic ingredients from your pantry, you can whip up this viral copycat drink in under five minutes. Let us dive into this complete masterclass guide!


    What is Dunkin’ Frozen Hot Chocolate?


    For years, Dunkin’ has been a global favorite for morning coffees and baked goods. That being said, the introduction of their icy blended drinks totally revolutionized the standard coffeehouse menu. The Frozen Hot Chocolate is a special hybrid drink designed for chocolate lovers who want something cold and frosty instead of a steaming hot mug.


    Unlike a traditional chocolate milkshake, which relies heavily on dense vanilla ice cream, a frozen hot chocolate is made by blending real chocolate bases, milk, and heavy ice together.


    The result is a texture that sits perfectly between a creamy milkshake and a light, refreshing snow cone. It is packed with a deep, intense cocoa flavor that is finished off with a mountain of whipped cream and a chocolate drizzle.


    The Texture Secret: Why Homemade Frozen Hot Chocolate Often Fails


    If you have tried making this drink at home before, you might have run into a common problem. Often, the ice crushes into chunky pieces, sinks to the bottom of the glass, and leaves a watery layer of chocolate milk sitting on top. This happens pickle lemonade popeyes because chocolate syrup and water do not naturally want to hold onto ice crystals.

    To fix this issue and match Dunkin’s rich mouthfeel, we use two expert culinary tricks:


    High-Fat Dairy Balance: Using skim milk or water makes the slush separate instantly. By using a combination of whole milk and a splash of heavy cream, the fat molecules coat the crushed ice particles. This keeps the drink perfectly emulsified and smooth.

     
    The Premix Dissolve Method: Never throw dry hot cocoa powder directly onto cold ice cubes. The sugar granules will not dissolve properly, leaving your drink tasting gritty and sandy. We dissolve the cocoa mix in warm liquid first to create a velvety smooth syrup base before blending.


    Catchy Customizations: Google Trending Variations to Try


    Once you know how to make the classic chocolate version, you can start modifying the recipe just like a professional barista. Here are the most highly-searched Dunkin’ variations that you can create at home:


    The Frozen Mocha Fusion


    If you need a serious caffeine kick to start your morning, add a single shot of cooled espresso or one teaspoon of instant coffee granules directly into the blender cup. The bitterness of the coffee cuts through the sweet sugar, creating a premium mocha flavor.


    The Salted Caramel Crunch


    Drizzle a generous amount of thick caramel syrup around the inside walls of your serving glass before pouring the slush. Sprinkle a tiny pinch of coarse sea salt over the top of your whipped cream for a fancy gourmet twist.


    The Holiday Peppermint Twist


    Recreate Dunkin’s famous winter holiday menu by adding two small drops of pure peppermint extract into the blender. Garnish the final drink with crushed candy canes for a beautiful festive look.


    Simple Ingredients Checklist


    You only need a few affordable, everyday ingredients to get started. Grab these items from your local grocery store:

    Ingredients layout for making a frozen chocolate drink.


    Hot Cocoa Powder: 3 packets (or 6 tablespoons) of your favorite high-quality sweet hot chocolate mix. (Brands like Swiss Miss or Ghirardelli work beautifully).

    Whole Milk: 1 cup of cold whole milk. This provides the ideal creamy base.

    Heavy Cream: 2 tablespoons of heavy whipping cream. This is our secret weapon for adding a rich cafe-style texture.

    Chocolate Syrup: 2 tablespoons of rich chocolate fudge syrup to deepen the color and sweetness.

    Ice Cubes: 2.5 to 3 cups of solid, fresh ice cubes.

    Toppings: Whipped cream from a spray can and extra chocolate syrup for drizzling over the top.


    Step-by-Step Instructions (The Foolproof Blending Method)


    Follow these exact steps to ensure your frozen beverage comes out completely smooth and beautifully layered.


    Step 1: Create the Liquid Chocolate Paste


    Take a small microwave-safe bowl or measuring cup. Pour in 1/4 cup of your whole milk and heat it in the microwave for 20 seconds until it is warm (not boiling). Dump your hot cocoa powder into the warm milk and stir vigorously with a small spoon until a smooth, thick chocolate paste forms. Let it sit for two minutes to cool down completely.


    Step 2: Load the Blender Correctly


    Make sure to pour all the wet ingredients into the blender pitcher before dumping in any solid items. Pour the remaining 3/4 cup of cold whole milk, the 2 tablespoons of heavy cream, the 2 tablespoons of chocolate syrup, and your cooled chocolate paste into the bottom of your blender pitcher.


    Step 3: Add the Ice


    Dump your 3 cups of ice cubes directly on top of the liquid ingredients. Putting the ice on top helps push all the ingredients down into the spinning blades evenly.


    Step 4: The Pulse and Blend Technique


    Put the blender lid on securely. Do not just turn the machine on high speed immediately. Instead, press the Pulse button 5 to 6 times to break the large ice cubes down into smaller chunks. Once the ice is broken up, turn the blender to high speed and let it run continuously for 30 to 45 seconds until it looks exactly like smooth, creamy brown frost.


    Step 5: Garnish and Serve Beautifully


    Take a tall, clear glass. Pour your frosty chocolate mix right to the brim. Spray a massive cloud of whipped cream on top, and use your chocolate syrup bottle to draw a beautiful zigzag pattern over the cream. Pop a wide straw inside and enjoy immediately!

    Pouring smooth frozen hot chocolate from a blender.


    Dietary Adjustments: How to Make it Dairy-Free or Vegan


    If you cannot consume dairy, you do not have to miss out on this delicious trend. You can easily modify the recipe with these simple plant-based swaps:


    The Milk Swap: Replace the whole milk with a creamy plant milk. Oat milk or creamy cashew milk work the best because they naturally have a thicker body compared to watery almond milk.


    The Cream Swap: Use canned coconut cream instead of heavy dairy whipping cream. It adds a lovely subtle tropical richness.


    The Powder Check: Make sure to purchase a dairy-free hot cocoa powder brand, as many standard instant packets contain non-fat dry milk powder inside.


    Troubleshooting Guide: How to Fix Blending Mistakes


    If your frozen dessert is not looking quite right, use these quick expert fixes to save your drink instantly:


    Problem: My slush is full of large, crunchy ice chunks.

    • The Fix: Your blender might need a little extra help. Turn off the machine, stir the mixture thoroughly with a long spoon to break up air pockets, and blend it on high speed for an additional 20 seconds.


    Problem: The drink is too thick and won’t come up the straw.

    • The Fix: Add two tablespoons of cold milk into the blender cup and pulse it a few times to thin the consistency out slightly.


    Problem: It tastes way too sweet.

    • The Fix: Add a tiny pinch of fine table salt into the mix. Salt naturally tones down overpowering sugars and makes the cocoa flavor taste deeper.


    Conclusion


    Recreating your favorite cafe drinks at home is an amazing way to save money while completely controlling the quality of what goes into your body. By using our simple pre-dissolve method and balancing your fats correctly, you can make a copycat Dunkin Frozen Hot Chocolate that tastes even better than the drive-thru version. Grab your blender, mix up a frosty glass, and treat yourself to the ultimate chocolate luxury today!


    FAQs


    Does Dunkin’ Frozen Hot Chocolate contain coffee or caffeine?


    No! Unlike a frappuccino or a frozen coffee mix, the classic Dunkin’ Frozen Hot Chocolate does not contain any coffee or espresso bases. It is completely caffeine-free, making it a wonderful afternoon treat for kids and adults who are sensitive to caffeine.


    Can I make a large batch ahead of time and store it in the freezer?


    We do not recommend storing the finished, blended slush in the freezer. It will freeze solid into a hard block of chocolate ice. This drink is always best enjoyed fresh within ten minutes of blending. However, you can mix the chocolate liquid paste ahead of time and keep it in the fridge so you are ready to blend instantly.


    What blender setting is best for frozen coffeehouse drinks?


    If your blender has a specific “Smoothie,” “Ice Crush,” or “Frozen Drink” button, use that setting! Those programs are designed to automatically alternate between pulsing and high-speed blending to prevent the blades from getting jammed.

  • The Ultimate Popeyes Pickle Lemonade Copycat Recipe

    The Ultimate Popeyes Pickle Lemonade Copycat Recipe


    Editor’s Note


    When we first saw the Popeyes Pickle Lemonade going viral on social media, we knew we had to try it. Mixing sweet, tart lemonade with salty dill pickle juice sounds crazy at first. However, once we tasted it alongside some crispy fried chicken, we completely understood the hype! We spent hours in the kitchen testing different ratios of fresh lemon juice to pickle brine. We wanted to make sure our readers get the perfect, thirst-quenching balance without it tasting too salty. Follow this foolproof guide to recreate the internet’s favorite weird drink right at home!


    Are you looking for a completely new and exciting drink to cool you down? You are in the right place. Today, we are going to learn how to make the famous Popeyes Pickle Lemonade in your very own kitchen.


    Over the last few months, this unusual drink combination has completely taken over the internet. People are filming their reactions, taking beautiful photos, and sharing them everywhere.


    While mixing pickle juice and lemonade might sound like a joke, it is actually a genius flavor pairing. The sweet sugar, the sour lemons, and the salty pickle brine create an amazing balance. In this detailed guide, we will show you exactly how to make this trending drink step-by-step. Let us get started!


    What is the Popeyes Pickle Lemonade?


    Popeyes is a famous fast-food restaurant known for its incredibly crispy fried chicken and buttery biscuits. Recently, a secret menu hack became wildly popular among their customers.


    People started ordering a large cup of their classic premium lemonade and asking the staff to pour in a splash of dill pickle juice. Some people even drop whole pickle slices right into their cups!


    This created the “Pickle Lemonade.” It is a bright yellow, ice-cold drink with floating green pickle chips. It is sweet, tart, and very salty. It is the perfect drink to wash down heavy, greasy fast food because the vinegar cuts right through the richness.


    Why is the Internet Obsessed with Pickle Lemonade?


    If you scroll through your favorite social media apps, you will see this drink everywhere. Here is why everyone loves it so much:


    The Shock Factor: It sounds weird! People love trying strange food combinations just to see if they are actually good.


    Electrolyte Boost: Pickle juice is full of natural salt and electrolytes. When you mix it with hydrating water and lemon juice, it becomes a fantastic recovery drink for hot summer days.


    The Perfect Sweet and Salty Balance: Think about why people love salted caramel or chocolate-covered pretzels. Our tastebuds love it when sweet and salty flavors are mixed together.


    Nutritional Breakdown: What to Expect


    Before we start mixing, it is good to know what is in your glass. Here is a quick look at the nutrition facts for a standard homemade pickle lemonade:


    Calories: Because of the sugar in the lemonade, a medium glass has about 150 to 200 calories.

    Sodium: Pickle juice has a lot of salt. This drink is high in sodium, which is great for sweating on a hot day, but something to watch out for if you are on a low-salt diet.

    Vitamins: Fresh lemons give this drink a wonderful boost of Vitamin C, helping your immune system stay strong.


    Simple Ingredients for the Perfect Mix


    You do not need to wait in a long drive-thru line to get this viral drink. You can make it at home using just a few simple, cheap ingredients.

    Ingredients needed to make homemade Popeyes pickle lemonade.


    Fresh Lemons: You will need 4 to 5 large, juicy lemons. Freshly squeezed lemon juice is the secret to a high-quality copycat recipe.


    Dill Pickle Juice: 1/4 cup of juice straight from a jar of dill pickles. You must use dill pickles, not sweet pickles!


    White Granulated Sugar: 3/4 cup of plain white sugar to sweeten the drink.


    Cold Water: 4 cups of filtered, ice-cold water.


    Ice Cubes: Lots of clean ice to make the drink perfectly frosty.


    Pickle Slices: A few round pickle slices to drop into the glass for that authentic fast-food look.


    Step-by-Step Instructions (Easy Method)


    Making this beautiful drink is very fast. Follow these simple steps, and you will have a delicious pitcher ready in less than ten minutes.


    Step 1: Prepare the Fresh Lemon Juice


    Take your fresh lemons and cut them in half. Squeeze them into a measuring cup until you have exactly 1 cup of fresh lemon juice. Make sure to pick out any tiny lemon seeds that fall into the cup.


    Step 2: Make the Sweet Lemonade Base


    Take a large glass pitcher. Pour your 1 cup of lemon juice into the pitcher. Add your 3/4 cup of white sugar and 4 cups of cold water. Take a long wooden spoon and stir everything together for about two minutes. You want to make sure the sugar is completely melted into the water.


    Step 3: Add the Secret Salty Ingredient


    Now it is time for the magic. Measure out 1/4 cup of dill pickle juice. Slowly pour it into your sweet lemonade pitcher. Give the mixture one more big stir.


    Step 4: Prepare Your Glass


    Take a tall, clear drinking glass. Fill it all the way to the top with fresh ice cubes. Take two or three round pickle slices and slide them down the inside walls of the glass. This makes the drink look amazing for photos!


    Step 5: Pour and Enjoy


    Pour your freshly mixed pickle lemonade dragon fruit syrup right over the ice. Put a straw in the glass and take a big sip. Enjoy the amazing sweet, sour, and salty flavor!


    Trending Customizations: Make it Your Own


    The best part about making drinks at home is that you can change them! Here are three highly searched variations of the pickle lemonade:

    Spicy and sparkling variations of homemade pickle drinks.


    The Spicy Pickle Lemonade


    If you love spicy chicken sandwiches, you will love this. Add a small pinch of cayenne pepper or a dash of hot sauce directly into your glass. The spicy kick mixes perfectly with the sour lemon and salty pickle.


    The Sparkling Pickle Refresher


    Do you love bubbly drinks? Replace half of the cold water in the recipe with plain club soda or sparkling water. This gives your drink sonic pickle slush a wonderful, refreshing fizz that tickles your nose.


    The Skinny Diet Version


    If you want to cut down on sugar, you can easily make a low-calorie version. Simply swap the white sugar for your favorite zero-calorie sweetener, like Stevia or liquid Monk Fruit. It tastes just as good but has zero guilt!


    Troubleshooting Common Flavor Problems


    Sometimes, mixing completely different flavors can go wrong. Here is how to quickly fix your drink if it does not taste perfect:


    Problem: The drink is way too salty.

    Solution: You might have used a very strong brand of pickles. Simply add 1/2 cup of plain water and one extra tablespoon of sugar to the pitcher. Stir it well to dilute the salt.


    Problem: The lemonade is too sour and makes my face pucker.

    Solution: Your lemons were probably extra tart! Add two more tablespoons of sugar and stir until it dissolves completely.


    Problem: I cannot taste the pickle flavor at all.

    Solution: Add one more tablespoon of pickle juice at a time. Keep tasting it until you reach the perfect balance.


    How to Store Your Lemonade


    If you make a large batch for a summer party and have some leftovers, it is very easy to save it.

    Always store your lemonade in a pitcher with a tight lid. Keep it in the refrigerator. It will stay fresh and delicious for up to 4 days.

    Important tip: Do not put ice into the main pitcher! As the ice melts, it will water down your perfect flavor balance. Only put ice into your individual drinking glasses.


    The Best Food Pairings for Pickle Lemonade


    This drink is very strong, so it tastes best when you drink it with the right foods. Just like at Popeyes, this lemonade is the ultimate pairing for heavy, fried, and savory foods.

    Serve this drink alongside crispy fried chicken, greasy double cheeseburgers, or a big bowl of salty French fries. The vinegar in the drink cleans your palate after every bite, making your food taste even better!


    Conclusion


    You do not need to wait in your car at a fast-food drive-thru to try the internet’s most exciting drink trend. By mixing fresh homemade lemonade with a splash of salty dill pickle juice, you can recreate the famous Popeyes secret menu item right at home. It is perfectly sweet, wonderfully sour, and just salty enough to keep you coming back for more. Mix up a cold pitcher today and surprise your friends with this unforgettable flavor experience!


    FAQs


    What is the best brand of pickle juice to use?


    For the most authentic fast-food taste, use a classic dill pickle brand like Vlasic, Claussen, or Mt. Olive. They have a great garlic and salt profile. Never use sweet pickles or bread-and-butter pickles, as they will ruin the flavor of the lemonade.


    Can I use store-bought lemonade instead of making my own?


    Yes! If you are in a hurry, you can buy a bottle of high-quality yellow lemonade from the grocery store. Simply pour it into a glass and add a splash of your pickle juice. However, making it from scratch with fresh lemons always tastes much better.


    Can I freeze this drink to make a slushie?


    Absolutely. If you want a frozen treat, pour your mixed pickle lemonade into an ice cube tray. Once it is frozen solid, put the ice cubes into a blender and blend on high speed until it looks like snow.

  • The Ultimate Sonic Pickle Slush Copycat Recipe

    The Ultimate Sonic Pickle Slush Copycat Recipe


    Editor’s Note


    When we first heard about a bright green pickle-flavored slushie, we thought it was a joke. But after tasting the real thing at Sonic Drive-In, we understood why the internet went totally crazy for it. It is surprisingly sweet, salty, and incredibly refreshing. We spent days testing different pickle juices and ice blending methods to create the exact same slushie texture and flavor at home. If you want to satisfy your weirdest craving without leaving the house, this guide is everything you need!


    Are you feeling brave today? Do you want to try one of the most famous and weirdest fast-food drinks ever created? You have arrived at the perfect place. Today, we are making the famous Sonic Pickle Slush right in your own kitchen.


    When this bright green drink first came out, it broke the internet. People drove for miles just to taste it. Some people hated it, but millions of people absolutely loved it.


    If you love eating savory snacks, or if you constantly drink pickle juice straight from the jar, this is your dream beverage. In this massive guide, we will explain exactly what this drink is, what it tastes like, and how you can easily blend it up at home in less than five minutes.


    What exactly is the Sonic Pickle Slush?


    Sonic Drive-In is a huge fast-food chain in America. They are famous for having thousands of different drink combinations. In 2018, they released a special limited-time item: the Pickle Juice Slush.


    It was a glowing green, freezing cold, sweet and salty ice drink. It was so popular that Sonic brought it back again in 2022 because customers kept begging for it on social media.


    The drink is made using Sonic’s classic sweet slushie base mixed with a special salty pickle flavoring syrup. It is not just a cup of frozen pickle juice. It is a carefully mixed dessert drink that balances strong sweet and sour flavors.


    Why You Will Love This Weird Drink


    You might be asking yourself why anyone would want to drink a frozen pickle. Here are the top reasons why this drink became a viral sensation:


    It Hydrates You: Pickle juice is packed with natural salt and electrolytes. Drinking this on a hot summer day cools you down and hydrates your body very fast.


    The Perfect Balance: If you get tired of drinking things that are way too sweet and sugary, this drink gives you a sharp, salty break.


    It is Fun to Share: Making this bright green drink for your friends or family is a hilarious experience. Everyone wants to take a sip just to see what it tastes like!


    What Does a Pickle Slush Actually Taste Like?


    If you have never had one, the taste is very hard to imagine. Let us break down the exact flavor profile for you.


    When you take your first sip, you immediately taste the cold, sugary sweetness of a normal ice slushie. It feels like you are drinking a sweet snow cone.


    But a second later, the sharp, tangy, and salty flavor of a dill pickle hits the back of your tongue. It tastes exactly like a sweet dill pickle chip. The sweetness stops the salt from burning your throat, and the sour vinegar makes your mouth water for another sip. It is a very strange, but wonderful, flavor rollercoaster.


    Simple Ingredients You Need


    To make this viral copycat recipe at home, you do not need any expensive syrups. You can make it using four basic things from your kitchen:

    Ingredients needed to make a pickle slush.


    Dill Pickle Juice: 1/2 cup of juice straight from your favorite jar of dill pickles. Do not use sweet pickle juice!


    White Sugar: 1/4 cup of plain white granulated sugar. This is what gives the slush its sweet dessert flavor.


    Water: 1/2 cup of clean, cold water to balance out the strong vinegar taste.


    Ice: 3 to 4 big cups of solid ice cubes to create the perfect frozen texture.


    Green Food Coloring (Optional): 2 tiny drops. Sonic’s drink is a bright neon green. Pickle juice is naturally a pale yellow-green. Food coloring gives it that famous fast-food look.


    How to Make the Sonic Pickle Slush at Home


    Making this drink is incredibly easy. Just follow these simple steps to get a perfectly smooth, restaurant-quality slushie.


    Step 1: Make the Sweet Pickle Base


    First, take a small bowl. Pour in your 1/2 cup of cold water and your 1/4 cup of white sugar. Stir it very well for about two minutes until the sugar completely melts into the water. This is your simple syrup.


    Step 2: Add the Pickle Power


    Now, pour your 1/2 cup of dill pickle juice into the sugar water. If you want the bright neon color, drop in two drops of green food coloring right now. Stir the green liquid until everything is mixed together.


    Step 3: Blend with Ice


    Take your kitchen blender. Pour your sweet green liquid into the bottom of the blender cup. Dump your 3 to 4 cups of ice directly on top of the liquid.


    Step 4: The Blending Secret


    Put the lid on tightly. Start your blender on the lowest speed. Let it run for 15 seconds to break the big ice cubes. Then, turn the blender up to high speed for 30 seconds. Stop blending when the mixture looks like smooth, green snow.


    Step 5: Pour and Enjoy


    Pour your freezing cold pickle slush into a tall glass. Stick a thick straw in the middle. You can even put a small pickle slice on the edge of the glass for a fun decoration!


    3 Viral Customizations to Try


    One of the best things about Sonic is combining different flavors. Here are three trending ways people upgrade their pickle slush:

    Spicy and lemonade variations of frozen pickle drinks.


    The Spicy Pickle Slush


    Do you love spicy snacks? Drop a small pinch of cayenne pepper or a few dashes of Mexican Tajín seasoning directly into your blender. It gives the sweet and sour ice a wonderful, fiery kick.


    The Pickle Lemonade Fusion


    Instead of using plain water in Step 1, use 1/2 cup of freshly squeezed lemonade. The sour lemon mixes perfectly with the salty pickle juice, making it taste like a premium sour candy.


    The Adult Pickle Margarita


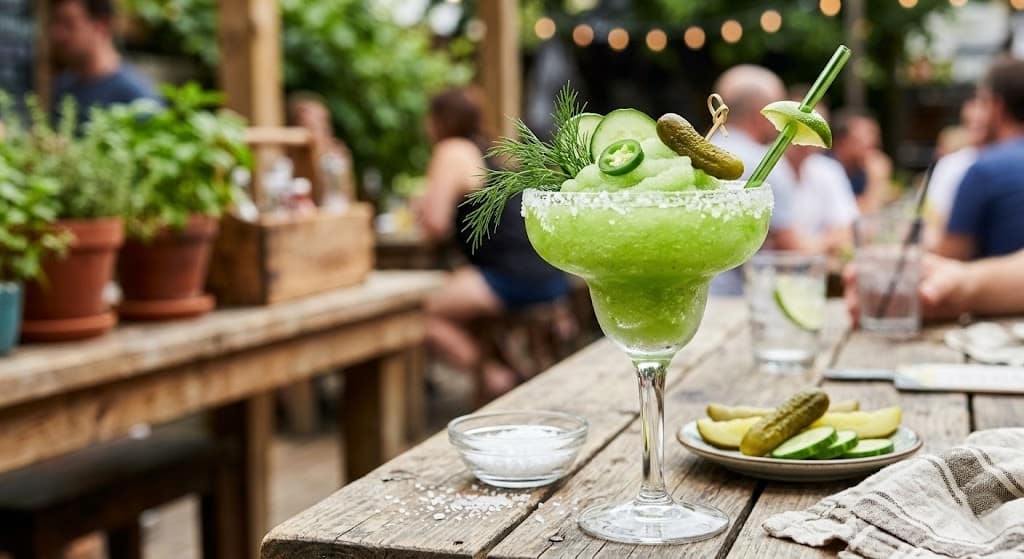
    If you are over 21, this makes an amazing party drink. Add 2 ounces of silver tequila and 1 ounce of triple sec to the blender. It turns the fast-food slushie into a savory, frozen pickle margarita!


    Expert Tips for the Perfect Slush Texture


    Sometimes making frozen drinks at home can be tricky. Here is how to fix common problems and get that perfect Sonic texture:


    Problem: The slush is too watery.

    • Solution: You did not use enough ice. Just drop one more handful of ice cubes into the blender and mix it again for ten seconds.


    Problem: The blender is stuck and not moving.

    • Solution: The mixture is too thick. Turn off the blender. Add one tablespoon of water or extra pickle juice to help the blades spin smoothly.


    Problem: It tastes too salty.

    • Solution: Every brand of pickles has a different amount of salt. If your drink is too strong, add one more spoonful of sugar and blend it in.


    Conclusion


    You no longer have to wait for Sonic to bring back their weirdest limited-time menu item. By mixing sweet sugar water with salty dill pickle juice and lots of ice, you can create the ultimate Pickle Slush right in your own kitchen. It is incredibly refreshing, cheap to make, and guaranteed to surprise anyone who tastes it. Grab your blender and mix up this bright green treat today!


    FAQs


    What kind of pickles should I use for this recipe?


    You must use classic dill pickles. Brands like Vlasic or Claussen work perfectly because they have a sharp, salty, and garlic-infused brine. Never use bread-and-butter pickles, as their warm spices will make the slush taste terrible.


    Is the Sonic Pickle Slush healthy?


    While it does not have any fat, it does contain a high amount of sodium from the pickle juice and a high amount of added sugar. It is best enjoyed as a fun, occasional treat rather than an everyday health drink.


    Can I freeze the liquid instead of blending it?


    Yes! If you do not have a strong blender, you can mix the pickle juice, water, and sugar together. Pour the liquid into an ice cube tray and freeze it. Once frozen solid, put the green ice cubes into a food processor to easily shave them into a snow-cone texture.

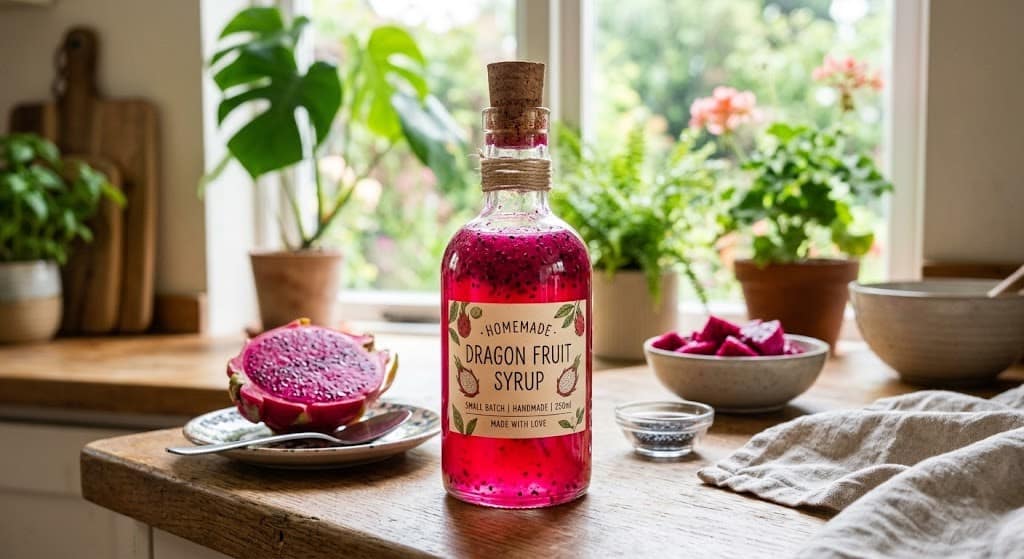
  • The Ultimate Homemade Dragon Fruit Syrup Recipe (Vibrant Magenta!)

    The Ultimate Homemade Dragon Fruit Syrup Recipe (Vibrant Magenta!)


    Editor’s Note


    Store-bought dragon fruit syrups are often expensive, hard to find, and packed with artificial chemicals. We spent a full week in our kitchen testing different types of pitaya (both fresh and frozen) to find the perfect formula. In this guide, we solve the biggest problem home baristas face: syrup turning a dull brown or losing its refreshing flavor after a couple of days. Simply follow our clear instructions to make a vibrant, hot-pink syrup that stays good for several weeks! 


    Are you looking to add a beautiful pop of pink color and a sweet tropical flavor to your morning drinks? You are exactly where you need to be. . Today, we are learning how to make the ultimate homemade dragon fruit syrup.


    This vibrant magenta liquid is taking over the beverage world. It is the secret ingredient behind your favorite cafe refreshers, tropical cocktails, and colorful boba drinks.


    The best part? Making it at home is incredibly simple, takes less than 15 minutes, and costs a fraction of the price of store-bought versions. Let us dive deep into this complete guide so you can master this viral ingredient today!


    What is Dragon Fruit Syrup?


    Dragon fruit syrup is a sweet, liquid sweetener infused with real dragon fruit (also known as pitaya). It is made by simmering the fruit with equal parts of sugar and water to draw out its natural juices.

    Dragon fruit itself has a beautifully subtle and refreshing flavor. Many people describe it as a delicate blend between a ripe pear, a kiwi, and a watermelon.

    When you turn this fruit into a concentrated simple syrup, the flavor deepens. It becomes a rich, sweet, and tropical mixer that instantly upgrades any drink it touches.


    Red vs. White Dragon Fruit: The Ultimate Color Secret


    If you have ever been to a grocery store, you know that dragon fruits come in different varieties. Choosing the wrong one is the main reason why people fail to get that beautiful neon-pink color. Here is what you need to know:


    White-Flesh Dragon Fruit: This variety has bright pink skin on the outside but pure white flesh with black seeds on the inside. Do not use this for syrup! It has a very mild flavor and will make your syrup look clear or a dull grey.


    Red/Pink-Flesh Dragon Fruit (Pitaya): This variety has dark red or bright pink flesh on the inside. This is the holy grail for syrup. It contains a high amount of natural pigments called betalains. This is what gives the syrup its stunning, glowing magenta hue.


    Pro Tip: If you cannot find fresh red-flesh dragon fruit in your local store, look in the supermarket freezer aisle! Frozen pink pitaya smoothie packets or frozen fruit chunks work perfectly and give an amazing, consistent color.


    5 Viral Ways to Use Dragon Fruit Syrup


    After storing a jar of this wonderful pink syrup in your fridge, you can create an endless variety of beverages. Here are the top trending ways people are using it right now:


    The Cafe Copycat Refresher


    Mix 2 tablespoons of your homemade syrup with cold green tea and a splash of white grape juice. Serve it over lots of ice for a delicious, refreshing afternoon pick-me-up.


    Tropical Dragon Lemonade


    Pour 2 ounces of the syrup into a tall glass of freshly squeezed, tart lemonade. The bright pink syrup swirling into the yellow lemonade looks absolutely beautiful and tastes like pure summer.


    The Neon Dragon Margarita


    Swap out regular simple syrup in your classic margarita recipe for dragon fruit syrup. It adds a lovely tropical sweetness that pairs beautifully with silver tequila and fresh lime juice.


    Pink Boba & Milk Tea


    Drizzle the thick pink syrup around the inside walls of a glass before adding your cooked tapioca pearls, ice, and cold milk. It creates a stunning, layered bubble tea experience.


    Bright Morning Mocktails


    Pour a splash of syrup into a glass of ice-cold sparkling water or club soda. Squeeze a fresh lime wedge on top for a healthy, bubbly, and low-calorie soda alternative.


    Simple Ingredients Checklist


    You only need three basic ingredients to create this gourmet mixology syrup.

    Fresh ingredients for making dragon fruit syrup.
    • Red Dragon Fruit: 1 cup of mashed fresh red dragon fruit, or 1 cup of thawed frozen pink pitaya chunks.
    • White Granulated Sugar: 1 cup of plain white sugar. White sugar keeps the pink color pure and bright. (Do not use brown sugar, or your syrup will turn muddy brown).
    • Water: 1 cup of clean, filtered water.
    • Fresh Lemon Juice: 1 teaspoon of fresh lemon juice. This is our secret weapon! The acid keeps the natural pink colors from fading and acts as a natural preservative.


    Step-by-Step Instructions (The Foolproof Hot-Process Method)


    Just follow these easy steps to get a perfectly clear, thick, and brightly colored syrup every single time.


    Step 1: Combine the Ingredients


    Take a small saucepan. Pour in your 1 cup of water and 1 cup of white sugar. Add your 1 cup of red dragon fruit pieces into the pot.


    Step 2: Simmer and Dissolve


    Place the saucepan over medium heat on your stove. Bring the liquid to a gentle boil, stirring occasionally with a spoon. Once it boils, lower the heat to a soft simmer. Allow the mixture to simmer for around 5 to 7 minutes. You will see the fruit pieces become pale as they release all their glorious pink juices into the sugar water.


    Step 3: Mash for Maximum Flavor


    Take a potato masher or the back of a large fork. Gently press down on the fruit pieces while they are simmering in the pot. This squeezes out every last drop of tropical flavor and natural color.


    Step 4: Add the Color Protectant


    Shut off the burner and take the pan off the stove. Stir in your 1 teaspoon of fresh lemon juice. Watch closely the acid will make the magenta color look even brighter and sharper instantly!


    Step 5: Strain and Cool


    Set a fine-mesh wire strainer over a clean glass jar or bowl. Slowly pour the warm syrup through the strainer to catch all the fruit pulp and black seeds. Let the clear pink liquid cool down completely at room temperature before closing the jar.

    Straining fresh pink syrup into a glass jar.


    Troubleshooting: How to Fix Common Syrup Problems


    Did your syrup not come out perfectly? Do not worry! Here is how you can fix any issue right away:

    • Problem: My syrup turned out too thin and runny.
      • The Fix: Put the syrup back into a clean saucepan and simmer it on low heat for an extra 3 to 5 minutes. This lets more water evaporate, making the liquid thicker.
    • Problem: The syrup looks cloudy or has white crystals.
      • The Fix: This means the sugar did not melt completely. Heat the syrup up gently with one tablespoon of extra water until the liquid becomes completely clear and smooth again.
    • Problem: The brilliant pink color is fading into a yellow-brown.
      • The Fix: This happens due to heat or light exposure. Make sure you added the lemon juice, and always store your syrup jar inside a dark, cold refrigerator, never out on a sunny countertop.


    Proper Storage Instructions for Maximum Freshness


    Because this is a completely fresh, homemade recipe with zero artificial preservatives, proper storage is key to keeping it safe and delicious.


    Always pour your cooled syrup into a thoroughly cleaned and sanitized glass jar with an airtight lid. Store the jar in the back of your refrigerator, where the temperature is the coldest and most stable.

    When stored correctly, your homemade dragon fruit syrup will stay perfectly fresh, sweet, and safe to consume for up to 3 to 4 weeks. Always use a clean spoon when scooping it out to prevent any spoilage!


    Conclusion


    Mastering the art of homemade syrups is the easiest way to elevate your home barista game. By combining real red dragon fruit with a simple sugar base and a touch of fresh citrus, you create a spectacular mixer that brings life, color, and tropical joy to any glass. Mix up a batch this weekend and start creating your own signature pink drinks!


    FAQs


    Can I leave the dragon fruit seeds inside the syrup?

    Yes, you can! If you are making boba tea or smoothies, keeping the tiny black seeds adds a lovely, authentic look. However, if you want a crystal-clear syrup for elegant cocktails or transparent lemonades, straining them out is best.


    Can I make this a sugar-free syrup?

    Absolutely. You can replace the white granulated sugar with an equal amount of a sugar-free sweetener like erythritol, monk fruit, or allulose. Keep in mind that sugar-free syrups are slightly thinner and should be consumed within 1 week as they spoil faster.


    Can I use this syrup as a pancake or waffle topping?

    Yes! If you want to use it as a thick dessert topping, simmer the syrup for an extra 5 minutes during the cooking process until it reaches a thick, honey-like consistency. It makes a beautiful, colorful breakfast treat!


    Why does my syrup taste slightly earthy?

    Dragon fruit grows on a cactus and naturally has a very mild, slightly earthy undertone. If you want to make it taste brighter and fruitier, simply add a splash of real passion fruit juice or raspberry extract to the mix.
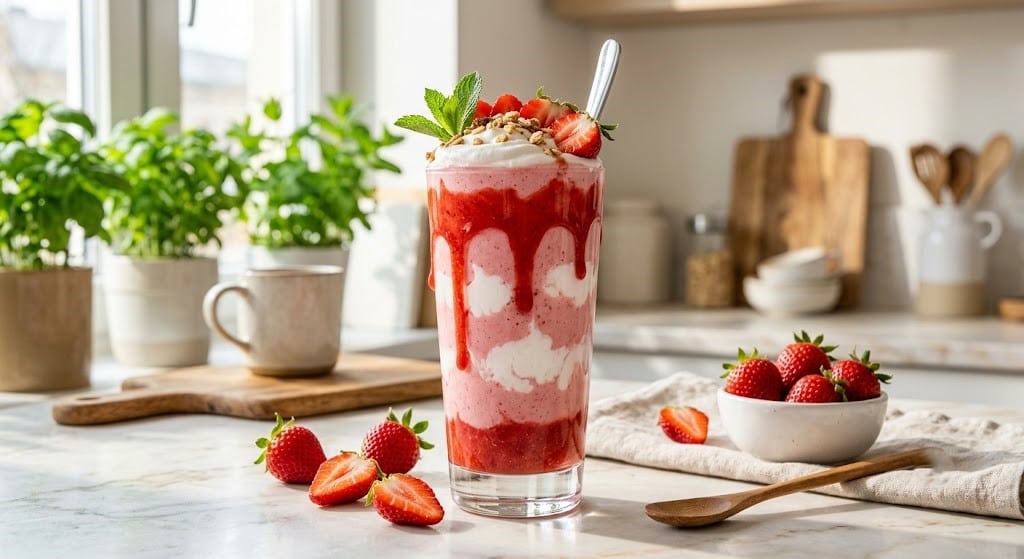
  • Lemon Drop Drink Recipe — Complete Blog Strategy

    Lemon Drop Drink Recipe — Complete Blog Strategy

    Main Keyword: lemon drop drink recipe Target Market: United States (English)


    PART 1: DEEP RESEARCH — Updated Data & Key Facts

    Origin & History (Storytelling Hook)

    • Inventor: Norman Jay Hobday, founder of Henry Africa’s bar in San Francisco, CA (opened 1969)
    • Invented: 1970s — during the Sexual Revolution era when women were first going to bars alone
    • Motivation: Attract female clientele with dessert-style drinks (“fern bar” concept)
    • Name Origin: Named after lemon drop hard candy — same sweet-sour flavor profile
    • Cultural Moments:
      • 2006: Oprah Winfrey made it on her show with Rachael Ray — massive popularity spike
      • 2019: Madonna referenced it in the song “Back That Up to the Beat” (album: Madame X)
      • 2024: Former UK PM John Major revealed he enjoyed Lemon Drops (BBC interview, Sept 2024)
    • Cocktail Family: Technically a “daisy” variant (not a true martini) — closest relatives: Margarita, Sidecar

    Classic Recipe — Tested Ratios

    IngredientAmount
    Vodka2 oz
    Fresh lemon juice3/4 oz
    Triple sec / Cointreau1/2 oz
    Simple syrup3/4 oz
    Sugar rimOptional but recommended

    Ratio Formula: ~3 parts spirit : 2 parts citrus : 1 part sweetener

    Popular Vodka Brands Mentioned in Community

    • Premium: Grey Goose, Ketel One, REYKA
    • Mid-range: Tito’s, Stolichnaya (Stoli), Absolut Citron
    • Budget: Smirnoff

    Trending Variations (2024–2026)

    1. Strawberry Lemon Drop (strawberry simple syrup swap)
    2. Blueberry / Raspberry Lemon Drop (muddled berries)
    3. Lavender Lemon Drop (lavender syrup — trending Spring 2026)
    4. Lemon Drop Shot (shooter version, no triple sec)
    5. Sparkling Lemon Drop (top with Prosecco)
    6. Lemon Drop Mocktail (club soda + lemon juice + syrup)
    7. Honey Lemon Drop (honey syrup instead of simple syrup)
    8. Lemon Drop with Gin (instead of vodka)
    9. Batch / Pitcher Lemon Drop (for parties — huge search demand)

    Nutritional Info (per serving)

    • Calories: ~180 kcal
    • Carbs: 14–18g (mostly sugar)
    • ABV: ~22–24% in the glass

    PART 2: COMPETITOR GAP ANALYSIS

    What Competitors Cover vs. What They Miss

    FeatureTito’sGrey GooseInspiredTaste
    Basic recipeYESYESYES
    Key ingredientsYESYESYES
    DirectionsYESYESYES
    Tips sectionNOYES (brief)YES
    History/originNONONO
    VariationsNONOYES (brief)
    Mocktail versionNONONO
    Batch/party recipeNONOYES (brief)
    Vodka comparisonNONONO
    Troubleshooting guideNONONO
    Nutrition/caloriesNONONO
    FAQs sectionNONONO
    Equipment guideNONONO
    Occasion/gifting tipsNONONO
    Storage/make-ahead tipsNONONO
    Lemon types explainedNONONO
    Word count~300 words~400 words~1,000 words

    10 Content Gaps — Your Opportunity

    1. No history or origin story — Oprah, Hobday, 1970s SF — nobody covers this compelling story
    2. No mocktail version — massive demand from pregnant women, sober-curious, designated drivers
    3. No troubleshooting guide — “too sour / too sweet / watered down” — top community complaints, zero coverage
    4. No neutral vodka comparison — Tito’s/Grey Goose are biased (they sell vodka). You can be neutral.
    5. No batch/pitcher recipe — party hosting is a top use case, barely covered
    6. No calorie or nutrition info — health-conscious readers want this; nobody provides it
    7. No equipment section — beginners without a cocktail shaker need alternatives
    8. No lemon variety explanation — Meyer lemons vs. regular lemons changes the drink completely
    9. No storage or make-ahead tips — how long can you refrigerate the mix? Nobody says.
    10. No seasonal/occasion angle — summer parties, bridal showers, girls’ night in — untapped

    PART 3: COMMUNITY PAIN POINTS

    Top 13 Real Pain Points from Readers & Comments

    1. “Mine came out too sour” — most common complaint, no fix given by competitors
    2. “Can I use bottled lemon juice?” — asked repeatedly
    3. “Which vodka should I use?” — beginners overwhelmed by choices
    4. “I don’t have a cocktail shaker” — need alternative equipment tips
    5. “How do I make it for a party?” — scaling recipe confuses people
    6. “Is there a non-alcoholic version?” — very common from pregnant women and sober guests
    7. “How many calories is in a lemon drop?” — health-conscious crowd asks this every time
    8. “Triple sec vs Cointreau — what’s the difference?” — readers unsure which to buy
    9. “How do I keep the sugar rim from melting?” — presentation problem nobody explains
    10. “My drink tastes watered down after shaking” — over-dilution issue with easy fix
    11. “Can I make it ahead of time?” — meal-preppers and hosts want advance prep info
    12. “Is a lemon drop a martini?” — confusion about cocktail classification
    13. “What glass if I don’t have a martini glass?” — practical substitution question

    PART 4: IDEAL CUSTOMER PROFILE (ICP)

    Primary Reader: “The Home Hostess”

    • Age: 25–42 years old
    • Gender: Primarily women (historically female-centric drink)
    • Location: US suburban/urban
    • Occasion: Girls’ night, bridal showers, summer parties, date nights
    • Skill level: Beginner to intermediate home bartender
    • Device: Mobile-first (searching on phone, often in kitchen)
    • Mindset: Wants to impress guests without complicated steps
    • Pain: Afraid of getting the sweet-sour balance wrong
    • Goal: Make a bar-quality drink at home that looks and tastes great

    Secondary Reader: “The Sober-Curious Explorer”

    • Age: 21–45, mixed gender
    • Interest: Dry January, pregnancy, health goals, designated driver
    • Need: A mocktail version that doesn’t feel like a lesser option
    • Goal: Participate in social settings without alcohol

    Secondary Reader: “The Party Planner”

    • Age: 28–50
    • Occasion: Bachelorette parties, birthday gatherings, summer BBQs
    • Need: Batch/pitcher recipe that scales easily
    • Goal: Prep cocktails in advance without running back to the bar all night

    PART 5: COMPLETE BLOG OUTLINE + WRITING PROMPTS

    Target Word Count: 1,800–2,200 words Tone: Friendly, knowledgeable, conversational


    H1: The Perfect Lemon Drop Drink Recipe (Classic, Batch & Mocktail)

    Meta Description: Learn how to make the perfect lemon drop drink recipe at home — with the classic version, party-sized batch, mocktail option, and expert tips to nail the sweet-sour balance every time.


    H2: What Is a Lemon Drop Drink?

    WRITING PROMPT: Write 2–3 short paragraphs explaining what a lemon drop is. Describe the flavor profile (sweet, sour, citrusy, refreshing). Clarify the common confusion — is it a martini? (Answer: No. It is a “daisy” category cocktail, just served in a martini glass, similar to how a Margarita is a daisy served in a wide glass.) Keep it approachable and engaging. End with a hook like: “Whether you’re hosting a girls’ night or just craving something citrusy after work, this is the recipe to bookmark.”


    H2: The Story Behind the Lemon Drop (The Oprah-Approved Cocktail)

    WRITING PROMPT: Tell the origin story in 150–200 words. Include these facts:

    • Norman Jay Hobday invented it at Henry Africa’s bar in 1970s San Francisco
    • It was a “fern bar” — a concept designed to attract women who were entering bars alone for the first time during the Sexual Revolution
    • The drink spread across San Francisco bars quickly and went nationwide
    • In 2006, Oprah Winfrey made it on her show with Rachael Ray and the drink’s popularity exploded
    • Madonna referenced it in a 2019 song Keep the tone fun and storytelling-oriented. This is your E-E-A-T hook — readers and Google both reward this kind of original context that competitors skip entirely.

    H2: Ingredients You’ll Need

    WRITING PROMPT: List all ingredients with a short “why it matters” note for each:

    • Vodka: Explain that a neutral, quality vodka works best. List 3 options at different price points — Grey Goose (premium), Tito’s (mid-range, most popular), Smirnoff (budget). Note that citrus-flavored vodka like Absolut Citron gives an extra lemon punch.
    • Fresh lemon juice: Emphasize this is non-negotiable. Bottled juice lacks brightness and tastes flat. Pro tip: squeeze lemons at room temperature for more juice.
    • Triple sec vs Cointreau: Explain the difference simply. Triple sec = affordable and accessible. Cointreau = more refined, stronger orange flavor, worth the upgrade for a special occasion.
    • Simple syrup: Tell readers they can make it in 2 minutes at home (equal parts sugar + warm water, stir until dissolved).
    • Sugar for the rim: Mention lemon zest mixed into sugar for an upgraded rim — a bartender trick nobody else mentions.

    Then add a short Equipment note:

    • Cocktail shaker (no shaker? Use a mason jar with a tight lid)
    • Jigger or measuring spoons
    • Fine mesh strainer
    • Chilled martini glass or coupe glass

    H2: How to Make a Lemon Drop Drink (Step by Step)

    WRITING PROMPT: Write 6–8 clear numbered steps:

    1. Place martini or coupe glass in freezer for 5–10 minutes to chill
    2. Make the sugar rim — rub a lemon wedge around the rim, then dip in granulated sugar (or lemon-zest sugar)
    3. Add vodka, lemon juice, triple sec, and simple syrup to a cocktail shaker filled with ice
    4. Shake hard for exactly 12–15 seconds until the outside of the shaker is very cold
    5. Double-strain through a fine mesh strainer into the chilled glass (removes ice shards for a smoother texture)
    6. Garnish with a lemon twist — express the oils over the glass by bending the peel skin-side down over the drink

    Add ONE Pro Tip callout box: “Always use fresh lemon juice. This single ingredient swap is the difference between a mediocre and a truly great lemon drop. Bottled juice makes the drink taste flat and slightly off.”


    H2: Lemon Drop Drink Recipe Card

    WRITING PROMPT: Create a structured recipe card (this will be your schema markup recipe block):

    • Prep time: 5 minutes
    • Servings: 1 cocktail
    • Calories: ~180 kcal
    • Ingredients with exact oz and ml measurements
    • Short numbered directions
    • Notes: can make simple syrup ahead, use superfine sugar for a smoother rim, taste before serving

    H2: How to Balance Sweet and Sour (Troubleshooting Guide)

    WRITING PROMPT: This section directly addresses the #1 community pain point. Write it as a problem → fix list:

    Problem: Too sour Fix: Add 1/4 oz more simple syrup. Stir gently and taste. Repeat until balanced.

    Problem: Too sweet Fix: Squeeze in a bit more lemon juice, about 1/4 oz extra. Too-sweet drinks usually just need more acid.

    Problem: Drink tastes too strong Fix: Reduce vodka to 1.5 oz or add a tiny splash of still water to the shaker before straining.

    Problem: Drink tastes watered down Fix: You over-shook. 12–15 seconds is the sweet spot. More than that and ice dilutes the drink.

    Problem: Sugar rim keeps falling off or dissolving too fast Fix: Only rub the lemon wedge once around the rim. Over-wetting causes excess sugar to slide off. Dip immediately after wetting.

    Note at the end: “This troubleshooting section is what separates a good recipe blog from a great one. Once you understand why each problem happens, you can fix any batch — at home or for a crowd.”


    H2: Lemon Drop Drink Variations (6 Twists to Try)

    WRITING PROMPT: Cover 6 variations in a scannable format — name, what changes, and a one-line flavor description:

    1. Strawberry Lemon Drop — Swap simple syrup for strawberry simple syrup. Bright, berry-forward twist that looks beautiful in the glass.
    2. Blueberry Lemon Drop — Muddle 5–6 fresh blueberries in the shaker before adding ice. Deep purple color, naturally sweet.
    3. Lavender Lemon Drop — Use lavender simple syrup (trending Spring 2026). Floral, elegant, perfect for bridal showers.
    4. Sparkling Lemon Drop — Skip straining into a clean glass; top with Prosecco instead. Lighter, festive, effervescent.
    5. Lemon Drop Shot — Same recipe minus the triple sec, served in a chilled shot glass. Dip a lemon wedge in sugar and use it as a chaser.
    6. Meyer Lemon Drop — Use Meyer lemons instead of regular lemons. They are sweeter, more floral, and less acidic — you may need slightly less simple syrup.

    Add a note: “Meyer lemons are worth trying if you can find them. The flavor is softer and almost perfumed — completely different drink.”


    H2: Lemon Drop Mocktail (Non-Alcoholic Version)

    WRITING PROMPT: Write a complete mocktail version in 100–150 words:

    • Ingredients: 1.5 oz fresh lemon juice, 1 oz simple syrup, 3 oz club soda or sparkling water, sugar rim
    • Steps: Add lemon juice and simple syrup to shaker with ice. Shake 10 seconds. Strain into chilled glass. Top with sparkling water. Garnish with lemon twist.
    • Optional: Use Seedlip Grove 42 or Ritual Gin Alternative for a more sophisticated non-alcoholic base.
    • End with: “This version is perfect for pregnant guests, designated drivers, and anyone doing Dry January — and it looks just as impressive in the glass as the original.”

    H2: Pitcher Recipe — Lemon Drops for a Party (Serves 8)

    WRITING PROMPT: Write a batch recipe section with:

    • Ingredients scaled to 8 servings: 2 cups (16 oz) vodka, 3/4 cup (6 oz) Cointreau, 1 cup (8 oz) fresh lemon juice, 3/4 cup (6 oz) simple syrup
    • Instructions: Mix all in a large pitcher. Do NOT add ice. Refrigerate for up to 24 hours.
    • At serving time: Pour individual portions into an ice-filled shaker, shake 10 seconds, strain into sugar-rimmed glass.
    • Pro tip callout: “Never batch with ice. Ice in the pitcher dilutes the whole batch and ruins the balance. Always shake to order.”

    H2: Frequently Asked Questions

    WRITING PROMPT: Answer these 5 questions in 2–4 sentences each:

    Q1: Can I use bottled lemon juice? A: Technically yes, but the drink will taste noticeably flat. Bottled juice lacks the aromatic brightness of fresh lemon. If you must use it, choose a cold-pressed juice brand rather than concentrate.

    Q2: What is the difference between Triple Sec and Cointreau? A: Both are orange liqueurs, but Cointreau is higher quality with a cleaner, more pronounced orange flavor. Triple sec is cheaper and more widely available — it works great in a casual lemon drop. Save Cointreau for when you want to impress.

    Q3: What glass should I use if I don’t have a martini glass? A: A coupe glass is the next best option. A regular wine glass or even a short rocks glass with ice works fine too. The martini glass is for presentation, not flavor.

    Q4: How many calories are in a lemon drop? A: Approximately 180 calories per serving, similar to a glass of wine. Most of the calories come from the vodka and simple syrup.

    Q5: Is a lemon drop a martini? A: Not technically. A true martini is gin and vermouth. The lemon drop is a “daisy” cocktail — it is just served in a martini glass, which is where the name confusion comes from.


    H2: What to Serve with a Lemon Drop

    WRITING PROMPT: Short section (80–100 words) with food pairing suggestions. Examples:

    • Shrimp cocktail or prawn skewers (citrus drinks and seafood pair perfectly)
    • Bruschetta or caprese skewers (light, fresh flavors)
    • Cheese boards with mild cheeses like brie or goat cheese
    • Lemon tarts or shortbread cookies (if you want to lean into the lemon theme)
    • Light pasta salads or summer rolls End with: “The lemon drop is naturally a palate cleanser, so it pairs best with light, fresh appetizers rather than heavy, fatty foods.”

    H2: Final Tips for the Perfect Lemon Drop Every Time

    WRITING PROMPT: Quick-fire tip list (6 bullets, each with a one-sentence reason):

    • Always chill your glass before pouring — a warm glass dilutes the drink faster
    • Use superfine sugar for the rim — it sticks better and dissolves evenly with each sip
    • Squeeze lemons at room temperature — they yield 30% more juice than cold lemons
    • Double-strain every time — removes tiny ice shards for a silky smooth result
    • Taste before you pour — adjust sweet/sour balance in the shaker, not in the glass
    • Express a lemon twist garnish over the drink — the citrus oils lift the aroma and make the first sip exceptional

    PART 6: FUTURE UPDATE CHECKLIST

    (Use this to refresh the blog every 3–6 months)

    • [ ] Add a short video embed (reel or YouTube tutorial) — increases dwell time significantly
    • [ ] Add seasonal variations: Cranberry Lemon Drop (holiday), Watermelon Lemon Drop (summer)
    • [ ] Add a comparison table: Lemon Drop vs Cosmopolitan vs Gimlet (related keyword targeting)
    • [ ] Update year in title tag if needed (e.g. add “2026” or “Easy Home Recipe” modifier)
    • [ ] Add Pinterest-optimized hero image with text overlay
    • [ ] Collect and add user-submitted photos for UGC trust signals
    • [ ] Add a “Jump to Recipe” button at the top for mobile users (reduces bounce rate)
    • [ ] Consider schema markup: Recipe schema + FAQ schema (both in one article = rich results)

    Strategy prepared for: Lemon Drop Drink Recipe Blog Primary Keyword: lemon drop drink recipe | Target: US SERP Competitors analyzed: greygoose.com, inspiredtaste.net, titosvodka.com Research date: May 2026