Blog

  • The Ultimate Homemade Pumpkin Spice Latte Recipe (Better Than the Coffee Shop)

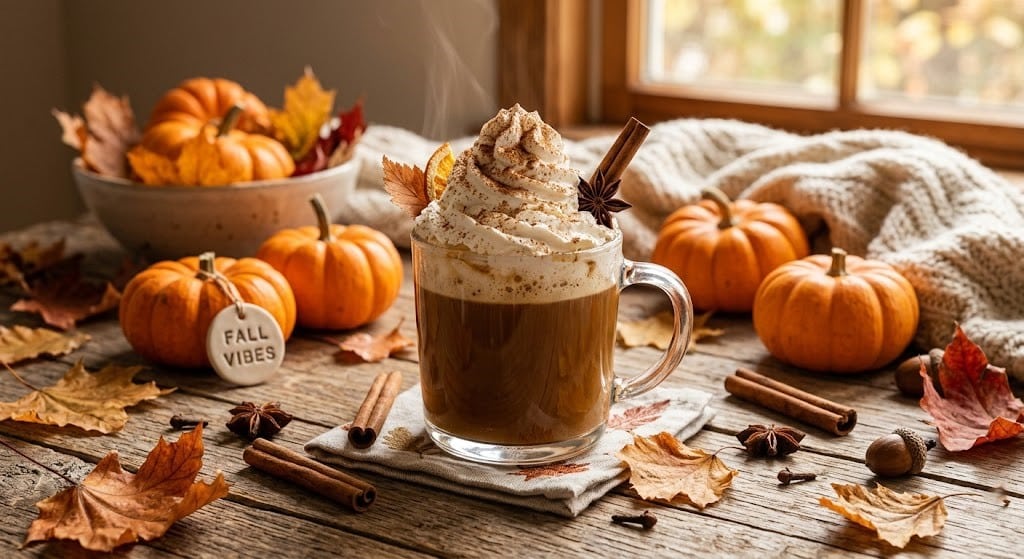
    The Ultimate Homemade Pumpkin Spice Latte Recipe (Better Than the Coffee Shop)


    Editor’s Note


    As a beverage recipe developer, I used to wait all year for coffee shops to release their fall menus. But once I realized the commercial versions often rely on artificial syrups with zero actual pumpkin, I started experimenting in my own kitchen. After testing dozens of spice ratios and milk-to-espresso combinations, I created a rich, authentic pumpkin syrup that tastes like a cozy fall day in a mug. It is naturally sweet, perfectly spiced, and completely customizable.


    As soon as the leaves begin to change color and the air turns crisp, the entire world craves one specific beverage. The iconic fall drink has built a massive cult following over the last two decades. But spending $6 to $7 every single day on a commercial coffee shop version can quickly drain your wallet.


    Fortunately, learning how to make the perfect pumpkin spice latte recipe at home is incredibly easy. The secret lies in making your own natural pumpkin syrup. Unlike the fast-food versions that use heavily processed flavorings, this homemade recipe uses real pumpkin puree and aromatic autumn spices.


    Why Make Your Own Pumpkin Spice Latte?


    Before we get to the brewing process, it is important to understand why the homemade version is superior.


    Real Ingredients: You control exactly what goes into your cup. By using 100% real pumpkin puree, you get authentic flavor and actual nutritional benefits.


    Massive Savings: A homemade latte costs less than $1 per cup. If you drink one daily during the fall season, you will save hundreds of dollars.


    Adjustable Sweetness: Commercial drinks are notoriously loaded with sugar. At home, you can easily tweak the sweetness level or use sugar-free alternatives like Stevia or monk fruit.


    If you love sweet, creamy coffee toppings, try adding our homemade  Sweet Cream Cold Foam Recipes  on top of your iced PSL!


    The Secret: Homemade Pumpkin Spice Syrup


    The foundation of an incredible latte is the syrup. Do not buy the pre-made bottles from the grocery store. Making it on your stove takes less than 10 minutes, and the batch will last you all week.

    Ingredients for homemade pumpkin spice syrup with real puree.


    Syrup Ingredients:

    • 1/2 cup water
    • 1/2 cup granulated sugar (or brown sugar for a deeper caramel flavor)
    • 1/3 cup real pumpkin puree (do not use pumpkin pie filling)
    • 1 tablespoon pumpkin pie spice (a blend of cinnamon, nutmeg, ginger, and cloves)
    • 1 teaspoon pure vanilla extract


    How to Make the Syrup:

    1. Add the water and sugar to a small saucepan over medium heat. Stir until the sugar completely dissolves.
    2. Whisk in the pumpkin puree and the pumpkin pie spice.
    3. Allow the mixture to gently simmer for 5 minutes. This cooks the pumpkin slightly and extracts the oils from the spices.
    4. Remove the pan from the heat and stir in the vanilla extract.
    5. Let it cool, then store it in an airtight glass jar in the refrigerator. For a completely smooth syrup, strain it through a fine-mesh sieve first.
    Stirring homemade pumpkin puree syrup in a saucepan


    Ingredients for the Perfect Latte


    Now that you have your liquid gold pumpkin syrup, it is time to assemble the actual beverage.

    • 2 tablespoons of homemade pumpkin spice syrup (add more if you have a sweet tooth)
    • 2 shots of freshly brewed espresso (or 1/2 cup of very strong, dark roast coffee)
    • 1 cup of whole milk (whole milk provides the best micro-foam, but 2% works well)
    • Whipped cream and extra cinnamon (for garnishing)


    Step-by-Step Brewing Instructions


    Creating café-quality espresso drinks at home is all about the assembly order. Follow these steps for the perfect hot latte.


    Brew the Espresso: Start by pulling two shots of fresh espresso. If you do not have an espresso machine, use a Moka pot, an Aeropress, or brew a very strong half-cup of dark roast coffee.


    Mix the Base: Pour the hot espresso directly into your favorite mug. Immediately stir in your desired amount of homemade pumpkin syrup. The heat from the coffee helps meld the flavors together.


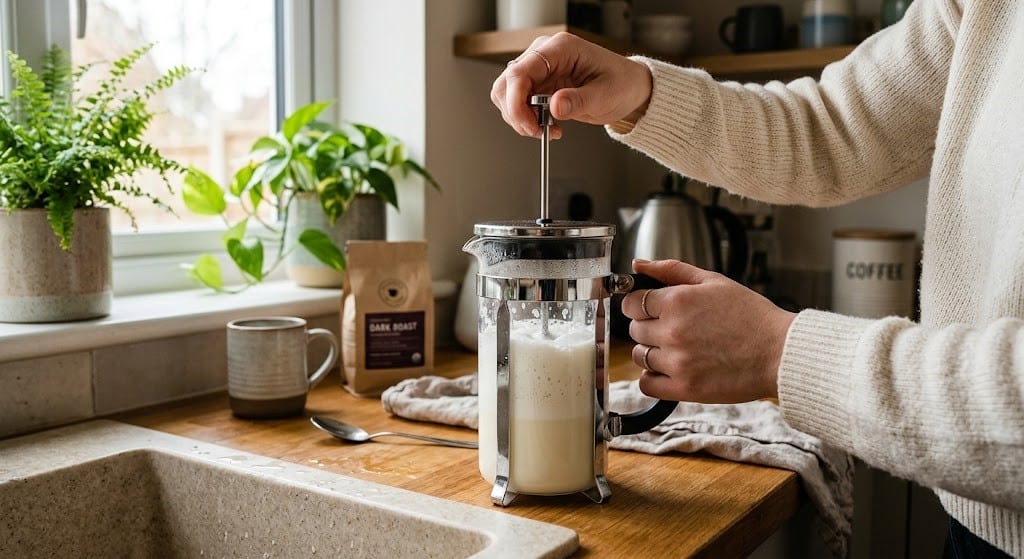
    Steam and Froth the Milk: Heat your milk on the stove or in the microwave until it is steaming but not boiling (around 150°F). Use a handheld milk frother or a French press to whisk the milk until it is thick and foamy.


    Pour and Combine: Slowly pour the frothy hot milk over the espresso and syrup mixture.


    Garnish: Top your mug with a generous mountain of whipped cream and a light dusting of pumpkin pie spice or cinnamon. Serve immediately!


    Looking for another visually stunning treat? Pair your morning coffee with our highly requested Dunkin Refreshers Recipe for a midday energy boost!


    Trending Variations: Iced and Dairy-Free


    The beauty of this recipe is its versatility. Here are the most highly searched ways to customize your drink.

    Iced pumpkin spice latte with sweet cream cold foam.


    The Iced Pumpkin Spice Latte 


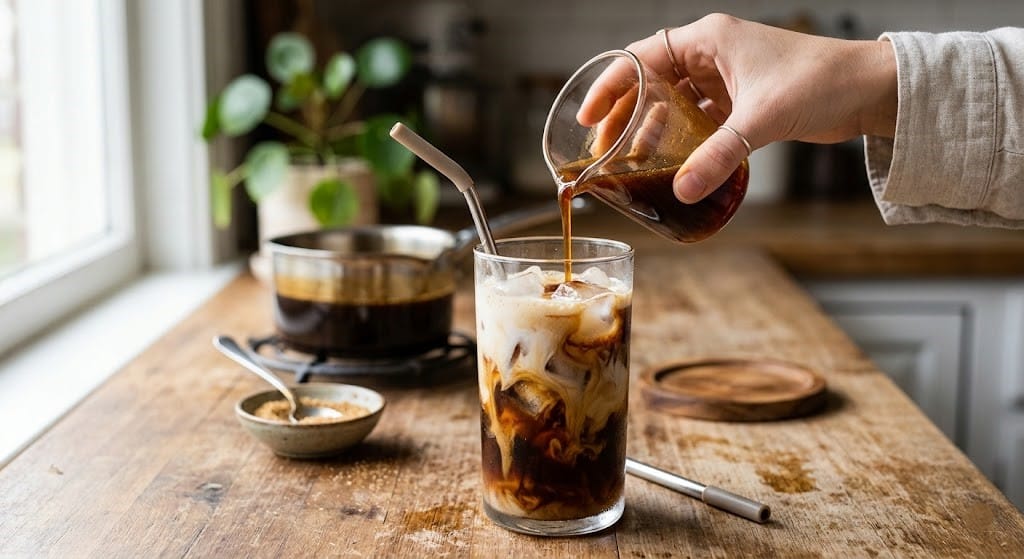
    Fall weather can be unpredictable. If it is still 80 degrees outside, an iced version is essential. Simply fill a tall glass with ice. Add your pumpkin syrup and cold milk, then stir. Finally, pour two shots of freshly brewed espresso over the top and watch the beautiful layers mix together.


    The Dairy-Free Vegan PSL 


    Traditional coffee shops often use a pumpkin sauce that contains dairy, meaning vegans cannot enjoy the real thing. Your homemade syrup is completely dairy-free! To make the latte entirely plant-based, swap the whole milk for a barista-blend oat milk or creamy almond milk. Top it with coconut whipped cream.


    Conclusion


    You do not need to wait for a specific date on the calendar to enjoy your favorite autumn flavors. By taking a few minutes to prepare a fresh, real-pumpkin syrup, you can elevate your morning routine with a café-quality beverage that is healthier, cheaper, and more delicious than the drive-thru versions. Gather your favorite spices, brew some fresh espresso, and enjoy the ultimate cozy cup today!


    FAQs


    How long does the homemade pumpkin syrup last? 

    When stored in an airtight glass container (like a mason jar) in the refrigerator, the homemade pumpkin spice syrup will stay fresh for up to 7 to 10 days.

    Can I use pumpkin pie filling instead of pumpkin puree? 

    No. Pumpkin pie filling is already heavily sweetened and spiced. Using it will make your latte far too sweet and throw off the flavor balance. Always use 100% pure canned pumpkin puree.

    Do I need an espresso machine to make this? 

    Not at all! While espresso provides a rich, concentrated coffee flavor, you can easily substitute it with a half-cup of extra-strong brewed coffee or even high-quality instant espresso powder mixed with hot water.

    Why is my milk not frothing properly? 

    If your milk is not getting foamy, it might be too hot or lack fat. Whole milk and barista-blend oat milks froth the best. Also, ensure you do not heat the milk past 160°F, as scalding destroys the proteins needed for foam.

    Is the pumpkin spice latte gluten-free? 

    Yes! All the ingredients in this homemade recipe pumpkin puree, sugar, spices, coffee, and milk are naturally gluten-free.
  • Exact Dunkin Refreshers Recipe: Make All 3 Flavors at Home

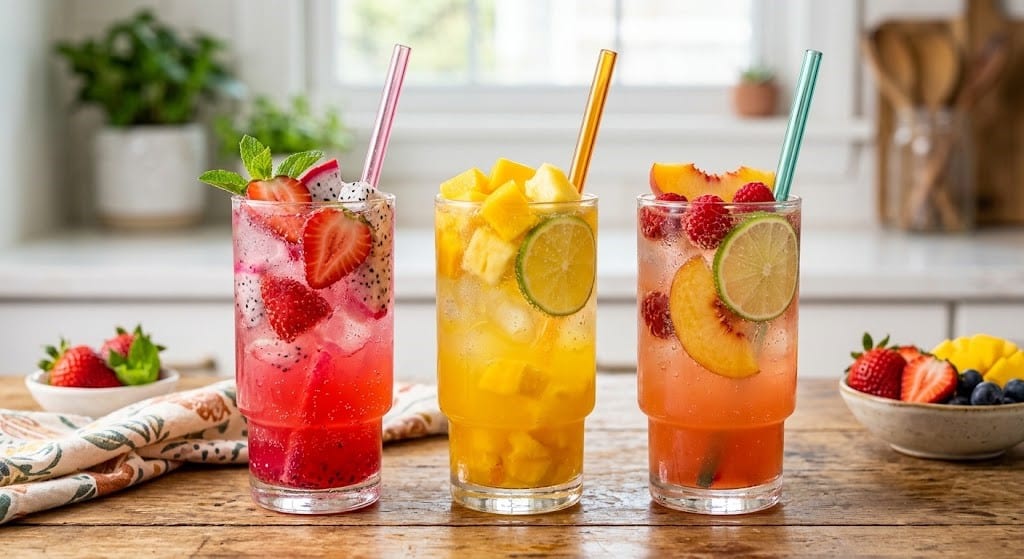
    Exact Dunkin Refreshers Recipe: Make All 3 Flavors at Home


    Editor’s Note


    As a beverage recipe developer, I noticed that most online tutorials just tell you to mix fruit juice with brewed green tea. That is not how the fast-food chain does it! Authentic Dunkin Refreshers get their signature zing from a concentrated fruit syrup mixed with green tea extract and B vitamins. I have spent weeks reverse-engineering their exact liquid concentrate so you can enjoy that authentic, lightly caffeinated, perfectly sweet café taste in your own kitchen.


    They are sweet, slightly tangy, and provide the perfect mid-day energy boost without the heavy jitters of dark roast coffee. But visiting the drive-thru every day quickly drains your wallet. At nearly $5 a cup, a daily habit can cost you over $1,800 a year.


    Fortunately, mastering the Dunkin Refreshers recipe at home is incredibly simple once you know the secret ingredient formula. You do not need expensive barista equipment. By prepping a simple fruit and green tea concentrate in advance, you can whip up a café-quality drink in under 30 seconds.


    The Secret Ingredient: Green Tea Extract


    The biggest misconception about Dunkin Refreshers is that they are made with freshly brewed green tea. If you simply brew a bag of green tea and pour fruit juice over it, your drink will taste watered down and earthy.

    Ingredients for the Dunkin refresher green tea extract base.


    The fast-food chain actually uses a liquid fruit concentrate that is infused with green tea extract and B vitamins. This is what gives the drink its bright, sweet flavor and a gentle dose of caffeine (about 60mg per medium cup) without any bitter tea aftertaste.


    To replicate this at home, you need liquid green tea extract. You can easily find alcohol-free liquid green tea extract online or at local health food stores. Just a few drops will give you that authentic energy boost.


    If you love caffeinated, creamy fruit drinks, you can also easily add [Sweet Cream Cold Foam] on top of these refreshers for a decadent twist!


    1. Strawberry Dragonfruit Refresher Recipe


    This is the most highly searched and universally loved flavor on the menu. It is bright pink, refreshing, and perfectly balances the sweetness of strawberries with the tropical tartness of dragonfruit.

    Pouring a pink Strawberry Dragonfruit Dunkin refresher over ice.


    Ingredients for the Strawberry Base:

    • 1 cup white granulated sugar
    • 1 cup water
    • 1 cup chopped fresh or frozen strawberries
    • 1 tablespoon freeze-dried dragonfruit powder (crucial for that neon pink color)
    • 1/2 teaspoon liquid green tea extract


    The Mixing Ingredients:

    • 1 cup cold filtered water (or green tea if you want extra caffeine)
    • Ice cubes
    • Freeze-dried dragonfruit pieces for garnish


    Step-by-Step Instructions:


    Make the Syrup: In a small saucepan, combine the sugar, water, and chopped strawberries. Simmer over medium heat for 10 minutes until the strawberries break down and the liquid becomes thick and syrupy.


    Strain and Color: Strain the mixture through a fine-mesh sieve into a glass jar, discarding the strawberry chunks. While the syrup is still warm, whisk in the dragonfruit powder until fully dissolved.


    Add the Energy: Once the syrup has completely cooled, stir in the liquid green tea extract. This is your master concentrate.


    Assemble the Drink: Fill a tall glass with ice. Pour 1/4 cup of your homemade strawberry dragonfruit concentrate over the ice. Fill the rest of the glass with cold filtered water, stir well, and garnish with freeze-dried dragonfruit pieces.


    Love vibrant pink aesthetic drinks? Check out our viral guide on how to make the ultimate [Starbucks Pink Drink Copycat] right at home!


    2. Peach Passion Fruit Refresher Recipe


    If you prefer a drink with a tangy, tropical bite, the Peach Passion Fruit variation is exactly what you need. It has a beautiful glowing orange color and a refreshing, tart finish.

    Homemade iced Peach Passion Fruit refresher in a mason jar.


    Ingredients for the Peach Base:

    • 1 cup white granulated sugar
    • 1 cup water
    • 1 cup chopped peaches (fresh or frozen)
    • 1/4 cup passion fruit puree (or passion fruit juice)
    • 1/2 teaspoon liquid green tea extract


    The Mixing Ingredients:

    • 1 cup cold filtered water
    • Ice cubes


    Step-by-Step Instructions:

    1. Boil the Peaches: Combine the sugar, water, and chopped peaches in a saucepan. Bring to a gentle simmer for 10 minutes.
    2. Strain the Syrup: Pour the hot mixture through a strainer into a mason jar to remove the peach solids.
    3. Add the Tropical Flavor: Stir the passion fruit puree into the smooth peach syrup. Let it cool completely in the refrigerator.
    4. Add the Extract: Once chilled, mix in the liquid green tea extract.
    5. Serve: Add ice to a glass, pour in 1/4 cup of the peach passion concentrate, top with cold water, and stir vigorously.


    3. Mango Pineapple Refresher Recipe


    This flavor tastes like a summer vacation in a cup. The rich sweetness of the mango pairs flawlessly with the sharp, acidic bite of fresh pineapple.


    Ingredients for the Mango Base:

    • 1 cup white granulated sugar
    • 1 cup water
    • 1/2 cup diced mango
    • 1/2 cup diced pineapple
    • 1/2 teaspoon liquid green tea extract


    The Mixing Ingredients:

    • 1 cup cold filtered water
    • Ice cubes


    Step-by-Step Instructions:


    Simmer the Fruit: Add the sugar, water, mango, and pineapple to a small pot. Let it simmer on medium-low heat until the fruit is very soft and the liquid reduces to a syrup.

    Strain: Run the mixture through a fine-mesh strainer into a clean jar.

    Cool and Caffeinate: Allow the tropical syrup to cool completely before stirring in the green tea extract.

    Assemble: Fill your glass to the brim with ice, add your desired amount of concentrate (usually 3 to 4 tablespoons), and top with chilled water.


    Pro Tips for the Best Experience


    To ensure your homemade versions taste exactly like the drive-thru originals, keep these barista secrets in mind:


    The Coconut Milk Hack: Dunkin offers a “Coconut Refresher” version for all these flavors. To make this at home, simply replace the 1 cup of cold mixing water with 1 cup of unsweetened coconut milk. Shake vigorously to prevent separation.


    Storage Rules: Your homemade fruit concentrates will last for up to two weeks in the refrigerator when stored in an airtight glass mason jar.


    Adjusting Sweetness: The fast-food versions are incredibly sweet. The beauty of making this at home is that you control the sugar. If you prefer a lighter drink, simply use less of the fruit concentrate in your final glass.


    You no longer have to wait in long morning lines or spend premium prices for a refreshing, caffeinated fruit drink. By preparing these simple green tea infused fruit concentrates over the weekend, you can enjoy a flawless Strawberry Dragonfruit, Peach Passion Fruit, or Mango Pineapple refresher anytime you want. Gather your ingredients, prep your syrups, and elevate your afternoon hydration routine instantly!


    FAQs


    Do Dunkin Refreshers have caffeine in them? 

    Yes. A medium size contains about 60 to 70 milligrams of caffeine. This comes entirely from the green tea extract mixed into the fruit concentrate, not from brewed coffee or traditional tea bags.


    Can I use brewed green tea instead of extract? 

    You can, but it will change the flavor profile. Brewed green tea adds an earthy, slightly bitter taste and waters down the fruit flavor. Liquid green tea extract provides the caffeine and health benefits without altering the sweet, fruity taste.


    Why is my Strawberry Dragonfruit drink not bright pink? 

    The vibrant neon pink color of the original drink comes from freeze-dried dragonfruit powder. If you only use strawberries, the drink will be a pale red. You can easily order dragonfruit powder online to achieve that authentic aesthetic.


    Are these recipes vegan? 

    Yes! All of the ingredients used in these fruit concentrates are 100% vegan. If you choose to mix the concentrate with milk instead of water, just ensure you use a plant-based option like coconut milk or oat milk.


    How do I stop the coconut milk from curdling? 

    The acid in the fruit syrups can sometimes cause coconut milk to separate. To prevent this, always pour the coconut milk over the ice first, and then slowly pour the fruit concentrate on top. Stir gently.

  • The Ultimate Homemade S’mores McFlurry Recipe (No Ice Cream Machine Needed!)

    The Ultimate Homemade S’mores McFlurry Recipe (No Ice Cream Machine Needed!)


    Editor’s Note


    When McDonald’s first released the S’mores McFlurry, it instantly became the ultimate summer dessert. However, recreating it at home is tricky. Most people just throw dry marshmallows into ice cream, which turn into hard, freezing rocks that hurt your teeth! We spent the whole weekend testing different methods. We found that using a mix of toasted marshmallow syrup and crushed graham crackers creates the exact creamy, campfire flavor without the hard chunks. Follow our exact guide to get a perfectly blended, soft-serve dessert in just five minutes.

    The Ultimate Homemade S’mores McFlurry Recipe (No Ice Cream Machine Needed!)


    Do you love the taste of a warm campfire treat but also crave freezing cold ice cream? You have come to the perfect place. Today, we are going to learn how to make the famous McDonald’s S’mores McFlurry right in your own kitchen.


    When this amazing dessert hit the fast-food menu, it sold out everywhere. People loved the mix of creamy vanilla, crunchy graham crackers, and rich chocolate. Sadly, it was only a limited-time item, and fans have been begging for its return ever since.


    The good news is that you do not have to wait for McDonald’s to bring it back. You also do not need an expensive commercial ice cream machine to make it. With a few simple ingredients and a clever mixing trick, you can enjoy this thick, sweet treat anytime you want. Let us get started!


    Why Did McDonald’s Discontinue the S’mores McFlurry?


    If this dessert was so popular, why did it leave the menu? This is one of the most highly searched questions on Google.

    McDonald’s often creates special seasonal items to keep their menu exciting. The S’mores flavor was designed as a “Summer Only” promotion. The ingredients, like special chocolate chunks and marshmallow syrup, took up extra space in the kitchen.

    When summer ended, they removed it to make room for fall and winter flavors. But because it is so easy to make at home, you can easily enjoy this summer classic all year long!


    Simple Ingredients You Need for This Campfire Treat


    You only need five basic ingredients to recreate this masterpiece. You probably already have most of these in your pantry right now!

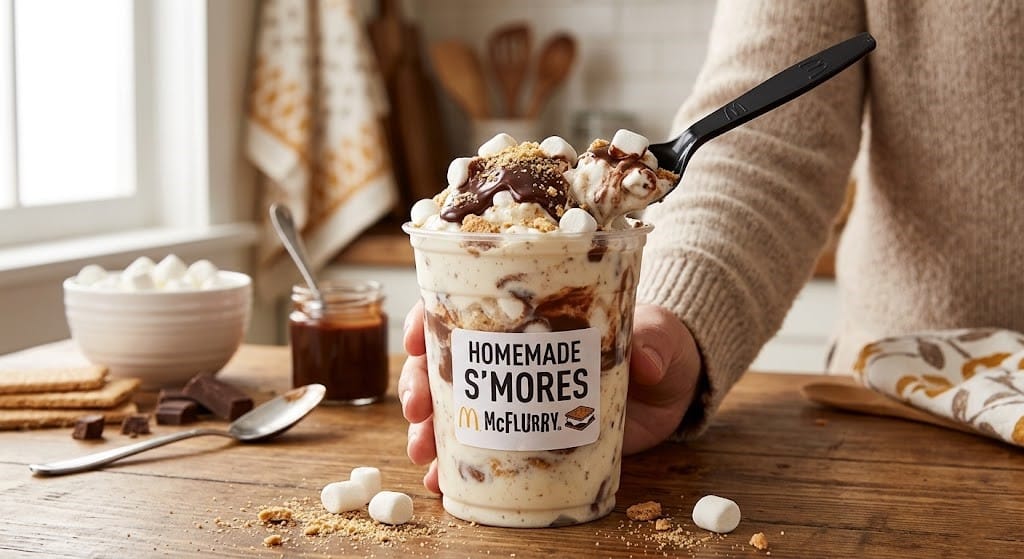
    Ingredients for a homemade S'mores McFlurry.


    Vanilla Ice Cream: 2 big scoops of high-quality vanilla ice cream. Let it sit on the counter for 5 minutes so it gets a little bit soft.

    Graham Crackers: 1 full sheet of honey graham crackers. This gives the McFlurry its signature pie-crust crunch.

    Chocolate Chunks: 2 tablespoons of semi-sweet chocolate chunks or mini chocolate chips.

    Marshmallow Fluff (The Secret Ingredient!): 1 big tablespoon of marshmallow creme (fluff). Do not use regular mini marshmallows, because they will freeze hard as rocks in the cold ice cream!

    Whole Milk: Just 1 tablespoon of cold milk to help everything blend smoothly.

     If you are serving this dessert at a party and need a great cold drink to go with it, check out our amazing Dunkin Frozen Hot Chocolate Copycat Recipe!


    Step-by-Step Instructions: How to Make a S’mores McFlurry


    Making a McFlurry at home is all about the mixing technique. You want it to be thick enough to eat with a spoon, not thin like a milkshake. Follow these exact steps for the best texture.


    Step 1: Crush the Graham Crackers


    Put your graham cracker sheet into a small plastic zip-top bag. Use a rolling pin or the bottom of a heavy cup to smash the cracker. You want small, crunchy pieces, not fine dust.


    Step 2: Soften the Ice Cream


    Put your 2 big scoops of vanilla ice cream into a large metal or glass mixing bowl. Add your 1 tablespoon of cold milk. Use a strong metal spoon to mash and stir the ice cream until it looks like a thick, smooth soft-serve.


    Step 3: Add the S’mores Flavors


    Now, add your crushed graham crackers, chocolate chunks, and the sticky marshmallow fluff right on top of the soft ice cream.


    Step 4: The Fold and Swirl Technique


    Do not use a blender! A blender will turn your dessert into soup. Instead, use your spoon to gently fold the ingredients into the ice cream. Swirl it around 5 or 6 times so there are thick ribbons of marshmallow and chocolate in every single bite.


    Step 5: Freeze and Serve


    Spoon your thick mixture into a tall cup. If it got a little too soft while mixing, put the cup in the freezer for exactly 5 minutes to firm up. Serve it immediately with a long spoon!


    Pro Tips for the Perfect McFlurry Texture


    Many homemade desserts melt way too fast. Here is how you can solve common ice cream problems like a pro:


    Chill Your Bowl: Before you start making your dessert, put your empty mixing bowl and your serving cup into the freezer for 15 minutes. A freezing cold bowl stops the ice cream from melting while you stir in the toppings.


    Toasted Flavor Trick: If you want an authentic campfire flavor, use a kitchen torch to carefully toast the marshmallow fluff on a piece of foil for 10 seconds before adding it to your ice cream.


    Avoid Over-mixing: The more you stir, the thinner the ice cream gets. Only stir until the toppings are just mixed in.


    Trending Customizations to Try Today


    The best part about being your own fast-food chef is that you can upgrade the recipe. Here are three highly searched variations to try next:

    Peanut butter and double chocolate S'mores McFlurry variations.


    The Peanut Butter S’mores Swirl


    Peanut butter and chocolate are a perfect match. Drizzle one tablespoon of warm, melted peanut butter over the top of your finished dessert. It adds an amazing salty and savory flavor that cuts through the sweet sugar.


    The Double Chocolate S’mores


    If you are a serious chocoholic, swap the vanilla ice cream for rich chocolate ice cream. Add a squirt of hot fudge syrup instead of regular chocolate chunks for a deeply rich, brownie-like experience.


    The Caramel Sea Salt Crunch


    Pour a thick ribbon of sticky caramel sauce inside the serving cup before you spoon the ice cream in. Add a tiny pinch of coarse sea salt on top for a fancy, gourmet coffeehouse vibe.

    Looking for a weird, savory, and sour drink to balance out all this sweetness? You have to try our viral Sonic Pickle Slush Copycat Recipe!


    The “Dirty” Espresso S’mores McFlurry (Coffee Lover’s Twist)


    Coffee-infused desserts are dominating social media feeds right now. This variation pours a hot shot of rich espresso over cold, creamy s’mores ice cream, creating an irresistible “affogato-style” texture where hot meets cold.

    Espresso poured over s'mores McFlurry ice cream.


    What You Need:

    • 1 serving of your homemade S’mores McFlurry base (Vanilla ice cream blended with marshmallow fluff, chocolate sauce, and graham cracker crumbs)
    • 1 fresh shot of warm espresso (or 2 tablespoons of concentrated cold brew)
    • Extra toasted mini marshmallows for topping


    How to Make It:

    1. Prepare the Base: Scoop your freshly blended s’mores McFlurry into a tall serving glass or jar, filling it about three-quarters full.
    2. The Espresso Pour: Slowly drizzle the hot espresso shot directly over the cold McFlurry. Watch as the dark coffee melts into the marshmallow swirl and chocolate fudge.
    3. Top and Serve: Torch a few extra mini marshmallows with a kitchen blowtorch (or under the oven broiler) and place them on top. Serve immediately with a long spoon!


    Conclusion


    You do not need to wait for a special summer menu to enjoy the ultimate campfire dessert. By using soft vanilla ice cream, crunchy graham crackers, and sticky marshmallow fluff, you can whip up a perfect S’mores McFlurry right at home. It is thick, creamy, and completely packed with chocolatey goodness. Grab your spoon, mix up this easy treat, and enjoy a delicious fast-food favorite today!


    FAQs


    Can I use a blender to make a McFlurry?


    We highly recommend not using a blender. Blenders spin too fast and generate heat, which turns the ice cream into a thin, watery milkshake. The secret to a McFlurry is using a spoon to hand-mix the ingredients so it stays thick.


    What kind of vanilla ice cream is best?


    For the most authentic fast-food taste, buy a tub of “Vanilla Bean” or “French Vanilla” ice cream. Look for a brand that is very creamy and high in fat. Cheap, icy ice creams will not mix well with the marshmallow fluff.


    Can I save my leftover McFlurry in the freezer?


    Yes! If you cannot finish your dessert, cover the top of your cup tightly with plastic wrap and place it in the freezer. When you are ready to eat it again, let it sit on the kitchen counter for 10 minutes to soften up before eating.

  • The Ultimate Dunkin Frozen Hot Chocolate Copycat Recipe (Super Creamy!)

    The Ultimate Dunkin Frozen Hot Chocolate Copycat Recipe (Super Creamy!)


    Editor’s Note


    Many homemade frozen hot chocolate recipes end up tasting like watery chocolate ice cubes that separate after two minutes. We spent the last week blending, testing, and tasting different milk-to-cocoa ratios to solve this exact issue. We managed to perfectly match that signature smooth, luxurious Dunkin’ consistency by chilling our liquid cocoa mix beforehand and utilizing a smart thickening ingredient. Follow our step-by-step guide to get a perfectly smooth, restaurant-quality frozen treat that stays thick down to the very last sip!


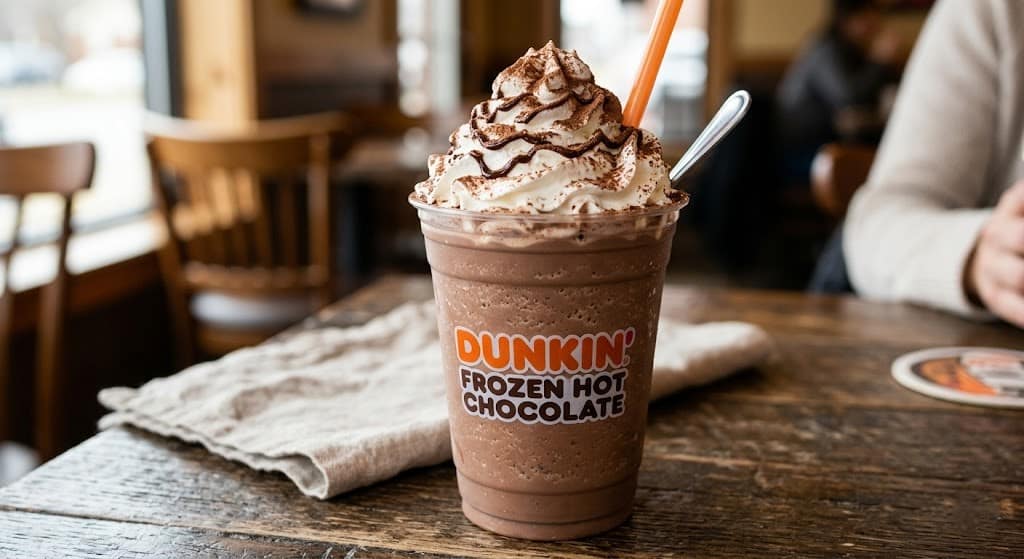
    Are you craving the rich, icy, and chocolatey goodness of Dunkin’s signature winter-meets-summer drink? You are in the absolute perfect spot. Today, we are learning how to make a flawless homemade Dunkin Frozen Hot Chocolate right in your own kitchen.


    When the weather gets warm, standing in a long drive-thru line or spending four to five dollars every day on a single beverage can become frustrating. Plus, sometimes you just want to enjoy a decadent sweet treat late at night when the cafes are already closed.


    The great news is that you do not need a commercial blending machine or secret commercial powders to achieve that signature cafe consistency. With a few basic ingredients from your pantry, you can whip up this viral copycat drink in under five minutes. Let us dive into this complete masterclass guide!


    What is Dunkin’ Frozen Hot Chocolate?


    For years, Dunkin’ has been a global favorite for morning coffees and baked goods. That being said, the introduction of their icy blended drinks totally revolutionized the standard coffeehouse menu. The Frozen Hot Chocolate is a special hybrid drink designed for chocolate lovers who want something cold and frosty instead of a steaming hot mug.


    Unlike a traditional chocolate milkshake, which relies heavily on dense vanilla ice cream, a frozen hot chocolate is made by blending real chocolate bases, milk, and heavy ice together.


    The result is a texture that sits perfectly between a creamy milkshake and a light, refreshing snow cone. It is packed with a deep, intense cocoa flavor that is finished off with a mountain of whipped cream and a chocolate drizzle.


    The Texture Secret: Why Homemade Frozen Hot Chocolate Often Fails


    If you have tried making this drink at home before, you might have run into a common problem. Often, the ice crushes into chunky pieces, sinks to the bottom of the glass, and leaves a watery layer of chocolate milk sitting on top. This happens pickle lemonade popeyes because chocolate syrup and water do not naturally want to hold onto ice crystals.

    To fix this issue and match Dunkin’s rich mouthfeel, we use two expert culinary tricks:


    High-Fat Dairy Balance: Using skim milk or water makes the slush separate instantly. By using a combination of whole milk and a splash of heavy cream, the fat molecules coat the crushed ice particles. This keeps the drink perfectly emulsified and smooth.

     
    The Premix Dissolve Method: Never throw dry hot cocoa powder directly onto cold ice cubes. The sugar granules will not dissolve properly, leaving your drink tasting gritty and sandy. We dissolve the cocoa mix in warm liquid first to create a velvety smooth syrup base before blending.


    Catchy Customizations: Google Trending Variations to Try


    Once you know how to make the classic chocolate version, you can start modifying the recipe just like a professional barista. Here are the most highly-searched Dunkin’ variations that you can create at home:


    The Frozen Mocha Fusion


    If you need a serious caffeine kick to start your morning, add a single shot of cooled espresso or one teaspoon of instant coffee granules directly into the blender cup. The bitterness of the coffee cuts through the sweet sugar, creating a premium mocha flavor.


    The Salted Caramel Crunch


    Drizzle a generous amount of thick caramel syrup around the inside walls of your serving glass before pouring the slush. Sprinkle a tiny pinch of coarse sea salt over the top of your whipped cream for a fancy gourmet twist.


    The Holiday Peppermint Twist


    Recreate Dunkin’s famous winter holiday menu by adding two small drops of pure peppermint extract into the blender. Garnish the final drink with crushed candy canes for a beautiful festive look.


    Simple Ingredients Checklist


    You only need a few affordable, everyday ingredients to get started. Grab these items from your local grocery store:

    Ingredients layout for making a frozen chocolate drink.


    Hot Cocoa Powder: 3 packets (or 6 tablespoons) of your favorite high-quality sweet hot chocolate mix. (Brands like Swiss Miss or Ghirardelli work beautifully).

    Whole Milk: 1 cup of cold whole milk. This provides the ideal creamy base.

    Heavy Cream: 2 tablespoons of heavy whipping cream. This is our secret weapon for adding a rich cafe-style texture.

    Chocolate Syrup: 2 tablespoons of rich chocolate fudge syrup to deepen the color and sweetness.

    Ice Cubes: 2.5 to 3 cups of solid, fresh ice cubes.

    Toppings: Whipped cream from a spray can and extra chocolate syrup for drizzling over the top.


    Step-by-Step Instructions (The Foolproof Blending Method)


    Follow these exact steps to ensure your frozen beverage comes out completely smooth and beautifully layered.


    Step 1: Create the Liquid Chocolate Paste


    Take a small microwave-safe bowl or measuring cup. Pour in 1/4 cup of your whole milk and heat it in the microwave for 20 seconds until it is warm (not boiling). Dump your hot cocoa powder into the warm milk and stir vigorously with a small spoon until a smooth, thick chocolate paste forms. Let it sit for two minutes to cool down completely.


    Step 2: Load the Blender Correctly


    Make sure to pour all the wet ingredients into the blender pitcher before dumping in any solid items. Pour the remaining 3/4 cup of cold whole milk, the 2 tablespoons of heavy cream, the 2 tablespoons of chocolate syrup, and your cooled chocolate paste into the bottom of your blender pitcher.


    Step 3: Add the Ice


    Dump your 3 cups of ice cubes directly on top of the liquid ingredients. Putting the ice on top helps push all the ingredients down into the spinning blades evenly.


    Step 4: The Pulse and Blend Technique


    Put the blender lid on securely. Do not just turn the machine on high speed immediately. Instead, press the Pulse button 5 to 6 times to break the large ice cubes down into smaller chunks. Once the ice is broken up, turn the blender to high speed and let it run continuously for 30 to 45 seconds until it looks exactly like smooth, creamy brown frost.


    Step 5: Garnish and Serve Beautifully


    Take a tall, clear glass. Pour your frosty chocolate mix right to the brim. Spray a massive cloud of whipped cream on top, and use your chocolate syrup bottle to draw a beautiful zigzag pattern over the cream. Pop a wide straw inside and enjoy immediately!

    Pouring smooth frozen hot chocolate from a blender.


    Dietary Adjustments: How to Make it Dairy-Free or Vegan


    If you cannot consume dairy, you do not have to miss out on this delicious trend. You can easily modify the recipe with these simple plant-based swaps:


    The Milk Swap: Replace the whole milk with a creamy plant milk. Oat milk or creamy cashew milk work the best because they naturally have a thicker body compared to watery almond milk.


    The Cream Swap: Use canned coconut cream instead of heavy dairy whipping cream. It adds a lovely subtle tropical richness.


    The Powder Check: Make sure to purchase a dairy-free hot cocoa powder brand, as many standard instant packets contain non-fat dry milk powder inside.


    Troubleshooting Guide: How to Fix Blending Mistakes


    If your frozen dessert is not looking quite right, use these quick expert fixes to save your drink instantly:


    Problem: My slush is full of large, crunchy ice chunks.

    • The Fix: Your blender might need a little extra help. Turn off the machine, stir the mixture thoroughly with a long spoon to break up air pockets, and blend it on high speed for an additional 20 seconds.


    Problem: The drink is too thick and won’t come up the straw.

    • The Fix: Add two tablespoons of cold milk into the blender cup and pulse it a few times to thin the consistency out slightly.


    Problem: It tastes way too sweet.

    • The Fix: Add a tiny pinch of fine table salt into the mix. Salt naturally tones down overpowering sugars and makes the cocoa flavor taste deeper.


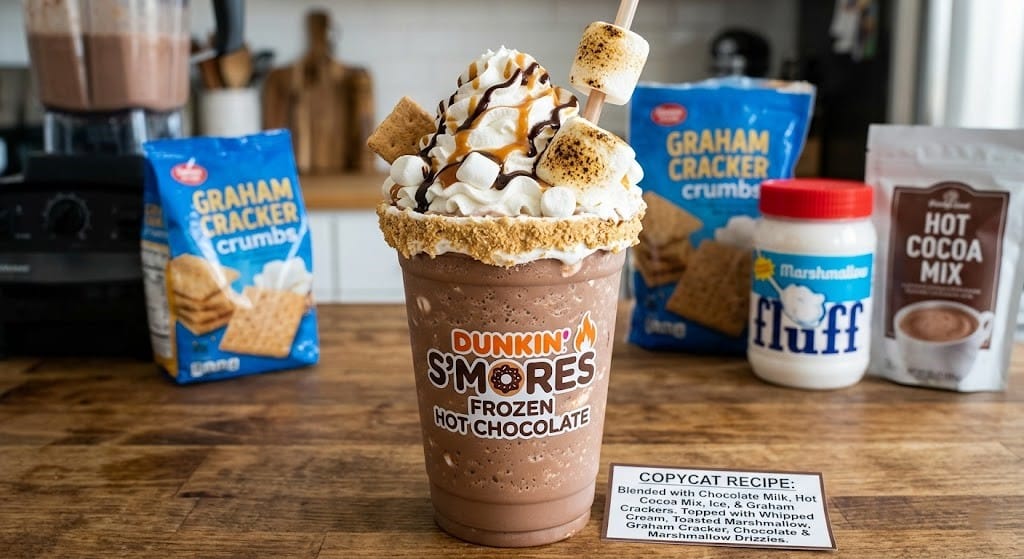
    The S’mores Campfire Frozen Hot Chocolate (Dunkin’ Secret Hack)


    This variation combines rich blended chocolate with the nostalgic flavor of roasted marshmallows and toasted graham crackers. It is rich, chocolatey, and visually stunning.


    What You Need:

    • 1 serving of your classic Dunkin’ Frozen Hot Chocolate base (Hot cocoa mix, milk, chocolate syrup, and ice blended).
    • 2 tablespoons of marshmallow fluff or marshmallow ice cream topping.
    • 2 crushed graham crackers.
    • Chocolate drizzle & mini marshmallows for garnish.


    How to Make It:

    1. Prep the Glass: Dip the rim of your glass into marshmallow fluff, then roll it in crushed graham cracker crumbs so it sticks to the edge.
    2. Layer the Cup: Drizzle the inside walls of the glass with extra chocolate syrup.
    3. Blend and Pour: Pour your blended Frozen Hot Chocolate into the prepared glass.
    4. Top It Off: Pile high with whipped cream, extra graham cracker crumbs, mini marshmallows, and a final squeeze of chocolate syrup.
    Smores frozen hot chocolate dunkin copycat recipe.


    Conclusion


    Recreating your favorite cafe drinks at home is an amazing way to save money while completely controlling the quality of what goes into your body. By using our simple pre-dissolve method and balancing your fats correctly, you can make a copycat Dunkin Frozen Hot Chocolate that tastes even better than the drive-thru version. Grab your blender, mix up a frosty glass, and treat yourself to the ultimate chocolate luxury today!


    FAQs


    Does Dunkin’ Frozen Hot Chocolate contain coffee or caffeine?


    No! Unlike a frappuccino or a frozen coffee mix, the classic Dunkin’ Frozen Hot Chocolate does not contain any coffee or espresso bases. It is completely caffeine-free, making it a wonderful afternoon treat for kids and adults who are sensitive to caffeine.


    Can I make a large batch ahead of time and store it in the freezer?


    We do not recommend storing the finished, blended slush in the freezer. It will freeze solid into a hard block of chocolate ice. This drink is always best enjoyed fresh within ten minutes of blending. However, you can mix the chocolate liquid paste ahead of time and keep it in the fridge so you are ready to blend instantly.


    What blender setting is best for frozen coffeehouse drinks?


    If your blender has a specific “Smoothie,” “Ice Crush,” or “Frozen Drink” button, use that setting! Those programs are designed to automatically alternate between pulsing and high-speed blending to prevent the blades from getting jammed.

  • The Ultimate Homemade Brown Sugar Syrup for Coffee (Ready in 5 Minutes)

    The Ultimate Homemade Brown Sugar Syrup for Coffee (Ready in 5 Minutes)


    Editor’s Note


    As a recipe developer and daily coffee drinker, I used to spend a small fortune on store-bought flavored syrups. When I realized they were filled with artificial preservatives and high-fructose corn syrup, I decided to make my own. After testing multiple ratios and sugar types, I perfected this foolproof, 5-minute recipe. It delivers that authentic, rich café taste without any of the unnecessary chemicals.


    Are you tired of paying extra for flavored syrups at your local café? Or perhaps you have read the back of a store-bought syrup bottle and felt overwhelmed by the long list of artificial ingredients. If you want to elevate your morning coffee routine, learning how to make homemade brown sugar syrup for coffee is an absolute game-changer.


    Brown sugar syrup is the secret ingredient behind some of the most famous and highly requested coffee shop beverages. It adds a deep, rich, caramel-like sweetness that regular white sugar simply cannot replicate.


    The best part? You only need three basic ingredients, five minutes of your time, and zero special equipment. In this detailed guide, we will walk you through exactly how to make, store, and use the best coffee syrup you will ever taste.


    Why Make Brown Sugar Syrup at Home?


    If you are still on the fence about making your own syrups, here are a few undeniable reasons why the DIY route is superior to buying pre-made bottles:


    Massive Money Saver: A high-quality bottle of coffee syrup can cost upwards of $15. Making it at home costs mere pennies per batch.


    Zero Artificial Ingredients: Store-bought syrups rely on preservatives to stay on supermarket shelves for years. Your homemade version uses real, whole ingredients.


    Complete Customization: Do you like your syrup extra thick? Do you want a stronger vanilla flavor? When you make it yourself, you control the final taste and texture.

    If you love making café basics at home, be sure to check out our foolproof guide on How to Make Sweet Cream Cold Foam at Home!


    Ingredients You Need


    This recipe follows the classic “simple syrup” ratio, which is equal parts sugar and liquid. You likely already have everything you need in your pantry.

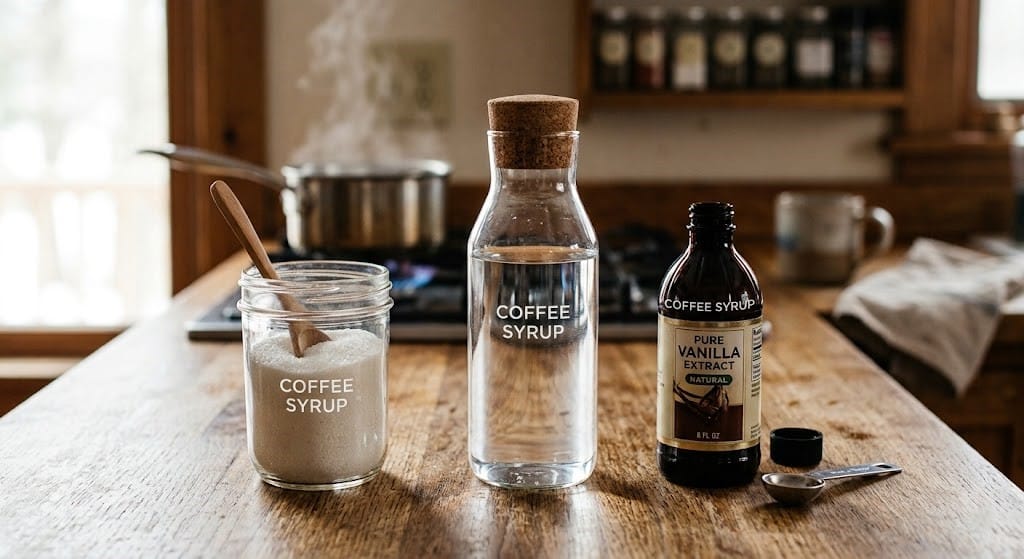
    Three simple ingredients for homemade coffee syrup.


    1 Cup Brown Sugar: This is the star of the show. Make sure your sugar is fresh and soft, not hard and clumpy.


    1 Cup Filtered Water: Using filtered water ensures there are no harsh chlorine tastes interfering with your coffee.


    1 Teaspoon Vanilla Extract: This is optional but highly recommended. Vanilla enhances the caramel notes of the sugar and gives it a true coffee-shop flavor.


    Dark vs. Light Brown Sugar: Which is Better?


    One of the most frequently asked questions is whether to use light or dark brown sugar. Dark brown sugar contains more molasses. This will give your syrup a deeper, richer, and slightly smoky caramel flavor, which pairs perfectly with strong espresso. Light brown sugar has less molasses, resulting in a milder, sweeter, and more delicate flavor. Both work perfectly, but dark brown sugar provides the most authentic café experience.


    Step-by-Step Instructions (How to Make It)


    Making homemade simple syrup is incredibly easy, but following these steps will ensure your syrup does not crystallize or burn.

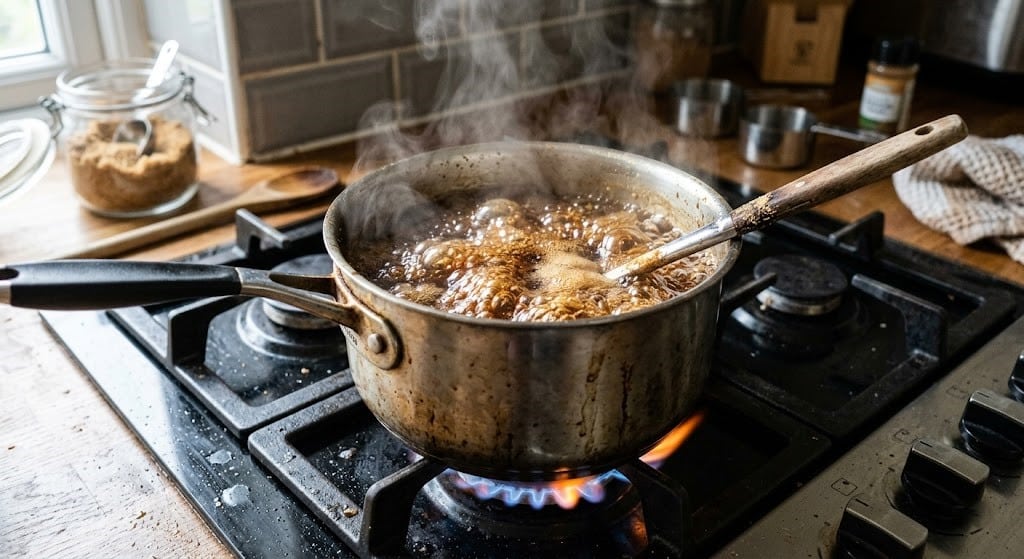
    Boiling brown sugar and water in a saucepan.


    Step 1: Combine Sugar and Water


    In a small saucepan, combine your 1 cup of brown sugar and 1 cup of filtered water.


    Step 2: Heat and Stir


    Place the saucepan over medium heat. Gently stir the mixture using a wooden spoon or whisk. The goal here is to dissolve the sugar completely into the water before it comes to a full boil.


    Step 3: Simmer


    Once the mixture reaches a gentle boil and all the sugar granules have completely dissolved, lower the heat to a simmer. Let it simmer for about 3 to 5 minutes. Do not let it boil vigorously for too long, or the water will evaporate, and your syrup will turn into hard candy once it cools.


    Step 4: Add Flavor and Cool


    Remove the saucepan from the heat. Stir in the 1 teaspoon of vanilla extract. Let the syrup sit in the pan until it reaches room temperature. As it cools, the liquid will naturally thicken into a beautiful, rich syrup.


    How to Store Your Homemade Coffee Syrup


    Proper storage is key to making your syrup last. Since there are no artificial preservatives, you must handle it correctly.

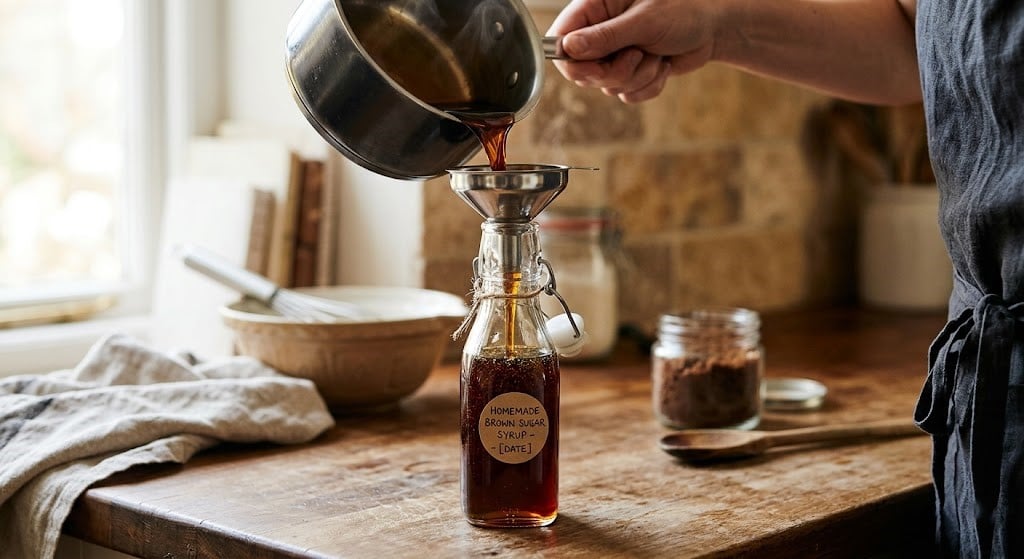
    Storing homemade brown sugar syrup in a glass bottle.


    The Container: Always store your syrup in an airtight glass container. Mason jars, squeeze bottles, or vintage glass dispensers with a pump work perfectly.


    Refrigeration: While some people leave simple syrup on the counter, it is highly recommended to store this brown sugar syrup in the refrigerator. This prevents any mold growth.


    Shelf Life: When kept in an airtight glass bottle in the fridge, your homemade syrup will easily stay fresh for 3 to 4 weeks.


    Troubleshooting: Why Did My Syrup Crystallize?


    Sometimes, after a few days in the fridge, you might notice sugar crystals forming at the bottom of your bottle. This happens when the sugar was not fully dissolved during the cooking process, or if the syrup boiled for too long and lost too much water.


    How to fix it: Simply place the glass jar in a bowl of warm water, or microwave it for 15 seconds. Give it a good shake, and the crystals will melt right back into the liquid.


    Best Drinks to Make with Brown Sugar Syrup


    Now that you have your liquid gold, how should you use it? This syrup dissolves perfectly into both hot and cold beverages.

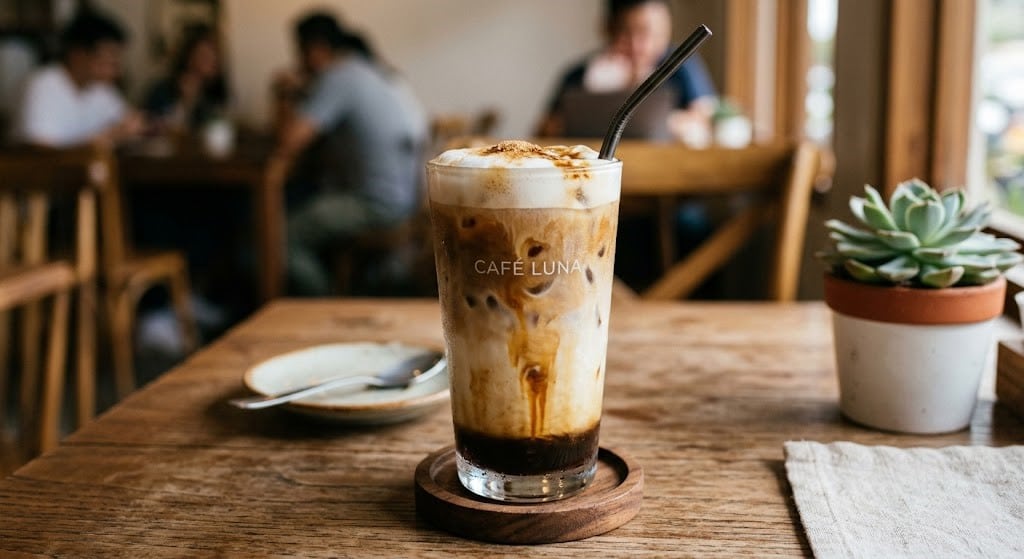
    Iced latte made with rich brown sugar syrup.


    Iced Brown Sugar Oatmilk Shaken Espresso: This is the most famous drink for this syrup. Shake two shots of espresso, a tablespoon of your syrup, and a dash of cinnamon over ice. Top with oat milk.


    Classic Iced Latte: Pour a tablespoon of syrup over ice, add milk, and top with espresso.


    Hot Caramel Macchiatos: Use this syrup as the sweet base for your hot morning drinks instead of standard white sugar.


    Put your new syrup to the test by making our viral Starbucks Copycat Recipes right in your kitchen!


    Conclusion


    Upgrading your morning coffee doesn’t require expensive equipment or a trip to a premium café. By learning how to make homemade brown sugar syrup for coffee, you gain complete control over your ingredients while saving a significant amount of money. With just equal parts brown sugar and water, and five minutes of simmering, you can craft a rich, caramel-like syrup that elevates any latte, cold brew, or shaken espresso.


    FAQs


    Does homemade brown sugar syrup need to be refrigerated? 

    Yes. Because it does not contain any chemical preservatives, storing it in an airtight container in the refrigerator will keep it fresh and prevent mold from developing. It will last for up to a month in the fridge.


    Can I use this syrup in cold drinks? 

    Absolutely! The main benefit of turning sugar into a liquid syrup is that it blends seamlessly into iced coffees, cold brews, and iced teas without leaving gritty sugar crystals at the bottom of your cup.


    Why is my brown sugar syrup too thin and watery? 

    Simple syrup is naturally a bit thinner than store-bought commercial syrups because it lacks thickeners like xanthan gum. However, if it feels too watery, you may not have let it simmer long enough. Simmering it for an extra 2 minutes helps evaporate more water, resulting in a thicker consistency once cooled.


    Can I add other flavors besides vanilla? 

    Yes! You can completely customize this recipe. Try adding a dash of cinnamon during the boiling process, or a drop of maple extract, to create unique seasonal flavors.


    Is this syrup vegan? 

    Yes, this recipe is entirely vegan. Just double-check your brand of brown sugar, as some sugars are processed with bone char, but the recipe itself contains no animal products.

  • NYC Freakshakes Extreme Milkshake Recipes

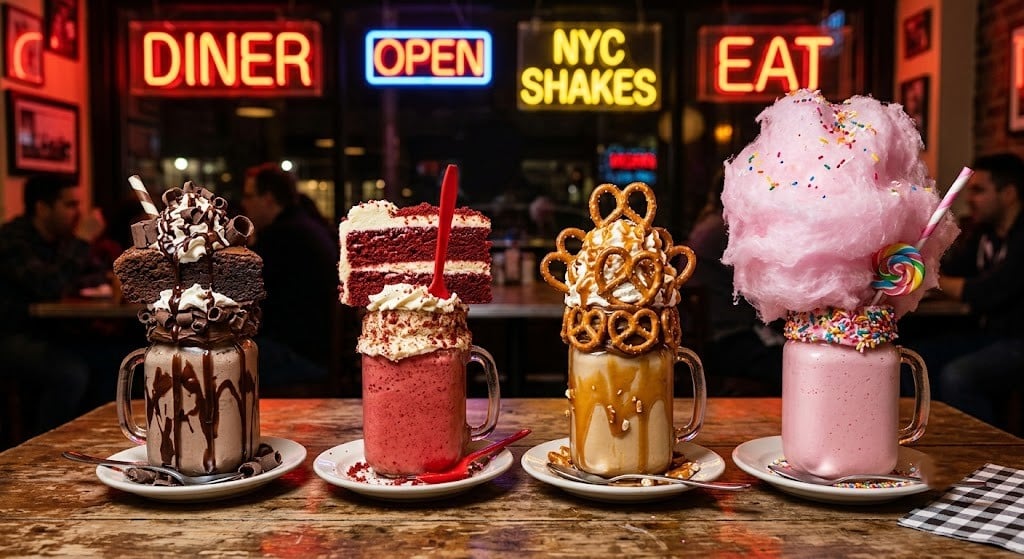
    NYC Freakshakes Extreme Milkshake Recipes


    Editor’s Note


    As a beverage recipe developer, I have always been fascinated by the over-the-top, jaw-dropping “freakshakes” made famous by NYC cafes and Australian dessert bars. However, paying $25 for a single milkshake is steep! I have spent countless hours in the kitchen perfecting the structural integrity of these monstrous drinks. The secret is not just in the blending, but in how you prep your glass. These four recipes are designed to give you that authentic, café-level extreme milkshake experience right at home, without the towering toppings collapsing on your kitchen counter.


    If you have scrolled through Instagram or Pinterest in the last few years, you have definitely seen them. Towering masterpieces of ice cream, frosting, candy, cake slices, and pure sugary joy. They are known as “Freakshakes” or extreme milkshakes, and they have completely revolutionized the dessert industry.


    Originating in small boutique cafes and exploding into massive popularity in cities like New York, freakshakes are more than just a drink; they are an edible work of art. But you do not need to book a flight to NYC to enjoy one. Making freakshake recipes at home is surprisingly easy, incredibly fun, and the ultimate way to impress guests at your next party.


    The Secret to a Perfect Freakshake (Don’t Let It Collapse!)


    Before we start blending, we need to talk about structure. The biggest mistake beginners make is blending a thin milkshake and piling heavy toppings on it. The result? A messy, collapsed disaster. Follow these trending barista rules:


    Thick Base: Your milkshake must be exceptionally thick. Use more ice cream and less milk than a standard recipe.


    Chill the Glass: Always put your mason jar or serving glass in the freezer for 15 minutes before decorating. A cold glass prevents the frosting on the rim from melting.


    The Frosting Glue: Use thick store-bought frosting (not homemade glaze) to coat the outside rim of the glass. This acts as “glue” for your candies and cookies.


    Use Skewers: If you are adding heavy items like whole brownies or cake slices, push a wooden skewer through them and rest the skewer across the rim of the glass for support.

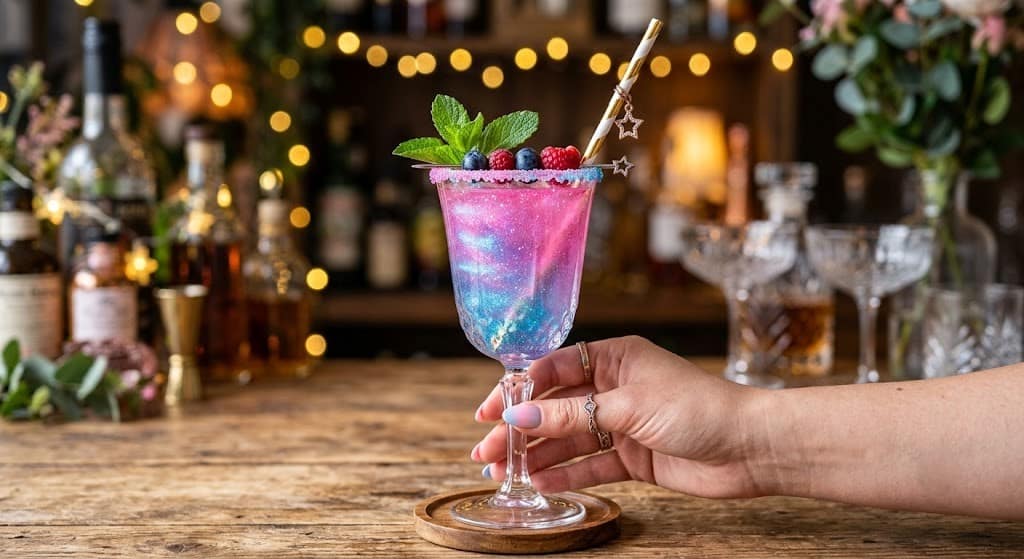
    If you love adding visual magic to your drinks, try incorporating our Edible Glitter Mocktails techniques into your next milkshake party!


    Cookies and Cream Milkshake


    This is the ultimate crowd-pleaser. It is rich, chocolatey, and packed with everyone’s favorite sandwich cookies. The contrast between the cold shake and a dense brownie topping is incredible.

    Extreme cookies and cream milkshake with a brownie on top.


    The Glass Prep

    • Take your chilled mason jar.
    • Use a butter knife to smear a thick layer of vanilla frosting around the top two inches of the outside rim.
    • Roll the frosted rim in crushed Oreo cookies until completely coated.


    The Milkshake Base

    • 3 massive scoops of premium vanilla bean ice cream
    • 1/2 cup of whole milk
    • 5 whole Oreo cookies
    • Instructions: Blend these ingredients in a high-powered blender until thick and creamy, 
    • leaving a few cookie chunks for texture. Pour into your decorated glass.


    The Extreme Toppings

    • A giant mountain of canned whipped cream
    • 1 whole fudgy chocolate brownie (use a skewer if needed to hold it up)
    • 2 whole Oreo cookies pushed into the whipped cream
    • A heavy drizzle of dark chocolate syrup over everything


    Red Velvet Milkshake


    Perfect for Valentine’s Day or whenever you are craving a slice of cake in liquid form. This shake is beautiful, vibrant, and incredibly decadent.

    Red velvet freakshake topped with a slice of cake.


    The Glass Prep

    • Coat the outside rim of your chilled glass with thick cream cheese frosting.
    • Roll the frosting in red, white, and silver sprinkles.


    The Milkshake Base

    • 3 scoops of vanilla ice cream
    • 1/3 cup of whole milk
    • 1 large slice of leftover red velvet cake (crumble it directly into the blender)
    • Instructions: Blend until the cake is fully incorporated into the ice cream, turning it a beautiful pinkish-red color. Pour it into the glass.


    The Extreme Toppings

    • Generous swirls of whipped cream
    • Another whole slice of red velvet cake resting carefully on the rim
    • A dusting of cocoa powder
    • An oversized red straw to complete the look

    Looking for something to wake you up after this sugar rush? Learn How to Make Cold Foam at Home for your morning coffee!


    Peanut Butter Pretzel Milkshake


    For those who love the combination of sweet and salty, this NYC freakshake recipe is a dream come true. The saltiness of the pretzels perfectly cuts through the richness of the peanut butter.

    Peanut butter pretzel milkshake with chocolate drizzle.


    The Glass Prep

    • Smear a thick layer of chocolate ganache or chocolate frosting around the rim.
    • Press roughly crushed salted pretzels into the chocolate until it is completely covered.


    The Milkshake Base

    • 3 scoops of rich chocolate ice cream
    • 1/2 cup of whole milk
    • 3 tablespoons of creamy peanut butter
    • Instructions: Blend until completely smooth. The peanut butter will make this shake exceptionally thick. Pour into the prepared glass.


    The Extreme Toppings

    • A tall tower of whipped cream
    • 3 whole Reese’s Peanut Butter Cups
    • A handful of whole mini pretzels
    • A crisscross drizzle of both caramel and chocolate sauce


    Cotton Candy Milkshake


    This is the most visually stunning freakshake on the list. It is highly popular for kids’ birthday parties and looks like a pastel wonderland.

    Pink cotton candy freakshake with a large lollipop.


    The Glass Prep

    • Coat the top rim with bright pink vanilla frosting.
    • Roll the sticky rim in large white pearl sprinkles or rainbow nonpareils.


    The Milkshake Base

    • 2 scoops of strawberry ice cream
    • 1 scoop of vanilla ice cream
    • 1/2 cup of whole milk
    • 1 teaspoon of cotton candy flavoring syrup (optional, but highly recommended)
    • Instructions: Blend until smooth and creamy. Pour the pastel pink shake into the glass.


    The Extreme Toppings

    • A massive, fluffy cloud of store-bought pink and blue cotton candy
    • A giant rainbow swirl lollipop pushed into the center
    • A sprinkle of edible glitter for that magical finish


    Conclusion


    Creating your own NYC freakshakes at home is an amazing way to unleash your culinary creativity. While they might look intimidating, breaking the process down into three steps: the glass prep, the thick base, and the extreme toppings makes it incredibly easy.

    Whether you are craving the chocolatey goodness of the Cookies and Cream milkshake or the salty-sweet perfection of the Peanut Butter Pretzel shake, these recipes are guaranteed to bring a smile to anyone’s face. So grab your blender, stock up on your favorite candies, and start building your own extreme milkshake masterpieces!


    FAQs


    What kind of glass is best for a freakshake? 

    Thick glass mason jars (16 oz or larger) or classic soda shop glasses work best. They are heavy enough to support the massive amount of toppings without tipping over.


    How do I keep the frosting on the rim from melting? 

    The secret is temperature control. Always place your empty glass in the freezer for at least 15 to 20 minutes before smearing the frosting on it. The cold glass hardens the frosting instantly, keeping it firmly in place.


    Why is my milkshake too runny to hold the toppings? 

    You are likely using too much milk. For a freakshake, the base needs to be thick enough to eat with a spoon. Stick to a ratio of 3 large scoops of ice cream to just 1/3 or 1/2 cup of milk.


    Can I use store-bought cake for the red velvet shake? 

    Absolutely! Store-bought cake, brownies, and cookies actually work perfectly for freakshakes because they are usually denser than homemade baked goods, making them easier to balance on top of the glass.


    How do I stop heavy toppings like brownies from sinking? 

    Use a thick wooden skewer. Push the skewer horizontally through the bottom of the brownie or cake slice, and let the ends of the skewer rest on the rim of the glass. Hide the skewer with whipped cream!

  • How to Make Thick, Creamy Cold Foam at Home in 30 Seconds

    How to Make Thick, Creamy Cold Foam at Home in 30 Seconds


    Editor’s Note


    As someone who tests and develops café-quality drink recipes every day, I used to spend an embarrassing amount of money just adding cold foam to my morning coffee orders. After buying a simple $10 milk frother and experimenting with dozens of milk-to-cream ratios, I finally cracked the code. The recipes in this guide are foolproof, thoroughly tested, and will give you that exact thick, pillowy texture you get at high-end coffee shops.


    It adds a rich, sweet, and velvety texture to any iced beverage without melting the ice or watering down your drink. The great news is that learning how to make cold foam at home is incredibly easy. You do not need a massive, expensive espresso machine to get café-quality results.


    Whether you love the classic vanilla sweet cream or need a dairy-free alternative, this detailed guide covers everything. We will explore the secret milk-to-cream ratios, the best tools to use, and troubleshooting tips to ensure your foam never falls flat.


    What exactly is Cold Foam?


    Before we start mixing, it is important to understand what cold foam actually is. Traditional milk foam (like what you find on a hot cappuccino) is created by forcing hot steam into milk.

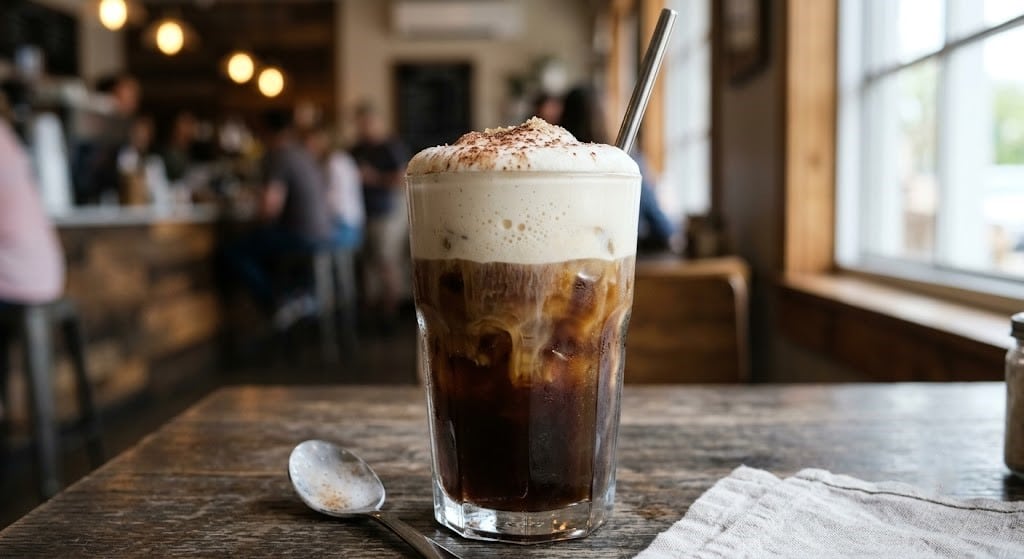
    Cold foam, on the other hand, is made by aerating cold milk and cream until it becomes thick, frothy, and pourable. Because it is cold, it sits perfectly on top of iced lattes, cold brews, and refreshers, slowly blending into the drink as you sip.

    Love recreating coffee shop favorites? Pair this cold foam with our ultimate Starbucks Iced White Mocha Copycat Recipe!


    The Secret Ratio for Perfect Sweet Cream Cold Foam


    If you want your foam to taste exactly like the famous coffee chain versions, you cannot just use plain milk. Milk alone creates large, watery bubbles that pop instantly. Heavy cream alone turns into whipped cream.

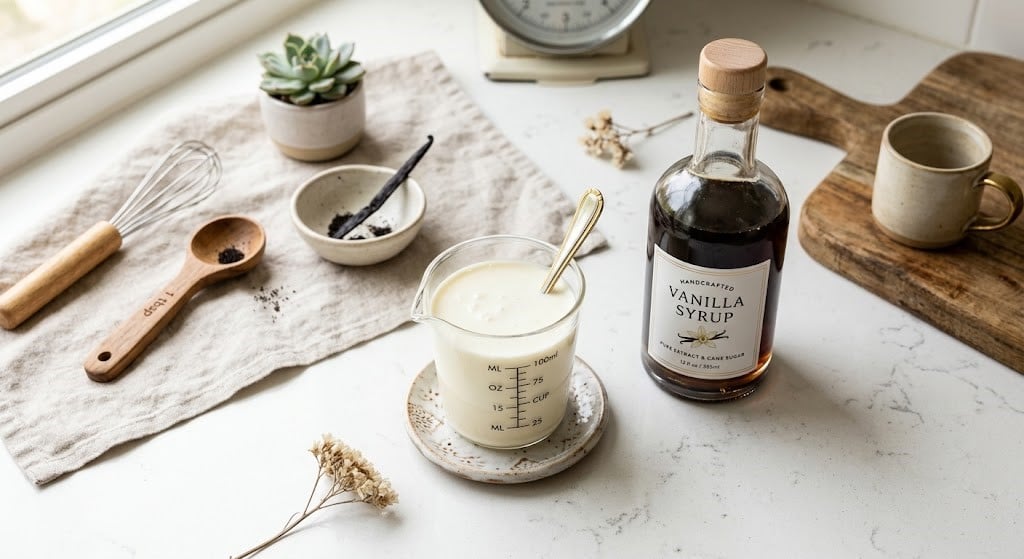
    Ingredients for homemade vanilla sweet cream cold foam.


    The secret lies in the perfect balance. Here is the golden ratio you need to memorize:

    • 2 Parts Heavy Whipping Cream (This provides the thick, luxurious texture)
    • 1 Part 2% or Whole Milk (This thins out the heavy cream so it remains pourable)
    • Flavoring (Usually 1 tablespoon of vanilla syrup)


    The Master Recipe:

    • 2 tablespoons heavy whipping cream
    • 1 tablespoon 2% milk
    • 1 tablespoon vanilla syrup


    Simply mix these three ingredients together. This creates the “sweet cream base.” You can make a large batch of this base and store it in an airtight mason jar in the fridge for up to a week!


    3 Easy Ways to Froth Cold Foam at Home


    You do not need expensive gear to get thick foam. Here are the three most popular and effective methods, ranked from best to easiest.

    Using a handheld frother to make cold foam at home.


    Method 1: The Handheld Milk Frother (Best & Fastest)


    A handheld battery-operated frother is a game-changer for drink lovers. It costs under $15 and delivers perfect results every single time.

    1. Pour your sweet cream base (cream, milk, and syrup) into a glass or small pitcher.
    2. Submerge the frother wand halfway into the liquid.
    3. Turn it on and froth for 20 to 30 seconds.
    4. Move the wand slightly up and down until the liquid doubles in size and looks like melted ice cream.


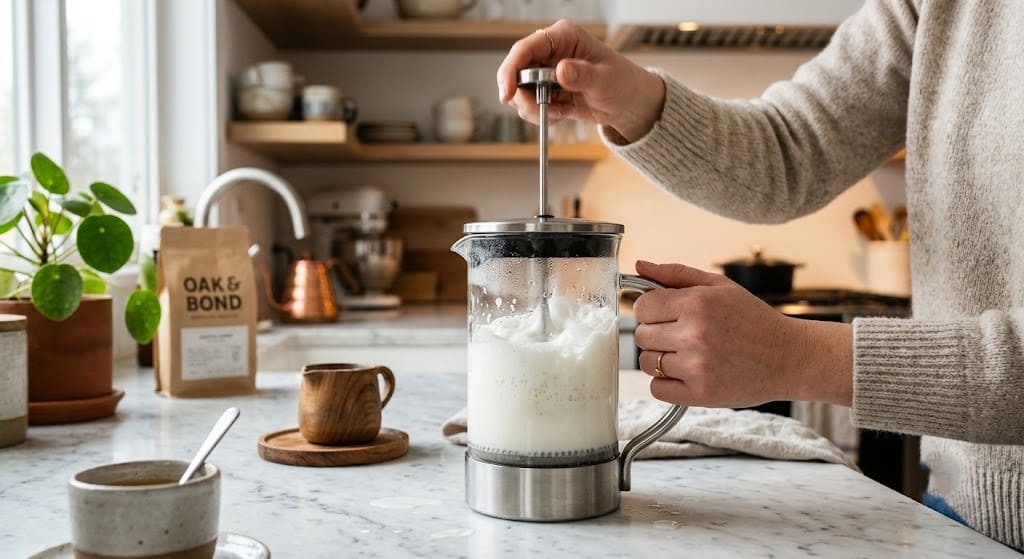
    Method 2: The French Press (Thickest Foam)


    If you do not have a handheld frother, a standard French press works wonders. In fact, it creates the thickest, most velvety foam of all the manual methods.

    Making cold foam using a glass French press.
    1. Pour your cold ingredients into the bottom of the French press.
    2. Place the lid on top.
    3. Rapidly pump the plunger up and down for about 30 to 40 seconds.
    4. The fine mesh screen forces air into the cream, expanding it beautifully. Let it rest for 10 seconds before pouring.


    Method 3: The Mason Jar Shake (No Equipment Needed)


    No frother? No French press? No problem! As long as you have a jar with a tight-fitting lid, you can make this recipe.

    1. Add your cream, milk, and syrup into a small mason jar.
    2. Ensure the lid is screwed on extremely tight.
    3. Shake vigorously for 45 to 60 seconds.
    4. The foam will not be quite as thick as the frother method, but it will still be delicious and bubbly.


    Trending Flavor Variations to Try


    Once you master the basic vanilla sweet cream, you can customize your foam to match any craving. Here are some highly searched flavor variations:


    Salted Caramel Cold Foam: Add 1 tablespoon of caramel syrup and a generous pinch of sea salt to your base before frothing. This is incredible on cold brew!


    Matcha Cold Foam: Sift 1/2 teaspoon of high-quality matcha powder into your base. Froth until perfectly green. Serve over an iced latte.


    Strawberry Cold Foam: Blend 1 tablespoon of strawberry puree or strawberry syrup into your heavy cream and milk. This creates a beautiful pink foam that looks amazing on fruit refreshers.


    Want to try that strawberry foam on a refreshing drink? Check out our viral Pink Drink Copycat Recipe!


    How to Make Dairy-Free Vegan Cold Foam


    Making vegan cold foam is a bit trickier because plant-based milks lack the fat content of heavy cream. If you try to froth standard almond milk, it will just create watery bubbles.

    To get a thick vegan foam, you need to use Barista Blend oat milk or a dairy-free heavy whipping cream alternative (like Silk or Country Crock plant cream).


    Dairy-Free Recipe:

    • 3 tablespoons of Barista Edition Oat Milk (chilled)
    • 1 tablespoon of dairy-free heavy cream
    • 1 tablespoon vanilla syrup
    • Pro-Tip: Froth this mixture a bit longer (about 45 seconds) to ensure the structure holds up.


    Troubleshooting: Why is My Cold Foam Runny?


    If your foam is falling flat, check these common mistakes:

    Your Ingredients Aren’t Cold Enough: Heat is the enemy of cold foam. Your milk and cream must be straight out of the refrigerator. Warm cream will not hold its shape.

    Too Much Milk, Not Enough Cream: If you only use milk, the foam will disappear in seconds. You need the fat from the heavy cream to give the foam its structure.

    Over-Frothing: Believe it or not, if you use a handheld frother for too long (over a minute), you will accidentally churn the heavy cream into actual butter. Stop when it looks like thick, pourable paint.


    Conclusion


    Learning how to make cold foam at home is the ultimate hack for any coffee lover. By keeping a simple sweet cream base in your fridge and using a cheap handheld frother, you can elevate your daily coffee routine in just 30 seconds.

    Not only does this save you money, but it also allows you to control the ingredients and experiment with fun, seasonal flavors. So grab your ingredients, start frothing, and enjoy your luxurious, café-quality iced drinks right in your own kitchen!


    FAQs


    Can I make cold foam with just milk? 

    You can froth plain skim or 2% milk, but it will not be “sweet cream cold foam.” Plain milk creates large, airy bubbles that dissolve very quickly. For that thick, café-style texture, you must add heavy cream.

    How long does homemade sweet cream last in the fridge? 

    If you mix a large batch of the unfrothed liquid base (heavy cream, milk, and syrup), it will stay fresh in an airtight mason jar in the fridge for up to 5 days. Just pour a little out and froth it whenever you need it.

    Does half-and-half work for cold foam? 

    Yes, half-and-half is essentially a pre-mixed combination of milk and cream. You can use it, but the foam will be slightly less thick and velvety compared to mixing heavy cream and milk yourself.

  • The Ultimate Popeyes Pickle Lemonade Copycat Recipe

    The Ultimate Popeyes Pickle Lemonade Copycat Recipe


    Editor’s Note


    When we first saw the Popeyes Pickle Lemonade going viral on social media, we knew we had to try it. Mixing sweet, tart lemonade with salty dill pickle juice sounds crazy at first. However, once we tasted it alongside some crispy fried chicken, we completely understood the hype! We spent hours in the kitchen testing different ratios of fresh lemon juice to pickle brine. We wanted to make sure our readers get the perfect, thirst-quenching balance without it tasting too salty. Follow this foolproof guide to recreate the internet’s favorite weird drink right at home!


    Are you looking for a completely new and exciting drink to cool you down? You are in the right place. Today, we are going to learn how to make the famous Popeyes Pickle Lemonade in your very own kitchen.


    Over the last few months, this unusual drink combination has completely taken over the internet. People are filming their reactions, taking beautiful photos, and sharing them everywhere.


    While mixing pickle juice and lemonade might sound like a joke, it is actually a genius flavor pairing. The sweet sugar, the sour lemons, and the salty pickle brine create an amazing balance. In this detailed guide, we will show you exactly how to make this trending drink step-by-step. Let us get started!


    What is the Popeyes Pickle Lemonade?


    Popeyes is a famous fast-food restaurant known for its incredibly crispy fried chicken and buttery biscuits. Recently, a secret menu hack became wildly popular among their customers.


    People started ordering a large cup of their classic premium lemonade and asking the staff to pour in a splash of dill pickle juice. Some people even drop whole pickle slices right into their cups!


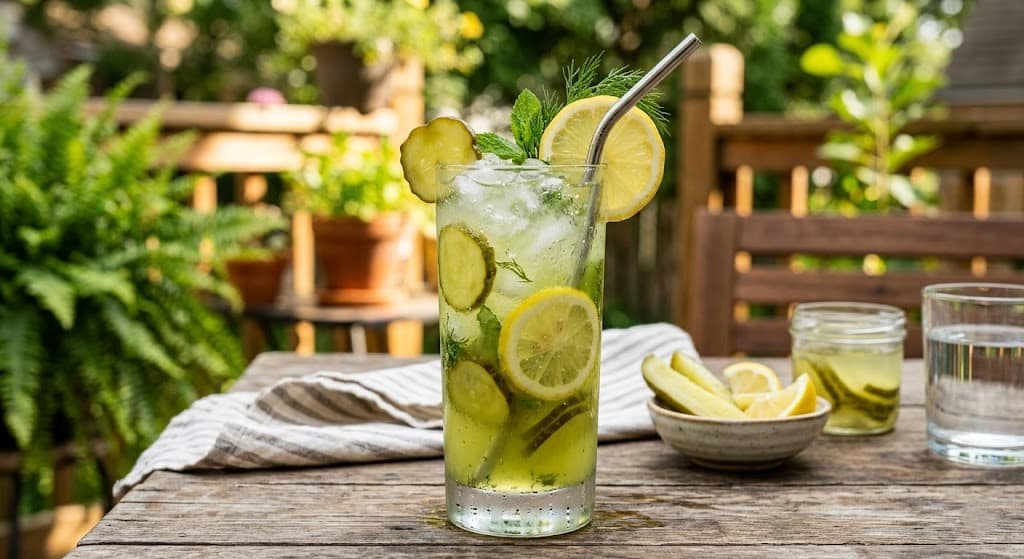
    This created the “Pickle Lemonade.” It is a bright yellow, ice-cold drink with floating green pickle chips. It is sweet, tart, and very salty. It is the perfect drink to wash down heavy, greasy fast food because the vinegar cuts right through the richness.


    Why is the Internet Obsessed with Pickle Lemonade?


    If you scroll through your favorite social media apps, you will see this drink everywhere. Here is why everyone loves it so much:


    The Shock Factor: It sounds weird! People love trying strange food combinations just to see if they are actually good.


    Electrolyte Boost: Pickle juice is full of natural salt and electrolytes. When you mix it with hydrating water and lemon juice, it becomes a fantastic recovery drink for hot summer days.


    The Perfect Sweet and Salty Balance: Think about why people love salted caramel or chocolate-covered pretzels. Our tastebuds love it when sweet and salty flavors are mixed together.


    Nutritional Breakdown: What to Expect


    Before we start mixing, it is good to know what is in your glass. Here is a quick look at the nutrition facts for a standard homemade pickle lemonade:


    Calories: Because of the sugar in the lemonade, a medium glass has about 150 to 200 calories.

    Sodium: Pickle juice has a lot of salt. This drink is high in sodium, which is great for sweating on a hot day, but something to watch out for if you are on a low-salt diet.

    Vitamins: Fresh lemons give this drink a wonderful boost of Vitamin C, helping your immune system stay strong.


    Simple Ingredients for the Perfect Mix


    You do not need to wait in a long drive-thru line to get this viral drink. You can make it at home using just a few simple, cheap ingredients.

    Ingredients needed to make homemade Popeyes pickle lemonade.


    Fresh Lemons: You will need 4 to 5 large, juicy lemons. Freshly squeezed lemon juice is the secret to a high-quality copycat recipe.


    Dill Pickle Juice: 1/4 cup of juice straight from a jar of dill pickles. You must use dill pickles, not sweet pickles!


    White Granulated Sugar: 3/4 cup of plain white sugar to sweeten the drink.


    Cold Water: 4 cups of filtered, ice-cold water.


    Ice Cubes: Lots of clean ice to make the drink perfectly frosty.


    Pickle Slices: A few round pickle slices to drop into the glass for that authentic fast-food look.


    Step-by-Step Instructions (Easy Method)


    Making this beautiful drink is very fast. Follow these simple steps, and you will have a delicious pitcher ready in less than ten minutes.


    Step 1: Prepare the Fresh Lemon Juice


    Take your fresh lemons and cut them in half. Squeeze them into a measuring cup until you have exactly 1 cup of fresh lemon juice. Make sure to pick out any tiny lemon seeds that fall into the cup.


    Step 2: Make the Sweet Lemonade Base


    Take a large glass pitcher. Pour your 1 cup of lemon juice into the pitcher. Add your 3/4 cup of white sugar and 4 cups of cold water. Take a long wooden spoon and stir everything together for about two minutes. You want to make sure the sugar is completely melted into the water.


    Step 3: Add the Secret Salty Ingredient


    Now it is time for the magic. Measure out 1/4 cup of dill pickle juice. Slowly pour it into your sweet lemonade pitcher. Give the mixture one more big stir.


    Step 4: Prepare Your Glass


    Take a tall, clear drinking glass. Fill it all the way to the top with fresh ice cubes. Take two or three round pickle slices and slide them down the inside walls of the glass. This makes the drink look amazing for photos!


    Step 5: Pour and Enjoy


    Pour your freshly mixed pickle lemonade dragon fruit syrup right over the ice. Put a straw in the glass and take a big sip. Enjoy the amazing sweet, sour, and salty flavor!


    Trending Customizations: Make it Your Own


    The best part about making drinks at home is that you can change them! Here are three highly searched variations of the pickle lemonade:

    Spicy and sparkling variations of homemade pickle drinks.


    The Spicy Pickle Lemonade


    If you love spicy chicken sandwiches, you will love this. Add a small pinch of cayenne pepper or a dash of hot sauce directly into your glass. The spicy kick mixes perfectly with the sour lemon and salty pickle.


    The Sparkling Pickle Refresher


    Do you love bubbly drinks? Replace half of the cold water in the recipe with plain club soda or sparkling water. This gives your drink sonic pickle slush a wonderful, refreshing fizz that tickles your nose.


    The Skinny Diet Version


    If you want to cut down on sugar, you can easily make a low-calorie version. Simply swap the white sugar for your favorite zero-calorie sweetener, like Stevia or liquid Monk Fruit. It tastes just as good but has zero guilt!


    Troubleshooting Common Flavor Problems


    Sometimes, mixing completely different flavors can go wrong. Here is how to quickly fix your drink if it does not taste perfect:


    Problem: The drink is way too salty.

    Solution: You might have used a very strong brand of pickles. Simply add 1/2 cup of plain water and one extra tablespoon of sugar to the pitcher. Stir it well to dilute the salt.


    Problem: The lemonade is too sour and makes my face pucker.

    Solution: Your lemons were probably extra tart! Add two more tablespoons of sugar and stir until it dissolves completely.


    Problem: I cannot taste the pickle flavor at all.

    Solution: Add one more tablespoon of pickle juice at a time. Keep tasting it until you reach the perfect balance.


    How to Store Your Lemonade


    If you make a large batch for a summer party and have some leftovers, it is very easy to save it.

    Always store your lemonade in a pitcher with a tight lid. Keep it in the refrigerator. It will stay fresh and delicious for up to 4 days.

    Important tip: Do not put ice into the main pitcher! As the ice melts, it will water down your perfect flavor balance. Only put ice into your individual drinking glasses.


    The Best Food Pairings for Pickle Lemonade


    This drink is very strong, so it tastes best when you drink it with the right foods. Just like at Popeyes, this lemonade is the ultimate pairing for heavy, fried, and savory foods.

    Serve this drink alongside crispy fried chicken, greasy double cheeseburgers, or a big bowl of salty French fries. The vinegar in the drink cleans your palate after every bite, making your food taste even better!


    The Spicy Cajun Pickle Lemonade (With Hot Honey & Tajín)


    Popeyes is world-famous for its spicy Cajun chicken, so it only makes sense to give their signature pickle lemonade a spicy upgrade. The sweet lemonade and salty pickle brine combine with a touch of hot honey and a fiery rim to create the ultimate sweet, sour, and spicy summer drink.


    What You Need:

    • 1 serving of classic Popeyes Pickle Lemonade base (1 cup sweet lemonade + 2-3 tbsp dill pickle juice)
    • 1 tablespoon Hot Honey (or regular honey mixed with a pinch of cayenne pepper)
    • Tajín or Cajun seasoning (for the rim)
    • 1 spicy pickle slice or jalapeño wheel (for garnish)


    How to Make It:

    1. Prep the Rim: Run a fresh lemon slice around the rim of a tall glass and dip it into Tajín or Cajun seasoning for an iconic spice kick.
    2. Mix the Drink: In a shaker or mason jar, combine cold lemonade, dill pickle juice, and hot honey with ice. Shake vigorously for 10 seconds until chilled.
    3. Pour and Garnish: Pour over fresh ice in your prepared glass. Top with a slice of spicy pickle and serve immediately!
    Spicy cajun pickle lemonade with tajin rim.


    Conclusion


    You do not need to wait in your car at a fast-food drive-thru to try the internet’s most exciting drink trend. By mixing fresh homemade lemonade with a splash of salty dill pickle juice, you can recreate the famous Popeyes secret menu item right at home. It is perfectly sweet, wonderfully sour, and just salty enough to keep you coming back for more. Mix up a cold pitcher today and surprise your friends with this unforgettable flavor experience!


    FAQs


    What is the best brand of pickle juice to use?


    For the most authentic fast-food taste, use a classic dill pickle brand like Vlasic, Claussen, or Mt. Olive. They have a great garlic and salt profile. Never use sweet pickles or bread-and-butter pickles, as they will ruin the flavor of the lemonade.


    Can I use store-bought lemonade instead of making my own?


    Yes! If you are in a hurry, you can buy a bottle of high-quality yellow lemonade from the grocery store. Simply pour it into a glass and add a splash of your pickle juice. However, making it from scratch with fresh lemons always tastes much better.


    Can I freeze this drink to make a slushie?


    Absolutely. If you want a frozen treat, pour your mixed pickle lemonade into an ice cube tray. Once it is frozen solid, put the ice cubes into a blender and blend on high speed until it looks like snow.

  • The Ultimate Sonic Pickle Slush Copycat Recipe

    The Ultimate Sonic Pickle Slush Copycat Recipe


    Editor’s Note


    When we first heard about a bright green pickle-flavored slushie, we thought it was a joke. But after tasting the real thing at Sonic Drive-In, we understood why the internet went totally crazy for it. It is surprisingly sweet, salty, and incredibly refreshing. We spent days testing different pickle juices and ice blending methods to create the exact same slushie texture and flavor at home. If you want to satisfy your weirdest craving without leaving the house, this guide is everything you need!


    Are you feeling brave today? Do you want to try one of the most famous and weirdest fast-food drinks ever created? You have arrived at the perfect place. Today, we are making the famous Sonic Pickle Slush right in your own kitchen.


    When this bright green drink first came out, it broke the internet. People drove for miles just to taste it. Some people hated it, but millions of people absolutely loved it.


    If you love eating savory snacks, or if you constantly drink pickle juice straight from the jar, this is your dream beverage. In this massive guide, we will explain exactly what this drink is, what it tastes like, and how you can easily blend it up at home in less than five minutes.


    What exactly is the Sonic Pickle Slush?


    Sonic Drive-In is a huge fast-food chain in America. They are famous for having thousands of different drink combinations. In 2018, they released a special limited-time item: the Pickle Juice Slush.


    It was a glowing green, freezing cold, sweet and salty ice drink. It was so popular that Sonic brought it back again in 2022 because customers kept begging for it on social media.


    The drink is made using Sonic’s classic sweet slushie base mixed with a special salty pickle flavoring syrup. It is not just a cup of frozen pickle juice. It is a carefully mixed dessert drink that balances strong sweet and sour flavors.


    Why You Will Love This Weird Drink


    You might be asking yourself why anyone would want to drink a frozen pickle. Here are the top reasons why this drink became a viral sensation:


    It Hydrates You: Pickle juice is packed with natural salt and electrolytes. Drinking this on a hot summer day cools you down and hydrates your body very fast.


    The Perfect Balance: If you get tired of drinking things that are way too sweet and sugary, this drink gives you a sharp, salty break.


    It is Fun to Share: Making this bright green drink for your friends or family is a hilarious experience. Everyone wants to take a sip just to see what it tastes like!


    What Does a Pickle Slush Actually Taste Like?


    If you have never had one, the taste is very hard to imagine. Let us break down the exact flavor profile for you.


    When you take your first sip, you immediately taste the cold, sugary sweetness of a normal ice slushie. It feels like you are drinking a sweet snow cone.


    But a second later, the sharp, tangy, and salty flavor of a dill pickle hits the back of your tongue. It tastes exactly like a sweet dill pickle chip. The sweetness stops the salt from burning your throat, and the sour vinegar makes your mouth water for another sip. It is a very strange, but wonderful, flavor rollercoaster.


    Simple Ingredients You Need


    To make this viral copycat recipe at home, you do not need any expensive syrups. You can make it using four basic things from your kitchen:

    Ingredients needed to make a pickle slush.


    Dill Pickle Juice: 1/2 cup of juice straight from your favorite jar of dill pickles. Do not use sweet pickle juice!


    White Sugar: 1/4 cup of plain white granulated sugar. This is what gives the slush its sweet dessert flavor.


    Water: 1/2 cup of clean, cold water to balance out the strong vinegar taste.


    Ice: 3 to 4 big cups of solid ice cubes to create the perfect frozen texture.


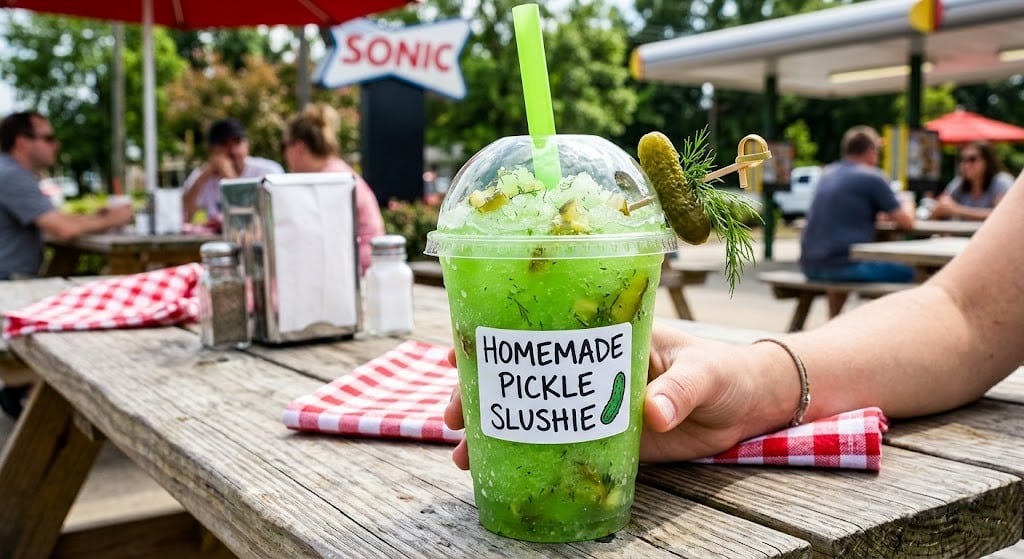
    Green Food Coloring (Optional): 2 tiny drops. Sonic’s drink is a bright neon green. Pickle juice is naturally a pale yellow-green. Food coloring gives it that famous fast-food look.


    How to Make the Sonic Pickle Slush at Home


    Making this drink is incredibly easy. Just follow these simple steps to get a perfectly smooth, restaurant-quality slushie.


    Step 1: Make the Sweet Pickle Base


    First, take a small bowl. Pour in your 1/2 cup of cold water and your 1/4 cup of white sugar. Stir it very well for about two minutes until the sugar completely melts into the water. This is your simple syrup.


    Step 2: Add the Pickle Power


    Now, pour your 1/2 cup of dill pickle juice into the sugar water. If you want the bright neon color, drop in two drops of green food coloring right now. Stir the green liquid until everything is mixed together.


    Step 3: Blend with Ice


    Take your kitchen blender. Pour your sweet green liquid into the bottom of the blender cup. Dump your 3 to 4 cups of ice directly on top of the liquid.


    Step 4: The Blending Secret


    Put the lid on tightly. Start your blender on the lowest speed. Let it run for 15 seconds to break the big ice cubes. Then, turn the blender up to high speed for 30 seconds. Stop blending when the mixture looks like smooth, green snow.


    Step 5: Pour and Enjoy


    Pour your freezing cold pickle slush into a tall glass. Stick a thick straw in the middle. You can even put a small pickle slice on the edge of the glass for a fun decoration!


    3 Viral Customizations to Try


    One of the best things about Sonic is combining different flavors. Here are three trending ways people upgrade their pickle slush:

    Spicy and lemonade variations of frozen pickle drinks.


    The Spicy Pickle Slush


    Do you love spicy snacks? Drop a small pinch of cayenne pepper or a few dashes of Mexican Tajín seasoning directly into your blender. It gives the sweet and sour ice a wonderful, fiery kick.


    The Pickle Lemonade Fusion


    Instead of using plain water in Step 1, use 1/2 cup of freshly squeezed lemonade. The sour lemon mixes perfectly with the salty pickle juice, making it taste like a premium sour candy.


    The Adult Pickle Margarita


    If you are over 21, this makes an amazing party drink. Add 2 ounces of silver tequila and 1 ounce of triple sec to the blender. It turns the fast-food slushie into a savory, frozen pickle margarita!


    Expert Tips for the Perfect Slush Texture


    Sometimes making frozen drinks at home can be tricky. Here is how to fix common problems and get that perfect Sonic texture:


    Problem: The slush is too watery.

    • Solution: You did not use enough ice. Just drop one more handful of ice cubes into the blender and mix it again for ten seconds.


    Problem: The blender is stuck and not moving.

    • Solution: The mixture is too thick. Turn off the blender. Add one tablespoon of water or extra pickle juice to help the blades spin smoothly.


    Problem: It tastes too salty.

    • Solution: Every brand of pickles has a different amount of salt. If your drink is too strong, add one more spoonful of sugar and blend it in.


    The Loaded Chamoy & Tajín Pickle Slush (Sweet, Sour & Spicy)


    Take your pickle slush on a spicy detour! Inspired by Mexican street food snacks, this variation layers tangy pickle ice with sweet-and-spicy Chamoy sauce and zesty Tajín seasoning. It is bold, colorful, and insanely photogenic.

    Spicy chamoy and tajin pickle slush drink.


    What You Need:

    • 1 serving of our classic Sonic Pickle Slush base (Dill pickle juice, water, simple syrup, green food color, and ice)
    • 2 tablespoons Mexican Chamoy sauce
    • 1 tablespoon Tajín chili-lime seasoning
    • 1 whole dill pickle spear


    How to Make It:

    1. Rim the Glass: Dip the rim of your glass into a small plate of Chamoy sauce, then press it into Tajín seasoning to coat the edge.
    2. Drizzle inside: Drizzle an extra tablespoon of thick red Chamoy sauce down the inner walls of your glass.
    3. Fill and Serve: Blend your classic Pickle Slush and pour it into the prepared glass. Slide a large pickle spear inside, sprinkle extra Tajín on top of the green slush, and enjoy the sweet-heat rush!


    Conclusion


    You no longer have to wait for Sonic to bring back their weirdest limited-time menu item. By mixing sweet sugar water with salty dill pickle juice and lots of ice, you can create the ultimate Pickle Slush right in your own kitchen. It is incredibly refreshing, cheap to make, and guaranteed to surprise anyone who tastes it. Grab your blender and mix up this bright green treat today!


    FAQs


    What kind of pickles should I use for this recipe?


    You must use classic dill pickles. Brands like Vlasic or Claussen work perfectly because they have a sharp, salty, and garlic-infused brine. Never use bread-and-butter pickles, as their warm spices will make the slush taste terrible.


    Is the Sonic Pickle Slush healthy?


    While it does not have any fat, it does contain a high amount of sodium from the pickle juice and a high amount of added sugar. It is best enjoyed as a fun, occasional treat rather than an everyday health drink.


    Can I freeze the liquid instead of blending it?


    Yes! If you do not have a strong blender, you can mix the pickle juice, water, and sugar together. Pour the liquid into an ice cube tray and freeze it. Once frozen solid, put the green ice cubes into a food processor to easily shave them into a snow-cone texture.

  • How to Make a Magical Color Changing Glitter Mocktail at Home

    How to Make a Magical Color Changing Glitter Mocktail at Home


    Editor’s Note


    As a recipe developer who loves hosting themed parties, I am always looking for drinks that double as entertainment. When I first experimented with butterfly pea flower tea and edible luster dust, the results completely blew my mind. I have spent countless hours perfecting the exact ratio of citrus to tea so you get the most dramatic, vibrant color change possible. This recipe is rigorously tested to ensure it is 100% food-safe, incredibly delicious, and visually unforgettable.


    Are you looking for a show-stopping beverage that will leave your guests completely speechless? Whether you are hosting a whimsical birthday party, a Halloween gathering, a bridal shower, or just want to impress your friends on a Friday night, this magical color changing glitter mocktail recipe is exactly what you need.


    Imagine serving your guests a stunning, deep sapphire-blue drink swirling with silver glitter. Then, right before their eyes, you pour in a special liquid, and the drink instantly transforms into a vibrant, glowing magenta-pink. It looks like absolute magic, but it is actually just a very simple, delicious, and safe science trick!


    In this comprehensive guide, we will cover the secret behind the color-changing magic, the safest way to use edible glitter, and a step-by-step recipe that guarantees a perfect drink every single time.


    The Secret Behind the Magic: How Does It Change Color?


    Before we start mixing, it is important to understand how this magic trick actually works. You do not need any artificial chemicals or strange food dyes to make this happen.


    The secret ingredient is Butterfly Pea Flower Tea. This tea is brewed from the leaves of the Clitoria ternatea plant, which is native to Southeast Asia. When you brew these dried flowers in hot water, they create a stunning, deep, and completely natural blue liquid.


    Here is where the science (and the magic) happens: Butterfly pea flower tea is highly sensitive to pH levels.

    • In its natural state, it is neutral and appears blue.
    • When you introduce an acidic ingredient (like lemon juice or lime juice), the pH level drops, causing the liquid to instantly change to purple, and then to a bright magenta-pink.


    By combining this natural color-changing reaction with food-safe edible glitter, you create a mesmerizing “potion” effect that looks incredible in photographs and videos.


    Ingredients You Will Need


    To create this visually stunning and refreshing drink, you only need a few simple, highly accessible ingredients.


    For the Magical Blue Base:

    • 1 tablespoon dried Butterfly Pea Flowers (or 2 butterfly pea tea bags)
    • 1 cup boiling water
    • 1/8 teaspoon silver or pearl food-grade edible drink glitter (luster dust)


    For the Flavor & Sweetness:

    • 1/2 cup sparkling water, Sprite, or 7UP (chilled)
    • 1 ounce simple syrup (or agave nectar)
    • 1/2 cup ice cubes


    For the Magic Color-Changing Potion:

    • 1.5 ounces freshly squeezed lemon juice (Do not use bottled lemon juice; fresh is required for the best taste and strongest acidic reaction)

      If you love visually stunning and aesthetic drinks, you must try our viral Edible Glitter Mocktails Guide or learn how to make the famous Starbucks Pink Drink Copycat at home!


    Step-by-Step Recipe: Making the Magic Happen


    Follow these easy steps to ensure your mocktail looks like a swirling galaxy and changes color perfectly.


    Step 1: Brew the Butterfly Pea Tea


    Start by placing your dried butterfly pea flowers (or tea bags) into a heat-safe glass or measuring cup. Pour 1 cup of boiling water over the flowers. Let it steep for 5 to 7 minutes. You will watch the water turn a deep, rich indigo blue. Once brewed, remove the flowers or tea bags and place the blue tea in the refrigerator to cool completely. (Using hot tea will melt your ice and ruin the drink).

    Brewing blue butterfly pea flower tea for mocktails.


    Step 2: Add the Glitter & Sweetness


    Once your blue tea is cold, it is time to add the magic. Pour the cooled blue tea into your serving glass. Add the simple syrup and stir well. Next, drop in your 1/8 teaspoon of edible food-grade glitter. Stir vigorously with a bar spoon. You will instantly see a mesmerizing, swirling galaxy effect in the blue liquid.

    Adding edible silver glitter to a blue mocktail.


    Step 3: Add Ice and Sparkle


    Gently add your ice cubes to the blue glitter tea. Pour the chilled sparkling water (or Sprite) over the ice. The carbonation will grab the glitter and keep it moving and dancing inside the glass.


    Step 4: The Magic Pour (Color Change)


    This is the moment you have been waiting for! Bring the glass to your guests. Have your freshly squeezed lemon juice ready in a small, separate shot glass or tiny pitcher. While everyone is watching, pour the lemon juice directly into the blue swirling drink.

    Lemon juice changing the color of a blue glitter mocktail.


    Give it a gentle stir, and watch in amazement as the deep blue liquid instantly transforms into a bright, glowing, swirling pink and purple potion.


    Is Edible Glitter Safe to Drink?


    This is a highly searched question, and the answer is a resounding yes if you buy the right product. You must use 100% Food-Grade Luster Dust or Brew Glitter. These are typically made from food-safe mica pigments that pass safely through the digestive system without altering the taste or texture of your drink.

    Never use craft glitter or items simply labeled “non-toxic.” Always check the label to ensure it is FDA-approved for consumption.


    Conclusion


    Creating a magical color changing glitter mocktail at home is easier than you might think. By harnessing the natural pH-reactive properties of butterfly pea flower tea and combining it with the mesmerizing swirl of food-safe edible glitter, you can craft a beverage that is truly unforgettable. It is refreshing, perfectly sweet, and provides an incredible interactive experience for anyone who drinks it. Gather your ingredients, start brewing, and get ready to amaze your guests!


    FAQs


    Does butterfly pea flower tea have a strong flavor? 

    No, butterfly pea flower tea has a very mild, slightly earthy, and woody flavor. It is very similar to a weak green tea. When mixed with lemon juice and simple syrup, the drink simply tastes like a delicious, refreshing sparkling lemonade.


    Can I make the blue tea ahead of time? 

    Absolutely! You can brew a large batch of the butterfly pea flower tea and store it in an airtight pitcher in the refrigerator for up to 5 days. This makes party prep incredibly easy.


    Will the glitter change the taste of my mocktail? 

    No. High-quality, food-grade edible glitter is completely tasteless and odorless. It is designed strictly for visual enhancement.