Blog

  • How to Make Easy Non-Alcoholic Glitter Drinks for Parties

    How to Make Easy Non-Alcoholic Glitter Drinks for Parties


    Editor’s Note


    At Sip Drafts Lab, we take food safety very seriously. The trend of shimmering, sparkly drinks is taking over the internet, but not all glitter is safe to eat. Before we created these recipes, our team tested multiple brands of edible dust. We only use and recommend FDA-approved, 100% food-grade edible luster dust (commonly used for cake decorating). Never use craft glitter in your beverages. These recipes are perfectly safe, stunningly beautiful, and guaranteed to be the highlight of your next party!


    The best part? You do not need alcohol to make a fancy, beautiful beverage. Creating easy non-alcoholic glitter drinks for parties is simple, incredibly cheap, and safe for guests of all ages, including kids.


    In this complete guide, we will show you the secret to making these drinks, what ingredients to buy, and three viral recipes that take less than five minutes to mix.


    The Secret Ingredient: What is Edible Glitter?


    Before we start mixing drinks, we need to talk about the magic ingredient. To make these drinks, you need something called Edible Luster Dust or Brew Glitter.

    Edible luster dust for making glitter drinks.


    This is not the plastic craft glitter you buy at an art store. Edible glitter is made from food-grade ingredients like sugar, maltodextrin, and mica-based pearlescent pigments. It has absolutely no taste and no texture. When you drink it, you will not feel any grit in your teeth.


    You only need a tiny pinch of this dust to make an entire pitcher of drinks sparkle. You can find edible glitter easily online or in the baking aisle of your local craft and hobby store.


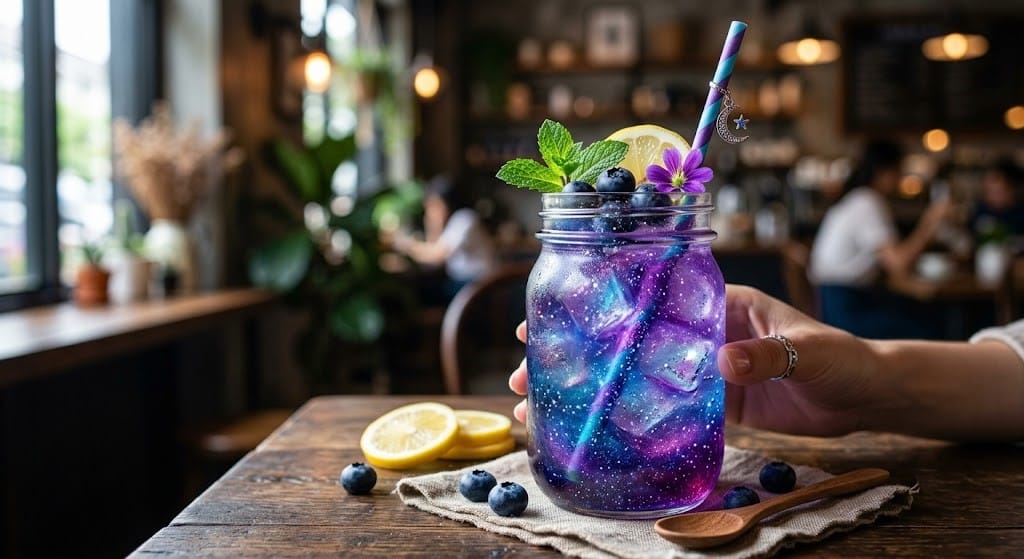
    Recipe 1: The Viral Shimmering Galaxy Lemonade


    This is the most highly searched glitter drink on the internet right now. It uses blue and purple tones to create a drink that looks exactly like outer space. It is tart, sweet, and mesmerizing.


    What You Need:

    • 1 cup of fresh lemonade (store-bought or homemade)
    • 1/2 cup of blue sports drink (like blue Gatorade or Powerade)
    • A tiny pinch of silver or purple edible luster dust
    • Ice cubes
    • Fresh lemon slices for garnish


    How to Make It:

    1. Take a tall, see-through glass and load it all the way to the top with ice cubes. Add a very small pinch (about 1/8th of a teaspoon) of the edible luster dust directly over the ice.
    2. Pour in the blue sports drink until the glass is half full.
    3. Slowly pour the fresh lemonade on top to fill the glass.
    4. Use a long spoon or a straw to stir the drink rapidly. Watch the “galaxy” come to life!


    If you love fresh citrus drinks, you have to try making our highly-rated Chick-fil-A Sunjoy Copycat Recipe for your next afternoon picnic!


    Recipe 2: The Pink Cotton Candy Sparkler


    If you are hosting a princess party, a baby shower, or just love sweet flavors, this bright pink sparkling mocktail is the perfect choice. It is bubbly and incredibly fun.

    Pink cotton candy mocktail with edible glitter.


    What You Need:

    • 1 cup of clear lemon-lime soda (like Sprite or 7-Up)
    • 2 tablespoons of pink cotton candy drink syrup (the Torani version is highly recommended for this). 
    • A pinch of pink or rose-gold edible glitter
    • A small piece of real pink cotton candy for garnish
    • Ice cubes


    How to Make It:

    1. In a small glass, mix the cotton candy syrup with the pink edible glitter. Stir until the glitter is completely mixed into the thick syrup.
    2. Fill your serving glass with ice.
    3. Pour the glittery syrup mixture over the ice.
    4. Slowly top with the cold lemon-lime soda.
    5. Stir gently to combine, and place a fluffy piece of real cotton candy on the rim of the glass right before serving.


    Looking for more vibrant, colorful party drinks? Check out our famous Sonic Twisted Flamingo Recipe to keep the summer vibes going!


    Recipe 3: The Golden Vanilla Cream Soda


    This recipe is slightly richer and looks like swirling liquid gold. It is perfect for evening parties, New Year’s Eve, or fancy dinner gatherings.


    What You Need:

    • 1 cup of a premium brand cream soda, though refreshing ginger ale works wonderfully too. 
    • 1 tablespoon of vanilla syrup
    • A pinch of gold edible luster dust
    • Crushed ice


    How to Make It:

    1. Add the gold edible dust to the bottom of an empty glass.
    2. Pour in the vanilla syrup and mix it with the dust to create a golden paste.
    3. Add your crushed ice to the glass.
    4. Pour the cold cream soda over the ice and stir vigorously. The golden swirls will catch the light beautifully.


    Craving a thicker, richer vanilla and chocolate treat? Our easy Wendy’s Brownie Batter Frosty Hack takes only 5 minutes in a blender!


    Expert Tips for Styling and Serving Glitter Drinks


    If you want to achieve that picture-perfect, viral aesthetic commonly found on TikTok and Pinterest, simply use these easy presentation guidelines: 

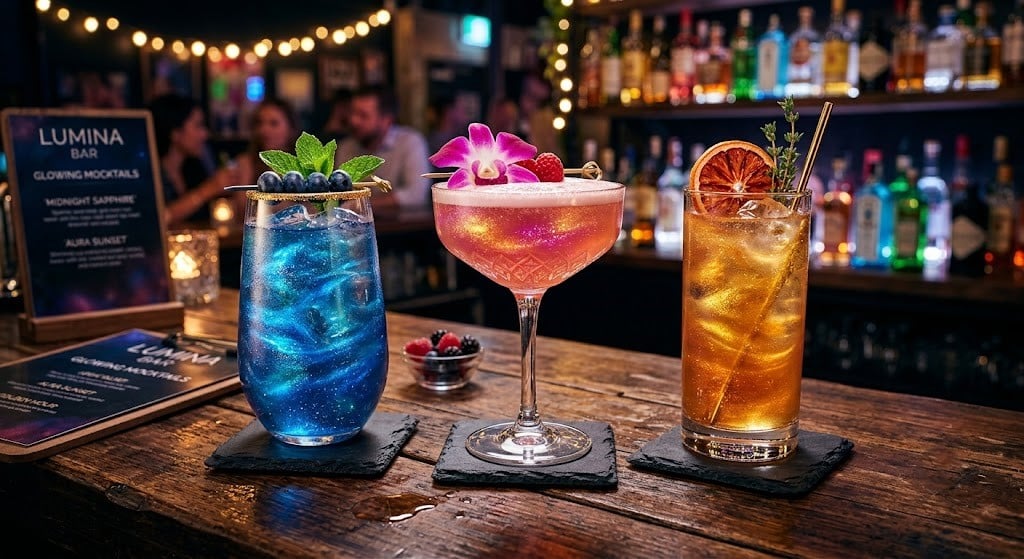
    Colorful shimmering non-alcoholic drinks in mason jars.


    Use Clear Glassware 


    Do not serve these drinks in plastic red cups or solid-colored mugs. The whole point of the drink is the visual swirl. Always use clear glasses, mason jars, or clear plastic party cups so the glitter is fully visible.


    Serve with a Stirrer 


    Edible glitter is heavier than water. If the drink sits on a table for 15 minutes, the glitter will eventually sink to the bottom. Always serve these drinks with a colorful straw or a swizzle stick so your guests can stir up the magic before taking a sip.


    Lighting is Everything 


    Glitter needs light to shine! If your party is outdoors in the sun, the drinks will sparkle naturally. If you are indoors, try placing a small LED light coaster under the glasses or serve them near a bright light source.


    Conclusion


    You do not need an expensive bartender or complicated ingredients to host an unforgettable party. By using a simple pinch of food-grade edible luster dust, you can transform basic sodas and lemonades into magical, swirling works of art.

    These easy non-alcoholic glitter drinks for parties are safe, incredibly fun to make, and will leave all your guests asking for your secret recipe. Grab some clear glasses, pick your favorite colors, and get ready to add a little sparkle to your next celebration!


    FAQs


    Does edible glitter change the taste of the drink?

    Not at all! High-quality edible luster dust is completely flavorless and odorless. It will not make your drink taste chalky, sweet, or salty. It is used purely for visual decoration.


    Is edible glitter safe for toddlers and young children?

    Yes, as long as you are using 100% FDA-approved, food-grade edible luster dust, it is completely safe for children to consume. Always check the label before buying to ensure it says “edible” and not just “non-toxic.”


    Can I make a large pitcher of glitter drinks ahead of time?

    Yes, you can mix the liquids and the glitter in a large pitcher before the party. However, because the glitter will settle at the bottom over time, you will need to give the pitcher a very good stir right before pouring it for your guests.
  • How to Make Edible Glitter Mocktails at Home (Easy & Safe Recipes)

    How to Make Edible Glitter Mocktails at Home (Easy & Safe Recipes)


    Editor’s Note 


    As a beverage expert who loves hosting, I know how important it is to serve drinks that not only taste amazing but also look unforgettable. When edible glitter trended on TikTok, I spent weeks testing different brands to ensure they were 100% food-safe. In this guide, I will share my exact secrets for creating mesmerizing, shimmering mocktails that will wow your guests without compromising on health or flavor.


    However, working with glitter in food and drinks requires a bit of knowledge. You cannot just use any sparkle you find at the craft store. In this comprehensive guide, we will cover everything from choosing the safest ingredients to mastering three stunning recipes that outshine any expensive restaurant drink.


    What is Edible Glitter and Is It Safe to Drink?


    This is the most critical question when making shimmering drinks. Yes, edible drink glitter is completely safe to consume, but only if you buy the right kind.


    True edible glitter is usually made from food-grade mica powder, sugar, or pearlescent pigments that the FDA (Food and Drug Administration) has approved for consumption. It passes safely through your digestive system without causing any harm. It has no taste, no texture, and no smell, meaning it will not alter the flavor of your favorite mocktail.


    Warning: Never use products labeled as “non-toxic.” Non-toxic just means it won’t poison you immediately, but it is not meant to be eaten. Always look for the exact words “100% Edible” or “Food-Grade” on the label.


    Where to Buy and How to Choose the Best Glitter


    To get that beautiful, swirling “potion” effect, you need the right texture.


    Avoid large, chunky sugar glitters. These will just sink to the bottom of your glass and look like sand. Instead, look for “luster dust” or “brew glitter.” These are micro-fine powders that float effortlessly in liquids. You can easily find high-quality, FDA-approved edible drink glitters on Amazon, in specialized baking stores, or on dedicated beverage supply websites.


    The Golden Rule: How to Use Edible Glitter in Drinks


    Before we jump into the recipes, you need to know the proper mixing technique. If you just dump the powder on top of an icy drink, it might clump up.

    Food Grade Edible Drink Glitter


    Start Small: You only need a tiny pinch (about 1/8 of a teaspoon) for a single glass. A little goes a very long way.


    Mix with Syrup First: For the absolute best results, mix the dry glitter into a small amount of simple syrup, lemon juice, or warm water first. Stir it into a paste, then add your main liquid.


    Stir Vigorously: Use a long bar spoon and stir vigorously in a circular motion to create a vortex. This activates the swirling effect.


    3 Trending Edible Glitter Mocktail Recipes You Must Try


    Now that you know the basics, let us create some magic. Here are three highly requested, easy-to-make recipes that will make you look like a professional mixologist.


    The Galaxy Lemonade (Blue & Purple Magic)


    This vibrant, space-themed drink is a massive hit at kids’ parties and summer gatherings. It is refreshing, tangy, and looks out of this world.

    Blue Galaxy Lemonade Mocktail


    Ingredients:

    • 1 cup freshly squeezed lemonade
    • 1/4 cup blue raspberry syrup (or blueberry juice)
    • 1/8 teaspoon silver or light blue edible luster dust
    • Ice cubes
    • Lemon slices and fresh mint for garnish


    Step-by-Step Instructions:

    1. In a tall glass, mix your blue raspberry syrup with the silver edible glitter. Stir until the glitter is fully dissolved in the syrup.
    2. Fill the glass to the top with ice cubes.
    3. Slowly pour the fresh lemonade over the ice.
    4. Watch as the clear lemonade mixes with the blue glitter syrup at the bottom, creating a beautiful swirling galaxy effect.
    5. Garnish with a fresh lemon wheel and a sprig of mint before serving.


    Sparkling Rose Gold Sunrise


    Perfect for bridal showers, Valentine’s Day, or a fancy brunch. This drink is elegant, bubbly, and has a luxurious rose-gold shimmer.

    Sparkling Rose Gold Mocktail


    Ingredients:

    • 1/2 cup sparkling apple cider or sparkling white grape juice (chilled)
    • 1/4 cup cranberry juice
    • 1/8 teaspoon rose-gold or pink edible brew glitter
    • A splash of fresh lime juice
    • Fresh raspberries for garnish


    Step-by-Step Instructions:

    1. Take a fancy coupe glass or a champagne flute.
    2. Add the splash of lime juice and the rose-gold edible glitter into the bottom of the glass. Stir them together.
    3. Pour in the cranberry juice and mix well to activate the shimmer.
    4. Top it off gently with the sparkling apple cider. The carbonation from the sparkling cider will keep the glitter dancing beautifully in the glass.
    5. Drop in two fresh raspberries for an elegant finish.


    Midnight Pearlescent Potion


    This dark, mysterious mocktail is highly trending during Halloween or evening events. It has a deep, rich color with a glowing, pearl-like swirl.


    Ingredients:

    • 1/2 cup pomegranate juice
    • 1/2 cup blackberry or dark cherry soda
    • 1/8 teaspoon pearl-white or silver edible glitter
    • 1/2 ounce vanilla syrup
    • Blackberries for garnish


    Step-by-Step Instructions:

    1. In a cocktail shaker, combine the vanilla syrup, pomegranate juice, and the pearl-white edible glitter.
    2. Add a small amount of ice and shake gently for 10 seconds.
    3. Strain the shimmering liquid into a serving glass filled with fresh ice.
    4. Top off the glass with the dark cherry soda.
    5. Stir gently with a bar spoon to combine the layers and watch the pearlescent clouds form. Garnish with a skewer of fresh blackberries.


    Pro Tips for the Perfect Shimmer


    To ensure your drinks look flawless every single time, keep these expert tips in mind:


    Carbonation is Your Friend: Using carbonated liquids (like sodas, sparkling water, or tonic) helps keep the glitter moving. The bubbles constantly push the glitter upwards, maintaining the swirl for much longer.


    Clear Liquids Show It Best: While you can add glitter to dark juices, clear or lightly tinted liquids (like lemonade, Sprite, or white grape juice) show off the sparkle much better.


    Keep a Spoon Handy: Eventually, gravity will win, and the glitter will slowly settle at the bottom. Serve your mocktails with decorative stirrers so guests can give their drink a quick spin to reactivate the magic.


    Conclusion


    Learning how to make edible glitter mocktails at home is an incredibly fun and creative way to upgrade your beverage game. By ensuring you purchase high-quality, FDA-approved luster dust and using the right mixing techniques, you can safely create café-quality, photogenic drinks right in your kitchen.


    Whether you are mixing up a sparkling rose gold treat for brunch or a dark galaxy potion for a themed party, these recipes guarantee a visually stunning experience. So, grab your favorite glasses, pick out a glitter color, and start stirring up some magic!


    FAQs


    Does edible glitter change the taste of my drink? 

    No, high-quality food-grade edible glitter is completely tasteless and odorless. It only adds visual appeal and will not alter the flavor or texture of your mocktail.


    Why is my edible glitter clumping at the top? 

    Clumping usually happens if you dump the powder directly onto a cold liquid. To prevent this, mix the glitter with a tiny bit of warm water or simple syrup first to create a paste, then add your cold drink.


    Will the glitter stay floating forever? 

    No, edible glitter is slightly heavier than liquid, so it will eventually settle at the bottom of the glass after 10 to 15 minutes. Using carbonated drinks helps it float longer, but you can always just give the drink a quick stir to reactivate the swirl.


    Can I use baking glitter or sanding sugar instead? 

    No. Sanding sugar or traditional baking glitters are too heavy and chunky. They will immediately sink to the bottom and dissolve, ruining the visual effect. You specifically need “luster dust” or “brew glitter” for drinks.


    Where can I buy 100% edible drink glitter? 

    You can easily find food-safe, FDA-approved drink glitters online on Amazon, at specialized cake decorating shops, or through brands like Brew Glitter and Fancy Sprinkles.

  • The Ultimate Cutwater Lemon Drop Martini Guide: Review & Copycat Recipe

    The Ultimate Cutwater Lemon Drop Martini Guide: Review & Copycat Recipe


    Editor’s Note


    Canned cocktails are booming, but not all of them taste great. We bought several 4-packs of the Cutwater Lemon Drop Martini and spent days testing them. We drank them straight from the can, over ice, and even created a fresh homemade version to compare. In this guide, we will solve the biggest complaints people have about canned drinks, like the strong alcohol burn and artificial aftertaste. Read on to get the perfect sip every single time!


    Are you looking for a quick and easy way to enjoy a premium cocktail without mixing it yourself? Canned cocktails are the perfect solution for busy nights, beach days, or backyard barbecues.


    One of the most talked-about drinks on the market right now is the Cutwater Lemon Drop Martini. It promises a bar-quality experience inside a small, convenient can.


    But does it actually taste good? Is it worth your hard-earned money? In this massive, deep-dive guide, we will answer all your questions, review the flavor, and even show you how to make a fresh version at home.


    What is the Cutwater Lemon Drop Martini?


    Cutwater Spirits is a very famous distillery based in San Diego, California. They are known for putting real, award-winning spirits into portable cans.

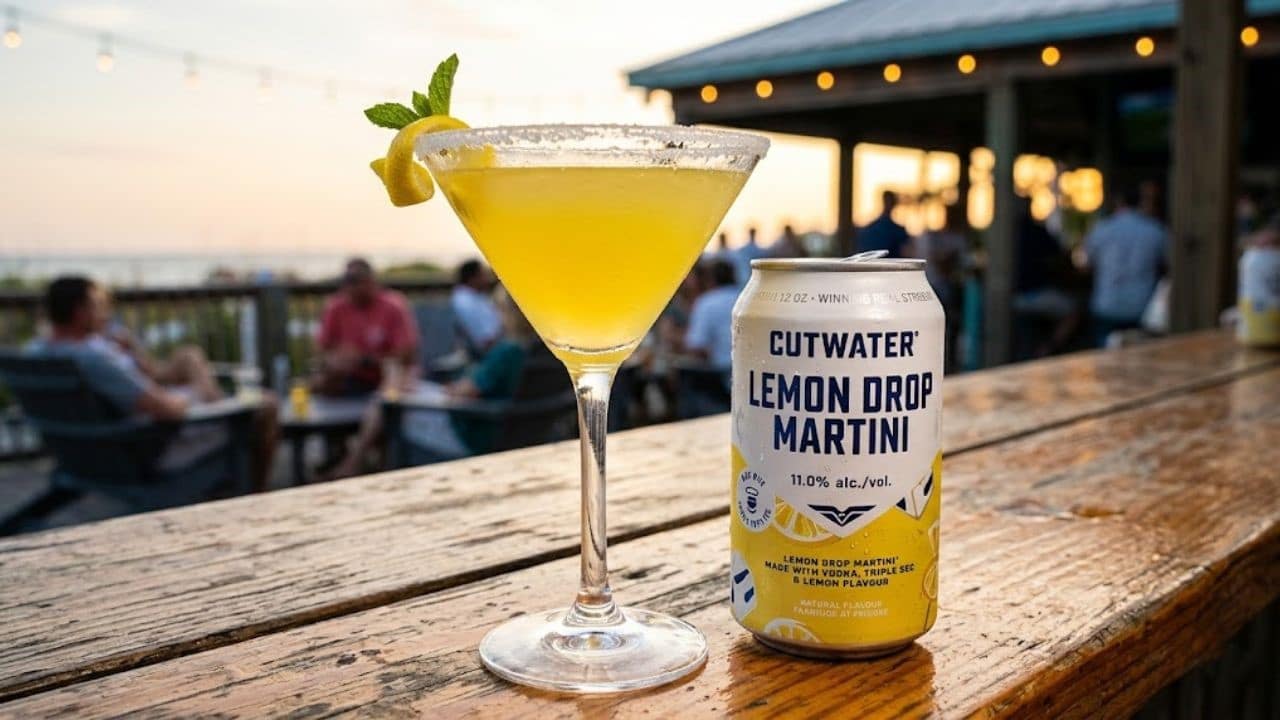
    The Lemon Drop Martini can is part of their high-strength cocktail lineup. Unlike cheap hard seltzers that use malt liquor, Cutwater uses their own real vodka. They mix dunkin mango pineapple refresher this premium vodka with natural lemon flavor and pure cane sugar.

    It is designed to give you a classic, sophisticated martini experience without needing a cocktail shaker, ice, or measuring tools. You just pop the top and enjoy.


    Honest Taste Test: What Does It Actually Taste Like?


    When you first sip this drink, you will notice two main things right away. It is very tart, and it is very strong.

    The lemon flavor is sharp and crisp. It tastes like real lemon juice, not fake candy flavoring. The pure cane sugar adds a nice sweetness that cuts through the sourness, preventing your face from puckering too much.

    However, because the alcohol content is high, you will feel a warm burn in your throat. Some people love this because it tastes like a real bar drink. Others might find it a bit too intense straight out of the can.


    Cutwater Lemon Drop Alcohol Content & Calories


    Before buying any drink, it is important to know what you are putting into your body. Here are the quick facts about this specific canned cocktail:


    Alcohol By Volume (ABV): 15% ABV. This is incredibly strong for a canned drink! One small can is equal to about two standard bar drinks.


    Calories: Approximately 220 to 240 calories per can.


    Sugars: Made with real cane sugar, so it is sweet but fits the traditional dessert cocktail profile.


    Because the ABV is 15%, you must drink this beverage slowly. It is not a light beer or a refreshing seltzer that you can chug on a hot day. It is a sipping drink.


    The Big Problem with Canned Cocktails (And How to Fix It)


    The biggest problem people face with Cutwater Martinis is that drinking them straight from the can feels too heavy and strong. The metal can does not give you the luxurious feeling of a real martini lounge.

    Fortunately, fixing this problem is incredibly easy. Follow our expert serving method to instantly elevate the flavor:


    Never Drink It Warm: Keep the cans in the back of your fridge where it is coldest.


    Use a Glass: Pouring the liquid out of the metal can change how you smell the drink, which improves the taste.


    The Ice Secret: Pour the drink over a glass filled with crushed ice. As the ice melts slightly, it softens the strong alcohol burn and blends the sugars perfectly.


    Trending Cutwater Flavor Rankings: Where Does Lemon Drop Stand?


    People on social media love to rank Cutwater flavors against each other. Based on recent internet trends, here is how the Lemon Drop compares to other popular options:


    Top Tier (The Winners): Cutwater Lime Margarita and Cutwater Lemon Drop Martini. These two win because the natural citrus covers the strong vodka taste beautifully.


    Middle Tier (Good but Strong): Vodka Mule and Rum Mint Mojito. These are tasty but have a much sharper bite.


    Bottom Tier (Too Sweet): Tiki Rum Mai Tai. Many users find this one a bit too sugary after a few sips.


    Overall, if you love clean, sour, and citrusy flavors, the Lemon Drop is widely considered one of the top three best cans Cutwater makes.


    How to Serve Cutwater Lemon Drop Like a Pro Bartender

    Sugar rimming a martini glass for a cocktail.


    Want to impress your friends at a dinner party? Do not just hand them a metal can. Follow these steps to make it look like an expensive restaurant drink:


    Step 1: Chill Your Glassware


    Put a beautiful martini glass or a short coupe glass into your freezer for 10 minutes before serving. A frosted glass keeps the drink ice-cold.


    Step 2: Sugar the Rim


    Take a fresh lemon wedge and run it around the rim of your chilled glass. Dip the wet rim into a small plate filled with white granulated sugar. This adds a lovely sweet crunch to every sip.


    Step 3: Pour and Garnish


    Pour the ice-cold Cutwater liquid into the glass. Drop a thin twist of lemon peel right into the center. Your guests will never guess this luxury cocktail came from a tin can!


    The Secret Copycat Recipe: Make It Fresh at Home


    If you cannot find Cutwater cans in your local store, or if you want a fresh version with zero preservatives, you can make it yourself! This recipe mimics the exact balance of the Cutwater can but uses fresh kitchen ingredients.


    Ingredients Needed


    Premium Vodka: 2 ounces (Choose a smooth, high-quality brand).

    Fresh Lemon Juice: 1 ounce (Never use bottled juice, fresh is key!).

    Simple Syrup: 1 ounce (Equal parts sugar and water melted together).

    Triple Sec / Orange Liqueur: 1/2 ounce (This adds depth to the citrus profile).


    Step-by-Step Instructions


    Fill the Shaker: Put a large handful of clean ice cubes into a cocktail shaker.

    Add Liquids: Pour in your premium vodka, fresh lemon juice, simple syrup, and triple sec.

    Shake Vigorously: Put the lid on and shake hard for 20 full seconds. The shaker should feel freezing cold in your hands.

    Strain and Serve: Pour the liquid through a strainer into a sugar-rimmed martini glass. Enjoy immediately!


    5 Fun Upgrades to Try With Your Cutwater Can

    Different variations of fruit vodka cocktails.


    If you have a 4-pack of Cutwater and want to experiment, try these quick and easy flavor upgrades:


    The Berry Drop


    Muddle two fresh strawberries or five blueberries at the bottom of your glass before pouring the Cutwater can on top. It creates a stunning color and adds a rich berry sweetness.


    The Fizzy Lemonade


    Fill a tall glass with ice. Pour in half a can of Cutwater Lemon Drop and top the rest with Sprite or club soda. This cuts the alcohol percentage in half and makes it a perfect daytime drink.


    The Herby Twist


    Clap three fresh basil leaves or mint leaves between your hands to release the oils. Drop them into your drink. The herbal aroma combines wonderfully with sharp lemon.


    The Tea Mixer


    Mix equal parts of Cutwater Lemon Drop with cold unsweetened black tea. It creates an adult, high-alcohol version of an Arnold Palmer drink!


    The Frozen Slushie


    Empty two cans of Cutwater into a high-speed blender with two cups of ice. Blend until it becomes a smooth, snowy slushie. Perfect for hot pool days.


    Troubleshooting Canned Cocktail Problems


    Did your drink not taste right? Here is how to fix it instantly:


    Problem: It tastes way too strong or burning.

    Solution: Pour it into a tall glass and add 2 ounces of club soda or water. This dilutes the alcohol without destroying the lemon flavor.


    Problem: It tastes flat or boring.

    Solution: Squeeze a fresh wedge of real lemon into the liquid. Canned fruit juices lose their brightness over time, and a splash of fresh citrus wakes it right up.


    Problem: It is too sweet.

    Solution: Add a dash of bitters or an extra splash of unsweetened premium vodka to balance out the sugar.


    Cutwater Canned Lemon Drop vs. Traditional Bar Martini


    How does the can hold up against a fresh drink made by a real bartender? Let us compare them side-by-side:

    FeatureCutwater Canned Lemon DropTraditional Bar Martini
    ConvenienceExtremely High (Ready in 2 seconds)Low (Requires tools and time)
    PriceAffordable (Around $3-$4 per can)Expensive ($12-$15 per drink)
    FreshnessMedium (Pasteurized for shelf life)High (Freshly squeezed fruit)
    Alcohol ControlFixed at 15% ABVCustomizable by the bartender


    If you prioritize speed, convenience, and saving money, the Cutwater can wins by a landslide. If you want the absolute freshest fruit flavor, a traditional bar drink is slightly better.


    Where to Buy and How to Store Your Cans


    You can find Cutwater products in most major American grocery stores, large liquor warehouses, and delivery apps.

    Always store your canned cocktails in a cool, dark place like a pantry or refrigerator. Avoid leaving the cans in a hot car or outside on a warm patio. Extreme heat can alter the pasteurized fruit juice inside, making the drink taste metallic or stale.


    The Viral Frozen Lemon Drop Slushie (Summer Hack)


    Why serve it on the rocks when you can turn it into an adult slushie? This hack takes the standard Cutwater can and transforms it into a frozen masterpiece that is perfect for sitting by the pool.

    Frozen Lemon Drop Martini slushie in a glass.


    What You Need:

    • 1 Can of Cutwater Lemon Drop Martini (or 1 serving of our homemade copycat recipe)
    • 1 oz Limoncello (adds an extra punch of sweet citrus)
    • 2 cups of crushed ice
    • Lemon zest for garnish


    How to Make It:

    1. Pour your Cutwater Lemon Drop and the Limoncello directly into a high-speed blender.
    2. Add the crushed ice and blend on high for about 30 seconds until completely smooth and frosty.
    3. Pour into a chilled margarita glass or a mason jar.
    4. Top with a sprinkle of fresh lemon zest and enjoy with a wide straw!


    Final Thoughts


    The Cutwater Lemon Drop Martini is a phenomenal canned cocktail if you respect its strength. It provides a true 15% ABV punch with authentic lemon and sugar flavors. By pouring it over ice and adding a fresh garnish, you can easily mimic a premium bar experience for a fraction of the cost.


    FAQs


    How many drinks are in one can of Cutwater Lemon Drop?

    Because it has a 15% ABV, one small 12-ounce can contains the alcohol equivalent of roughly two standard bar cocktails. Drink them responsibly!


    Does Cutwater Lemon Drop need to be refrigerated?

    While unopened cans are shelf-stable and safe at room temperature, we highly recommend storing them in the fridge. Canned cocktails always taste significantly better when served ice-cold.


    Is Cutwater Lemon Drop Martini gluten-free?

    Yes! Cutwater uses an exceptionally clean vodka base distilled from corn, and their flavorings are natural, making this drink safe for gluten-free diets.


    Can I get drunk off one can of Cutwater?

    For many casual drinkers, yes. Since one single can packs a 15% ABV punch, it can induce a strong buzz quickly if consumed fast. Always pace yourself.

  • 5 Best Starbucks Copycat Recipes to Make at Home (Save Money & Time)

    5 Best Starbucks Copycat Recipes to Make at Home (Save Money & Time)


    Editor’s Note


    As a passionate recipe creator and former barista enthusiast, I know how frustrating it is to spend $6 on a daily coffee. After months of testing ingredient ratios, tweaking syrup pumps, and perfecting brewing methods, I have crafted the ultimate guide to replicating your favorite café drinks in your own kitchen. These recipes are thoroughly tested to guarantee that perfect, premium taste.


    Are you tired of waiting in long drive-thru lines and spending a fortune on your daily caffeine fix? You are not alone. Making your favorite café beverages at home is easier than you think, and it is the ultimate way to save money while customizing your drink exactly to your liking.


    Whether you are craving a sweet blended frappuccino or a refreshing fruity refresher, having a reliable list of Starbucks copycat recipes will completely transform your morning routine. You do not need expensive espresso machines or professional barista training. With a few simple ingredients, you can easily recreate that iconic taste right in your own kitchen.


    Why Make Copycat Coffee Recipes at Home?


    Before jumping into the actual step-by-step instructions, it is worth discussing why preparing your own café-style beverages will completely transform your daily caffeine routine. 


    Massive Cost Savings: A $6 daily coffee habit adds up to over $2,100 a year! Buying ingredients in bulk reduces the cost per cup to just pennies.


    Complete Customization: Want extra caramel? Need dairy-free milk? Prefer half-caff? When you make it at home, you are the boss of your cup.


    Healthier Options: You can control the exact amount of sugar and syrups that go into your drink, making it easy to create low-calorie or keto-friendly versions.


    If you love recreating fast-food favorites, be sure to check out our ultimate Chick-fil-A Sunjoy Copycat Recipe for a refreshing summer treat!”)


    The Ultimate Starbucks Caramel Frappuccino Copycat


    The Caramel Frappuccino is arguably the most famous blended beverage in the world. Sweet, icy, and packed with rich caramel flavor, it is the perfect afternoon pick-me-up. Here is how to nail the texture so it isn’t too watery or too chunky.

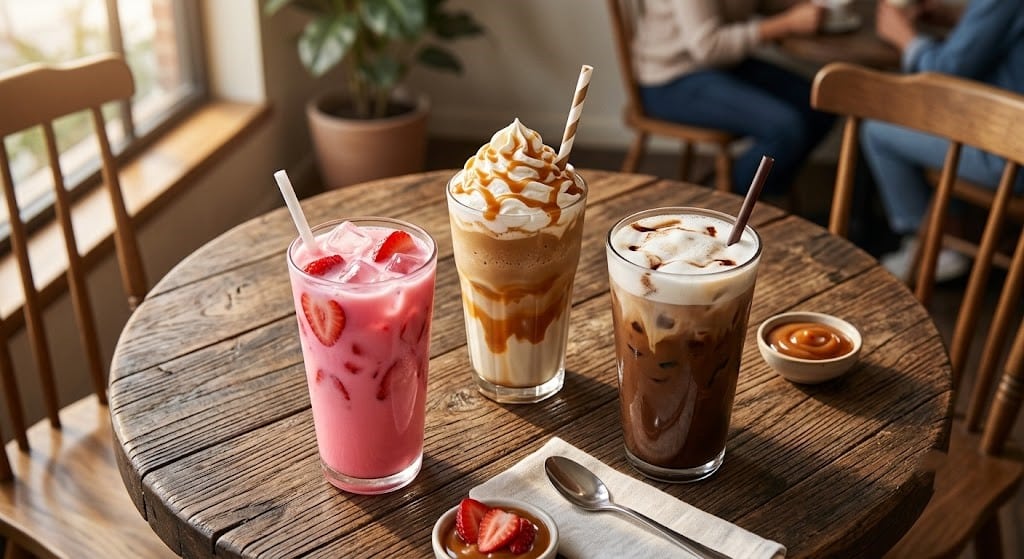
    Homemade Caramel Frappuccino with Extra Caramel


    Ingredients You Need

    • 1 cup strong brewed coffee (or 2 shots of espresso), chilled
    • 1/2 cup whole milk (or oat milk for a creamier dairy-free option)
    • 2 tablespoons caramel syrup
    • 1 tablespoon granulated sugar
    • 1.5 cups crushed ice
    • A generous dollop of whipped cream and a heavy drizzle of caramel syrup for the final garnish. 


    Secret Ingredient: 1/8 teaspoon xanthan gum (This prevents the drink from separating and gives it that smooth, commercial texture!)


    Step-by-Step Instructions


    Brew and Chill: Brew your coffee or espresso ahead of time. Allow the brewed liquid to chill thoroughly inside the refrigerator before using. Using hot coffee will melt your ice and ruin the slushy texture.


    Blend the Base: Add the chilled coffee, milk, caramel syrup, sugar, ice, and xanthan gum into a high-powered blender.


    Blend Until Smooth: Blend on high for 30 to 45 seconds until the ice is completely crushed and the mixture is thick and smooth.


    Decorate the Cup: Drizzle caramel sauce generously around the inside edges of a tall glass.


    Serve and Top: Pour the blended frappuccino into the glass, top with a mountain of whipped cream, and finish with a final caramel drizzle.


    Refreshing Starbucks Pink Drink (Secret Menu Classic)


    The Pink Drink took the internet by storm and quickly moved from the secret menu to the permanent menu. It is light, fruity, creamy, and incredibly aesthetic.

    Refreshing Starbucks Pink Drink with Strawberries


    Ingredients You Need

    • 8 ounces of prepared and fully cooled Tazo Passion Herbal Tea. 
    • 1/2 cup white grape juice (this mimics the sweetness of the official refresher base)
    • 4 ounces of sweetened coconut beverage (ensure it is the refrigerated carton version rather than the thick canned variety). 
    • Half a cup of dehydrated strawberry pieces (freshly cut strawberry slices work perfectly as an alternative). 
    • Ice


    Step-by-Step Instructions


    Prepare the Base: Brew a cup of Tazo Passion tea and let it cool completely.


    Mix the Liquids: In a large cocktail shaker or a mason jar with a lid, combine the chilled tea and white grape juice.


    Add the Berries: Toss in your freeze-dried strawberries. Let them sit in the liquid for about 2 minutes so they rehydrate and release their beautiful pink color.


    Add Ice and Milk: Fill the jar with ice cubes, then pour the coconut milk over the top.


    Shake It Up: Close the lid tightly and shake vigorously for 15 seconds. This ensures the coconut milk blends perfectly without separating. Pour into a tall glass and enjoy!


    Looking for more vibrant, fruity drinks? Try our highly-requested Sonic Unicorn Slush Copycat Recipe!


    Classic Iced White Chocolate Mocha


    Rich, decadent, and perfectly sweet, the Iced White Mocha is a fan favorite, especially when topped with sweet cream cold foam and an extra caramel drizzle.

    Creamy Iced White Chocolate Mocha


    Ingredients You Need

    • A double shot of freshly pulled espresso (alternatively, 4 ounces of a robust, dark-brewed coffee). 
    • 3 tablespoons high-quality white chocolate sauce (Torani or Ghirardelli work best)
    • 3/4 cup milk of your choice
    • Ice


    Step-by-Step Instructions


    Melt the Chocolate: While your espresso or coffee is still piping hot, pour it directly into your serving glass over the white chocolate sauce.


    Stir Well: Stir aggressively until the white chocolate sauce is completely melted and dissolved into the hot coffee.


    Cool It Down: Add cold milk to the mixture to bring the temperature down.


    Add Ice: Fill the rest of the glass to the top with ice. Stir once more to incorporate everything. Top with whipped cream if desired!


    The Famous Iced Brown Sugar Oatmilk Shaken Espresso


    This drink changed the iced coffee game. It is perfectly balanced, not too sweet, heavily caffeinated, and incredibly creamy thanks to the oat milk.

    Iced Brown Sugar Oatmilk Shaken Espresso


    Ingredients You Need

    • 2-3 shots of blonde espresso (blonde roast is crucial for the authentic taste)
    • 1 tablespoon dark brown sugar
    • A dash of cinnamon
    • 1/2 cup creamy oat milk (barista blend is highly recommended)
    • Ice


    Step-by-Step Instructions


    Prepare the Coffee Base: Start by pulling fresh shots using your favorite blonde roast espresso beans. 


    Dissolve the Sugar: Immediately add the brown sugar and cinnamon to the hot espresso so the sugar dissolves completely.


    Shake: Pour the sweetened espresso into a cocktail shaker filled halfway with ice. Shake vigorously for 20 seconds. This step is vital as it aerates the espresso and creates a delicious, frothy layer.


    Pour and Top: Pour the entire contents of the shaker (including the ice) into a glass. Top it off with a generous splash of oat milk. Do not stir too much; watch the beautiful marbling effect!


    Pro Tips for the Best Homemade Coffee Experience


    To ensure your recipes taste just as good as the ones from the drive-thru, keep these expert tips in mind:


    Invest in Good Syrups: Your drink is only as good as the flavors you put into it. Brands like Torani, Monin, and Fontana (the brand Starbucks actually uses) will give you the best results.


    Use Filtered Water for Ice: Bad tasting ice will ruin a good coffee. Always make your ice cubes using filtered water.


    Buy a Frother: A handheld milk frother costs less than $15 but will elevate your homemade drinks by allowing you to make your own cold foam in seconds.


    Conclusion


    You do not have to sacrifice quality to save money on your morning coffee. By mastering these simple Starbucks copycat recipes, you can enjoy premium, café-quality beverages from the comfort of your home. Whether you are shaking up a brown sugar espresso or blending a sweet caramel frappuccino, these recipes are guaranteed to satisfy your cravings. Gather your ingredients, grab a reusable cup, and start brewing!


    FAQs


    What brand of syrups does Starbucks use? 

    They use their own proprietary brand of syrups, which are manufactured by Fontana. You can sometimes buy these directly from a store if you ask the barista nicely, but brands like Torani and Monin are excellent, easily accessible substitutes.


    How do I stop my homemade frappuccinos from separating? 

    The secret is xanthan gum! Adding just 1/8 teaspoon of xanthan gum to your blender binds the water, ice, and milk together, creating that smooth, creamy texture that doesn’t separate after five minutes.


    Can I make these recipes without an espresso machine? 

    Absolutely. If a recipe calls for espresso, you can easily substitute it with very strong brewed coffee, instant espresso powder mixed with hot water, or cold brew concentrate.


    What kind of coconut milk is used in the Pink Drink? 

    Do not use canned coconut milk, as it is far too thick and will separate into chunks. You need the sweetened, refrigerated carton coconut milk (often found in the dairy aisle) for a smooth, refreshing texture.


    How long can I store homemade syrups? 

    If you decide to boil your own simple syrups at home (like a homemade brown sugar syrup), they will typically last for 2 to 3 weeks in the refrigerator when stored in an airtight glass jar or bottle.

  • The Ultimate Homemade Dunkin Mango Pineapple Refresher Recipe

    The Ultimate Homemade Dunkin Mango Pineapple Refresher Recipe


    Editor’s Note


    We spent hours in our kitchen testing this famous Dunkin drink to get the exact same taste. After many tries, we found the perfect balance of sweet mango and tart pineapple. If you want to save your money and enjoy a fresh, cold drink this summer, this guide is exactly what you need. You will forget about buying expensive cafe drinks!


    Are you looking for a cold and delicious fruit drink to beat the summer heat? You are in the perfect place. Today, we are teaching you how to make your very own mango pineapple refresher at home.


    Drinking this makes you feel like you are sitting on a tropical island. The taste is incredibly fresh and perfectly sweet. The best part? It is super easy and very cheap to make in your own kitchen instead of buying it from a store. Let’s look at how to make this perfect summer beverage.


    Trending Customizations: The Secret Menu


    If you look online, people are always changing up this drink to make new flavors. We tested the top trending ideas, and these secret menu variations are truly amazing:


    The “Sabrina’s Daydream” Twist: People are going crazy for this! This twist focuses heavily on the sweet mango flavor, using just a tiny splash of pineapple to balance it out.


    The Mango Pineapple Oat Milk Refresher: If you like your drinks to be creamy, use oat milk instead of water. This is the biggest hit on the secret menu right now!


    The Sparkling Upgrade: If you love fizzy sodas, mix in some sparkling water at the end. It is a fantastic way to stay hydrated.


    What You Need (Simple Ingredients)

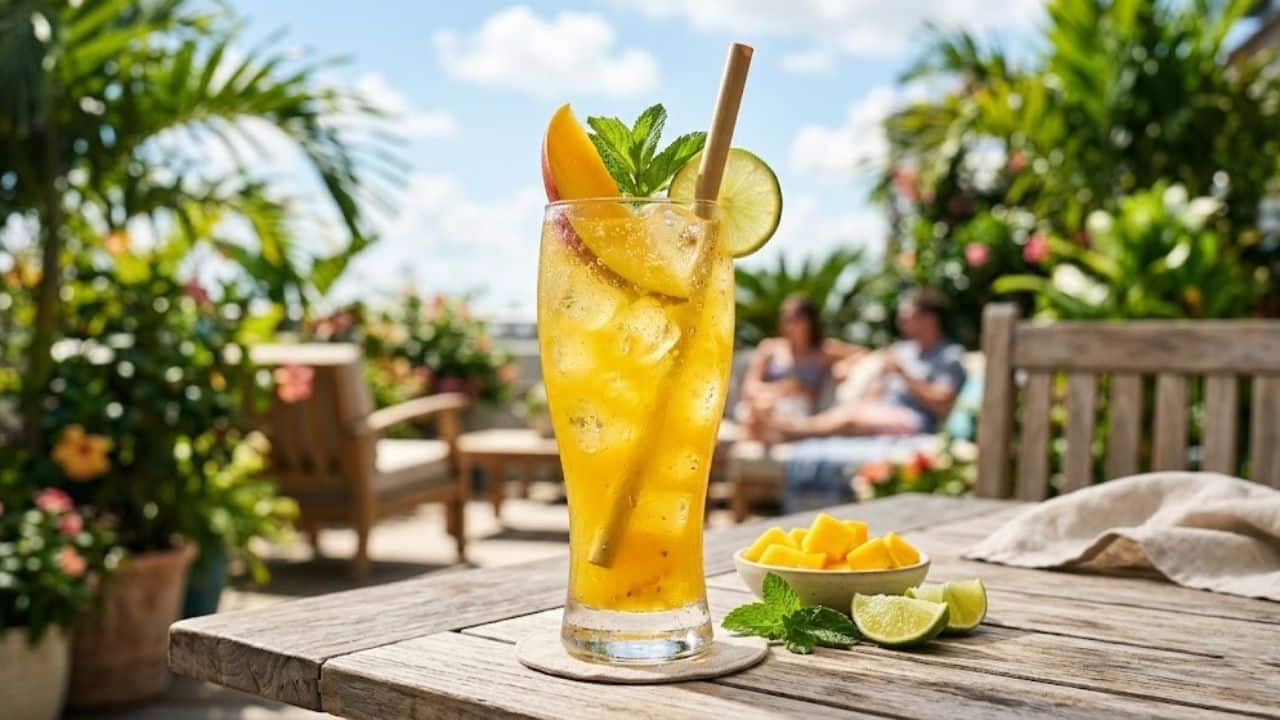
    Ingredients for homemade mango pineapple refresher.


    You do not need any fancy tools or hard-to-find items for this recipe. You probably have these simple things in your kitchen right now:


    Green Tea: 1 cup of cold green tea. Dunkin uses green tea in their refreshers to give you a nice boost of energy.


    Mango Puree: 3 big tablespoons. You can make this yourself by blending fresh mango pieces until they are smooth.


    Pineapple Juice: 1/2 cup of cold pineapple juice. Buying 100% pure juice will give you the best flavor.


    Sweetener: 1 to 2 tablespoons of simple syrup. You can also use honey if you prefer.


    Ice: Lots of ice cubes to keep your drink freezing cold.


    Easy Ingredient Substitutes


    Everyone likes different tastes. If you are missing an ingredient, you can easily swap things out:


    The Caffeinated Base


    If you do not like green tea, you can use regular black tea. If you want a drink with zero caffeine for your kids, just replace the tea with fresh coconut water.


    The Fruit Base


    If you cannot find liquid mango puree, just take frozen mango chunks and blend them with a little bit of water. This actually tastes much fresher!


    The Creamy Addition


    If you want your refresher to look milky and thick, add 2 tablespoons of coconut milk right before you drink it.


    Step-by-Step Instructions (The Easy Method)


    Just follow these easy steps and your wonderful drink will be ready in under five minutes.


    Step 1: Brew and Chill the Tea


    First, make your green tea. Let the tea bag sit in hot water for about 3 to 4 minutes, then take it out. Put this tea in the fridge until it is completely cold. If you use hot tea, it will melt all your ice!


    Step 2: Mix the Tropical Fruits


    Grab a large cup or a shaker. Pour in your cold pineapple juice and your fresh mango puree. Stir these two together with a spoon until the color becomes a beautiful yellow-orange.


    Step 3: Combine and Shake


    Now, pour your cold green tea into the fruit mixture. If you have a sweet tooth, add your simple syrup or honey now. Shake or stir it very well.


    Step 4: Pour Over Ice


    Fill your favorite drinking glass all the way to the top with ice cubes. Pour your delicious mixed drink over the ice. You can stick a small piece of pineapple on the edge of the glass to make it look fancy!


    Pro Tips to Perfect Your Refreshe

    Clear and creamy variations of mango fruit drink.


    Strain the Puree: If you do not like tiny pieces of fruit floating in your cup, pour your puree through a small strainer before mixing it.


    Make a Big Pitcher: If you are having friends over, just double all the ingredients and make a big jug. It stays totally fresh in the fridge for up to two days.


    Add a Citrus Kick: Squeezing a tiny bit of fresh lemon juice into the glass makes all the fruit flavors pop out even more.


    The “Golden Coconut” Mango Refresher


    If you love creamy, tropical drinks (like the famous Starbucks Pink Drink), this upgrade is for you. Instead of using brewed green tea as your liquid base, swap it entirely for cold, unsweetened coconut milk.

    • How to make it: Pour your homemade mango-pineapple syrup base over ice, and top it off with 1 cup of creamy coconut milk. Stir gently. The drink instantly turns into a beautiful, pastel yellow “golden” milk that tastes exactly like a melted tropical popsicle!
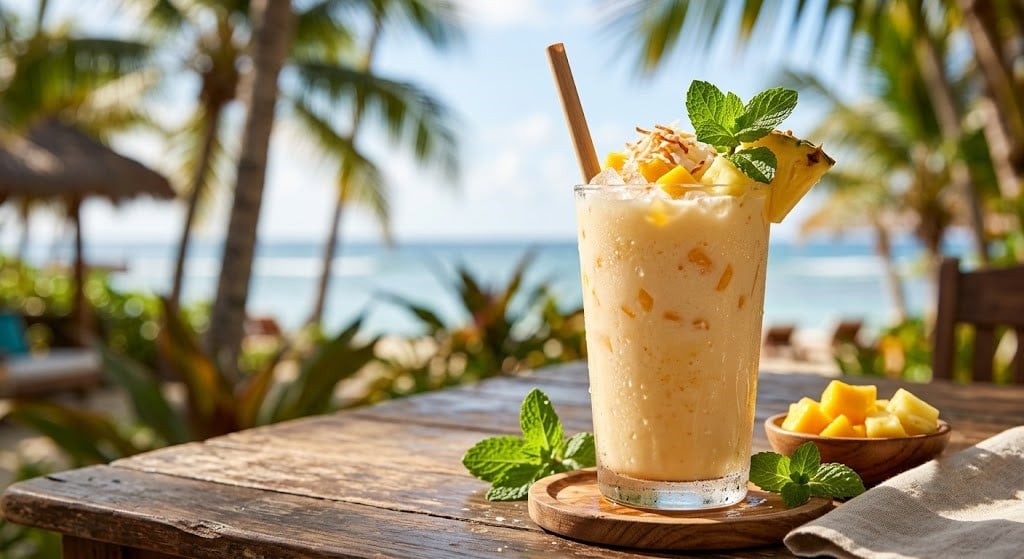
    Creamy coconut mango pineapple refresher drink.


    FAQs


    Can I put coconut milk in this drink?


    Yes, absolutely! If you add 2 big spoonfuls of coconut milk, it tastes exactly like the famous creamy Dunkin variation. It also turns the drink a very pretty pastel color.


    Can I use canned pineapple juice?


    Yes, canned juice works perfectly. Just try to buy the kind that has no added sugar, or else your final drink might be way too sweet.


    How long does this drink stay fresh?


    You can keep the mixed liquid (without ice) in your refrigerator for up to 3 days. When you are ready to drink it, just pour it into a fresh glass of ice.

  • The Ultimate Wendy’s Brownie Batter Frosty Recipe (Viral Copycat Hack)

    The Ultimate Wendy’s Brownie Batter Frosty Recipe (Viral Copycat Hack)


    Editor’s Note


    When Wendy’s first dropped the Brownie Batter Frosty, it broke the internet. However, fast-food items come and go, and depending on the season, you might not find it on the menu. Here at Sip Drafts Lab, we hate waiting for limited-time menus. Our culinary team tested dozens of combinations mixing different cocoa powders, heavy creams, and brownie mixes until we found the absolute perfect formula. This recipe requires zero fancy equipment, no ice cream maker, and takes just 5 minutes in a blender. It is thick, incredibly chocolatey, and gives you that nostalgic fast-food joy right in your own kitchen.


    Have you ever had a sudden, overwhelming craving for a thick, frosty, chocolatey dessert, but you just do not want to leave your house? We have all been there.


    Unfortunately, buying these fast-food treats every day is terrible for your wallet, and sometimes the machines at the restaurant are “down for cleaning.”


    The good news is that recreating this magic at home is surprisingly easy. You do not need an expensive ice cream machine. With a simple blender and a few clever grocery store ingredients, you can make a thick, spoonable dessert that rivals the original. Let us show you exactly how to master this copycat recipe!


    Why the Wendy’s Brownie Batter Frosty Broke the Internet


    Before we start blending, it helps to understand what makes this specific drink so incredibly popular.


    A standard chocolate milkshake is just ice cream and milk blended together. It is thin and melts quickly. Frosty, on the other hand, is famous for its unique texture. It is somewhere perfectly in the middle between soft-serve ice cream and a milkshake. You almost always need a spoon to eat it, not just a straw.


    The “Brownie Batter” version added a deep, dark cocoa flavor and a slightly chewy, rich finish that tasted exactly like licking the spoon when baking homemade brownies. It solves the ultimate sweet tooth problem instantly.

    If you love making fast-food drinks at home, you have to try our viral Sonic Twisted Flamingo Recipe next!


    Simple Ingredients You Need for the Ultimate Chocolate Rush


    To get that iconic texture without using a commercial ice cream machine, we use a very specific blend of ingredients. Here is what you need to gather:

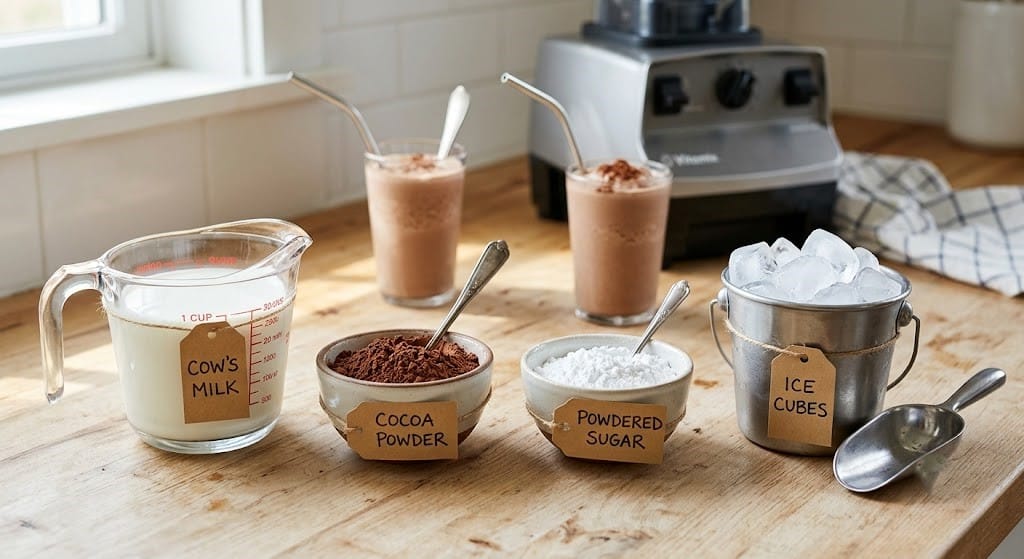
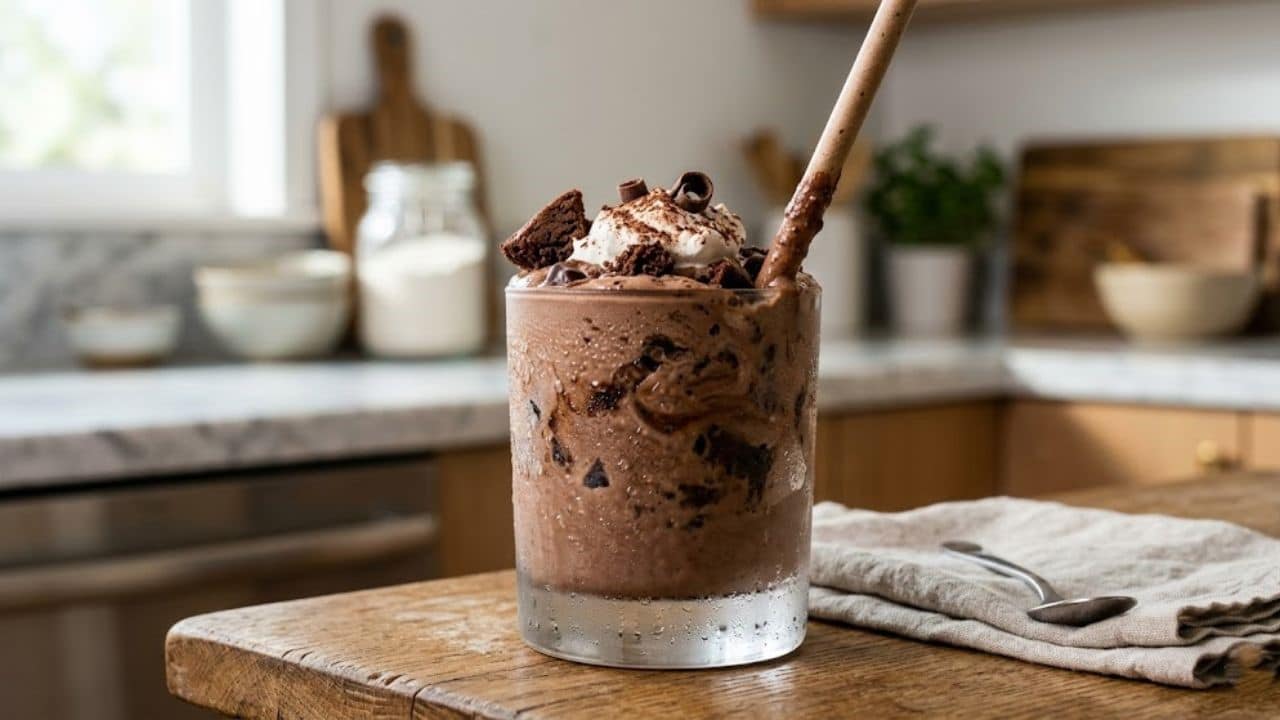
    Ingredients to make a homemade chocolate frosty.


    Vanilla Ice Cream: 3 cups of high-quality, full-fat vanilla ice cream. Using vanilla as the base (instead of chocolate) allows us to control the exact type of chocolate flavor we add later.


    Heavy Whipping Cream: 1/4 cup. This adds incredible richness and keeps the frosty thick. Do not use regular milk, or your drink will become too watery.


    Dry Brownie Mix: 3 tablespoons of dry, boxed brownie mix (like Betty Crocker or Duncan Hines). Safety note: Ensure you heat-treat the raw flour in the mix by microwaving it in a bowl for 60 seconds before using.


    Unsweetened Cocoa Powder: 2 tablespoons. This gives the frosty that dark, slightly bitter chocolate depth that balances out the sweetness.


    Sweetened Condensed Milk: 2 tablespoons. This is the secret ingredient! It provides that gooey, sticky texture that mimics raw brownie batter perfectly.


    Step-by-Step Instructions: Blending the Perfect Frosty


    Making this dessert is all about managing temperatures. You want your ingredients cold so the frost stays thick.


    Step 1: Heat-Treat the Brownie Mix


    Because raw flour can sometimes contain bacteria, it is always best to heat-treat it. Place 3 tablespoons of dry brownie mix in a microwave-safe bowl. Microwave it on high for 60 to 90 seconds. Let it cool completely before putting it in the blender.


    Step 2: Combine the Liquids and Powders


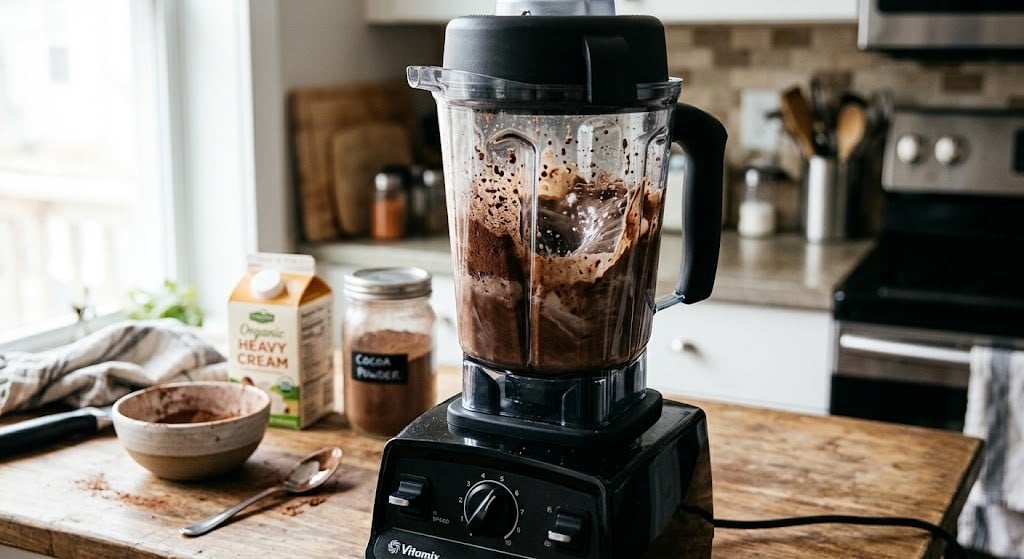
    In your blender, first pour in the heavy whipping cream and sweetened condensed milk. Next, add the cooled brownie mix and the unsweetened cocoa powder. Blend these together just for a few seconds until they form a thick, dark chocolate syrup.

    Blending cocoa powder and cream in a blender.


    Step 3: Add the Ice Cream Base


    Add your 3 cups of cold vanilla ice cream into the blender.


    Step 4: The Pulse Method


    Do not just turn the blender on high! If you blend it too fast or too long, the friction will melt the ice cream and turn it into soup. Instead, “pulse” the blender on and off in short bursts. Use a spoon to push the ice cream down (while the blender is off) if needed. Stop as soon as the mixture is smooth and thick.


    Step 5: Serve Immediately


    Pour the thick frost into a chilled glass. Grab a long spoon and a wide straw, and enjoy your masterpiece!


    The 2026 Viral Hack: The Loaded Fudge Rim & Espresso Boost


    If you want to upgrade your homemade frosty so it looks like a $15 gourmet dessert, you need to try these two massive viral trends dominating Pinterest right now.

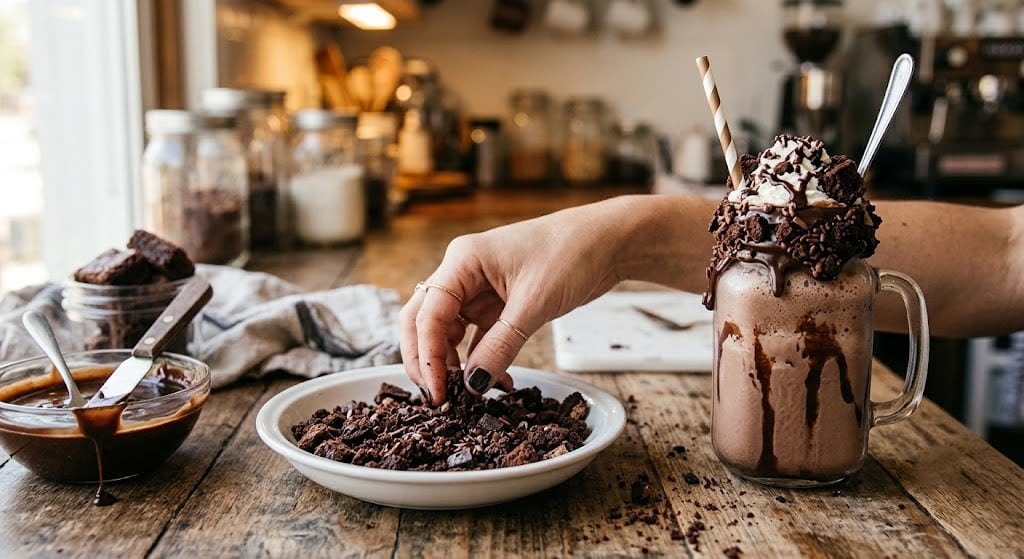
    Loaded brownie crumb and fudge rim hack.


    The Loaded Fudge Rim


    Pour some warm chocolate fudge syrup onto a small plate. On another plate, crush up some baked brownie pieces. Dip the rim of your empty serving glass into the gooey fudge, and then roll it in the brownie crumbs. When you pour your frosty inside, you get an incredible double-chocolate presentation!


    The Salted Espresso Boost


    Chocolate and coffee are best friends. If you want a deeper, darker, more intense chocolate flavor, add just 1/2 teaspoon of instant espresso powder and a tiny pinch of sea salt to your blender in Step 2. It will not make the drink taste like coffee; it simply acts like a magnifying glass for the cocoa, making the brownie flavor explode!

    Need a refreshing fruity drink to balance out all this chocolate? Check out our famous Chick-fil-A Sunjoy Copycat!


    How to Fix Common Homemade Frosty Mistakes


    Creating a thick frost at home can sometimes go wrong. Here are the most common problems and how to solve them instantly:


    Problem: My frost is way too thin and watery.

    • The Fix: You either over-blended it, or your kitchen was too hot. Put the entire blender pitcher into the freezer for 15 minutes to let it firm up before serving. Next time, use less heavy cream.


    Problem: It just tastes like regular chocolate ice cream, not brownie batter.

    • The Fix: You need more depth. Make sure you are using real dry brownie mix and sweetened condensed milk. The condensed milk is what creates that specific “batter” flavor and sticky texture.


    Conclusion


    You do not need to rely on the drive-thru or broken ice cream machines to get your fast-food dessert fix. By blending high-quality vanilla ice cream with real brownie mix, cocoa powder, and a splash of heavy cream, you can recreate the iconic Wendy’s Brownie Batter Frosty in just five minutes.

    It is thick, rich, perfectly icy, and delivers that ultimate chocolate satisfaction. Try adding the viral fudge rim hack to impress your friends, and enjoy the ultimate summer treat from the comfort of your couch!


    FAQs


    Can I make this Frosty dairy-free or vegan?

    Yes! You can easily adapt this recipe. Swap the regular vanilla ice cream for a high-quality oat milk or coconut milk vanilla ice cream. Use a dairy-free heavy cream alternative, and make sure your boxed brownie mix does not contain dairy.


    Why do I need to use vanilla ice cream instead of chocolate?

    Starting with vanilla ice cream gives you a blank canvas. If you use chocolate ice cream, the drink will just taste like a regular chocolate shake. By using vanilla and adding cocoa powder and brownie mix yourself, you create the distinct, complex “brownie batter” flavor profile.


    Do I need a special high-speed blender?

    No, a standard kitchen blender works perfectly fine. The secret is to let your ice cream soften on the counter for about 3 to 5 minutes before blending, and to use the “pulse” function so you do not overwork the motor or melt the ice cream.

  • The Ultimate Homemade Brownie Batter Frosty Recipe

    The Ultimate Homemade Brownie Batter Frosty Recipe


    Editor’s Note


    We know the feeling of waiting in a long drive-thru line just to get a cold, thick chocolate treat. That is why we went into the kitchen to make our own version. After trying many different methods, we found the perfect secret to making a rich, thick, and safe-to-eat brownie batter drink right at home. You do not need an ice cream machine, just a simple blender!


    Are you craving a thick, creamy, and super chocolatey drink? You have found the right place! Today, we are making the famous brownie batter frosty right in your own kitchen.


    This homemade version is rich, cold, and tastes exactly like licking the spoon when you bake brownies. The best part? It takes less than five minutes to make.


    Before we jump into our super easy recipe, let us talk about why this specific flavor is taking over the internet.


    We Ranked the Best Frosty Flavors (And Found the Winner)


    If you look online, people love to debate about the best fast-food frosty flavors. People try and rank every single flavor combination. Here is a look at the most popular trending flavors right now:


    The Classics: The Vanilla Frosty and Classic Chocolate Frosty are always loved by everyone.


    The Fruit Mixes: Flavors like the Pop-Tarts Strawberry Vanilla Frosty Fusion and the Strawberry Chocolate Frosty Swirl are great for fruit lovers.


    The Caramel Hits: Drinks like the Caramel Crunch Chocolate Frosty Fusion give a nice sweet crunch.


    The Ultimate Winners: At the very top of everyone’s list are the heavy chocolate desserts. The Brownie Batter Chocolate Frosty Swirl and the Oreo Brownie Twist Chocolate Frosty Fusion almost always win first place!


    Since the brownie batter flavor is the absolute king of desserts, we decided to teach you how to make the best version of it at home.


    Why Make This at Home?


    You might wonder why you should make this yourself instead of buying it. Here are three amazing reasons:


    Save Your Money: Buying fast-food desserts every day gets expensive. Making it at home costs only pennies per glass.


    Safe Ingredients: We use a special trick to make the raw brownie mix completely safe to eat.


    Perfect Thickness: You get to choose exactly how thick you want your drink to be!


    Ingredients You Need

    Ingredients for a homemade brownie batter drink.


    You only need four simple things from your kitchen to make this magic happen.


    Vanilla Ice Cream: 2 big cups of soft vanilla ice cream. Vanilla creates a better creamy base than chocolate ice cream.


    Milk: 1/2 cup of cold milk. Whole milk makes it the creamiest, but any milk will work fine.


    Dry Brownie Mix: 3 big spoons of dry chocolate brownie mix from a box. (Read our safety tip below before using this!)


    Cocoa Powder: 1 small spoon of dark cocoa powder to give it an extra rich color and taste.


    The Loaded Fudge Rim Upgrade


    If you want your homemade frosty to look exactly like a premium, $10 boutique dessert, you need to try the viral fudge rim hack that is currently dominating Pinterest and TikTok.


    The biggest problem with thick chocolate frosties is that they can look a bit plain in a regular glass. To fix this, grab a small plate and pour two tablespoons of hot chocolate fudge syrup or melted chocolate ganache onto it. On a second plate, place a handful of finely crushed brownie crumbs and mini chocolate chips.


    Before pouring your blended frosty into the glass, turn the glass upside down. Dip the rim first into the gooey chocolate fudge, and then immediately roll it in the brownie crumbs. Turn the glass right side up, and you will have a gorgeous, thick, double-chocolate border around the top! When you pour the frosty inside, the presentation is absolutely stunning. Plus, you get a bite of real chewy brownie with every single sip.

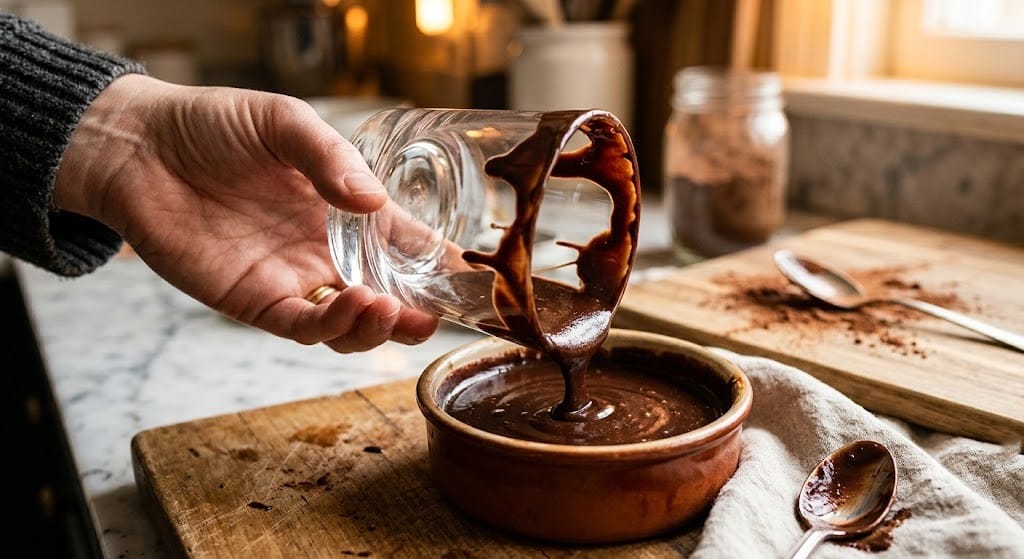
    Dipping a glass rim into chocolate fudge sauce.


    Important Safety Tip: Heat Your Brownie Mix


    Raw flour in dry boxed mixes can sometimes carry germs. But do not worry, fixing this is super simple!


    Put your dry brownie mix into a glass bowl. Put the bowl in your microwave for about one minute. This simple heat trick kills any bad germs. Let the powder cool down for a minute before you use it. Now it is completely safe to eat!


    Step-by-Step Instructions (The Easy Method)


    Ready to make your dessert? Follow these three easy steps.


    Step 1: Add the Wet Ingredients


    Take your blender cup. First, pour in your half cup of cold milk. Adding the liquid first helps your blender spin much easier. Next, drop in your two big cups of vanilla ice cream.


    Step 2: Add the Magic Chocolate


    Now, take your cooled, safe brownie mix powder and drop it into the blender. Add your small spoon of cocoa powder right on top.


    Step 3: Blend Until Thick


    Put the lid tightly on your blender. Turn it on a low speed first, then move to a medium speed. Blend it for about 30 seconds. Stop the blender and look inside. If it is too thick, add a tiny splash of milk. If it is too thin, add one more scoop of ice cream.


    Amazing Variations to Try

    Chocolate milkshakes with Oreo and caramel toppings.


    Want to make your frosty even better? Here are some fun ideas that are very popular right now:


    The Oreo Brownie Twist


    Crush two Oreo cookies into tiny pieces. Stir them into your cup with a spoon after you finish blending. This gives you a wonderful crunch in every bite.


    The Caramel Swirl


    Take a bottle of sticky caramel syrup. Squeeze it around the inside walls of your empty glass before you pour your drink in. It looks beautiful and tastes like candy!


    The Double Chocolate Crunch


    Drop a handful of mini chocolate chips on top of your finished frosty. This is perfect for true chocolate lovers.


    FAQs


    Can I use chocolate ice cream instead of vanilla?


    Yes, you can! However, using vanilla ice cream lets the true “brownie batter” flavor shine through better. Chocolate ice cream can sometimes hide the brownie taste.


    How do I store leftovers?


    If you make too much, pour the extra into a freezer-safe cup with a tight lid. Put it in your freezer. When you want to drink it later, let it sit on your table for 15 minutes to melt just a little bit.


    Do I need a fancy blender?


    Not at all! Because the ice cream is already soft, any normal kitchen blender will do a great job mixing these simple ingredients.


  • How to Make the Perfect Chick-fil-A Sunjoy at Home (Easy Copycat Recipe)

    How to Make the Perfect Chick-fil-A Sunjoy at Home (Easy Copycat Recipe)


    Editor’s Note


    To make your Sunjoy look and taste exactly like it came from Chick-fil-A, the ice matters! Fast-food chains use “pebble ice” or “nugget ice.” If you can get your hands on nugget ice (you can often buy bags of it directly from fast-food chains like Sonic or Chick-fil-A), your homemade drink will instantly level up. Furthermore, always make your tea and lemonade ahead of time so they are ice-cold before mixing. Pouring warm tea over ice will melt the ice and water down your beautiful beverage.


    When the weather gets warm and you are craving something incredibly refreshing, nothing hits the spot quite like a Sunjoy from Chick-fil-A. It is the ultimate thirst quencher that balances the tartness of fresh lemonade with the comforting sweetness of classic iced tea.


    If you find yourself constantly driving through the fast-food lane just to get your hands on this delicious drink, you are in the right place. Today, we are going to show you exactly how to recreate the famous Chick-fil-A Sunjoy recipe right in your own kitchen.


    What exactly is a Chick-fil-A Sunjoy?


    You might be wondering, what is a Sunjoy anyway? For years, customers ordered a “half sweet tea, half lemonade” at Chick-fil-A. It became so incredibly popular that the restaurant chain officially added it to their menu in 2021 and gave it a catchy new name: The Sunjoy.


    The concept is not entirely new. Historically, this blend of iced tea and lemonade is known worldwide as an “Arnold Palmer,” named after the famous American golfer. However, Chick-fil-A’s version stands out because they use their signature Southern-style sweet tea and their iconic freshly squeezed lemonade.


    The result is a beautifully balanced beverage. The sweet tea provides a robust, earthy base, while the lemonade adds a bright, citrusy punch that cuts through the sweetness perfectly.


    Why You Will Love This Homemade Sunjoy Recipe


    Creating copycat recipes at home is one of our specialties. Here is why this specific Sunjoy Chick-fil-A recipe is going to become your new favorite:


    100% Fresh Ingredients: No artificial syrups or preservatives. You are using real lemons, real tea, and real sugar.


    Customizable Sweetness: Fast-food drinks can sometimes be overly sweet. Making it at home means you control exactly how much sugar goes into your glass.


    Budget-Friendly: Buying drinks for the whole family at a drive-thru gets expensive quickly. A whole pitcher of homemade Sunjoy costs less than a single large cup at the restaurant.


    Perfect for Parties: This recipe easily scales up. It is the perfect refreshing beverage to serve at summer BBQs, picnics, and family gatherings.


    If you are looking for more refreshing summer drinks, don’t forget to check out our Dunkin Mango Pineapple Refresher Copycat!


    Ingredients You Will Need


    To get that authentic fast-food taste, you need high-quality, simple ingredients. Here is your shopping list:

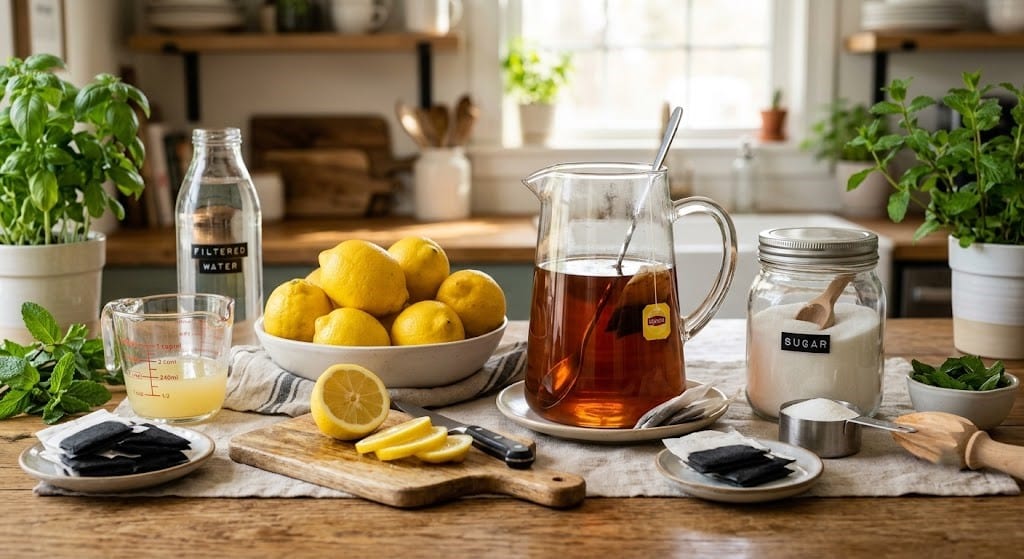
    Ingredients for making homemade sweet tea lemonade.


    For the Sweet Tea:


    Water: Filtered water works best for brewing tea, as it prevents any strange mineral tastes.


    Black Tea Bags: Standard black tea bags are perfect. Lipton or Luzianne brands will give you that authentic Southern sweet tea flavor. You will need about 3 to 4 family-size tea bags.


    Granulated Sugar: Standard white sugar is used to sweeten the tea while it is still warm so it dissolves completely.


    Baking Soda: Secret Ingredient Alert! A tiny pinch of baking soda removes the bitterness from the black tea and keeps it crystal clear in the fridge.


    For the Lemonade
    :


    Fresh Lemons: This is non-negotiable. Do not use bottled lemon juice. You need the bright, fresh acidity of real lemons. Plan on using about 6-8 large lemons to get 1 cup of fresh lemon juice.


    Granulated Sugar: To create a simple syrup base for the lemonade.


    Cold Water: To dilute the lemonade to the perfect strength.


    Step-by-Step Instructions: Crafting the Sunjoy


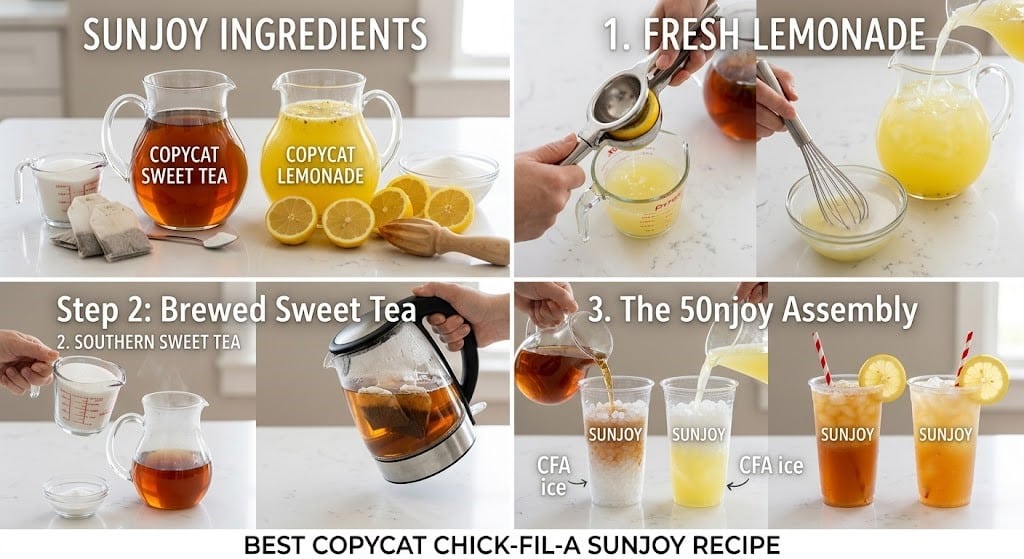
    Making a Sunjoy Chick-fil-A style requires making the two components separately before combining them into magic.


    Step 1: Brew the Southern Sweet Tea


    Boil the Water: Bring 4 cups of filtered water to a rolling boil in a medium saucepan.


    Steep the Tea: Remove the water from the heat. Add your black tea bags and a tiny pinch of baking soda. Let it steep for exactly 5 to 7 minutes. Do not leave the bags in longer, or the tea will become bitter.


    Sweeten: Remove the tea bags without squeezing them too hard. While the tea is still hot, stir in 3/4 cup of granulated sugar until it is completely dissolved.


    Cool Down: Add 4 cups of cold water to the concentrated hot tea. Let it sit until it reaches room temperature, then place it in the fridge to chill.

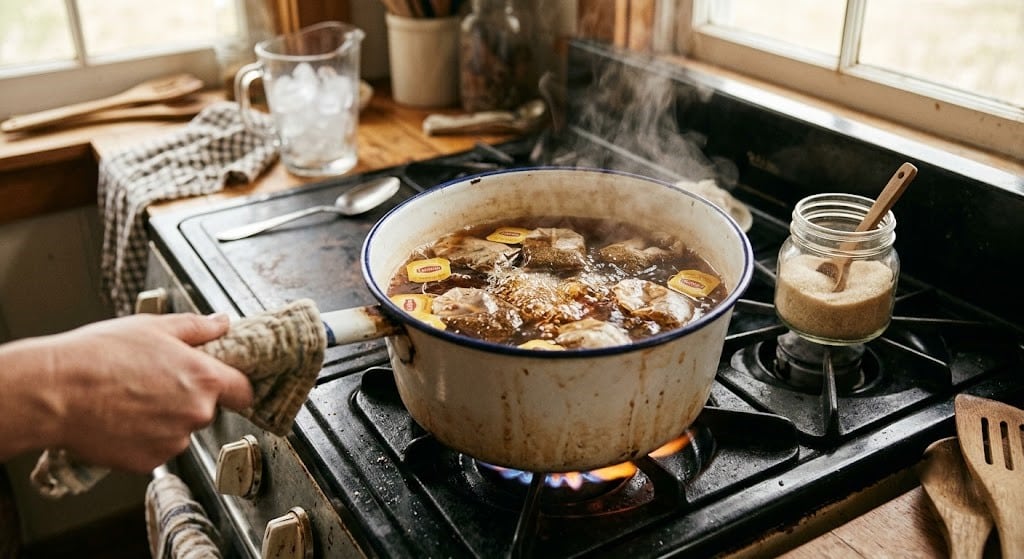
    Brewing Southern sweet tea in a pot.


    Step 2: Make the Fresh Lemonade


    Squeeze the Lemons: Roll your fresh lemons firmly on the counter to release their juices. Cut them in half and squeeze until you have exactly 1 cup of fresh lemon juice. Strain out the seeds.


    Make Simple Syrup: In a small saucepan, combine 1 cup of sugar and 1 cup of water. Heat gently over medium heat, stirring until the sugar dissolves completely. Let this simple syrup cool.


    Mix the Lemonade: In a large pitcher, combine the freshly squeezed lemon juice, the cooled simple syrup, and 3 cups of cold filtered water. Stir well and chill.


    Step 3: The Sunjoy Blend


    The Golden Ratio: The secret to a perfect Sunjoy is the ratio. Fill a tall glass to the top with ice cubes.


    Pour: Fill the glass halfway (50%) with your homemade sweet tea.


    Top it Off: Fill the remaining half (50%) with your fresh lemonade.


    Garnish and Serve: Give it a gentle stir. Garnish with a fresh lemon wheel and enjoy immediately!

    Mixing half sweet tea and half lemonade in a glass.


    Trending Variations & Customizations


    One of the best things about making drinks at home is making them your own. Here are some highly searched and trending variations of the classic Sunjoy:


    Diet Sunjoy: Want to cut the calories? Swap the granulated sugar in both the tea and the lemonade for a zero-calorie sweetener like Stevia, Monk Fruit, or Splenda.


    Strawberry Sunjoy: Muddle a handful of fresh strawberries at the bottom of your glass before adding the ice, tea, and lemonade. It adds a beautiful pink color and a fruity twist.


    Peach Sunjoy: Add a splash of peach syrup to your glass. Peach and sweet tea are a match made in heaven.


    Sparkling Sunjoy: For a fun, fizzy version, swap out half of the plain water in the lemonade recipe for sparkling water or club soda.


    Internal Link Opportunity: Love fruity twists? Try recreating our highly-rated Sonic Unicorn Slush for your next party!


    Conclusion


    Whether you are lounging by the pool, hosting a summer barbecue, or just need a sweet afternoon pick-me-up, this half-sweet tea, half-lemonade masterpiece is guaranteed to satisfy. Grab your pitchers, squeeze those lemons, and get ready to enjoy the most refreshing drink of the summer!


    There is no need to wait in a long drive-thru line when you can make the ultimate Chick-fil-A Sunjoy right in your own kitchen. By taking the time to brew real black tea and squeeze fresh lemons, you create a beverage that is arguably even better and fresher than the original.


    FAQs


    Does a Chick-fil-A Sunjoy have caffeine? 

    Yes. Because half of the drink is made with brewed black tea, a Sunjoy does contain caffeine. A large Sunjoy typically contains around 30-40mg of caffeine, which is about half the amount in a regular cup of coffee.


    Can I use store-bought lemonade and tea? 

    You absolutely can! If you are short on time, you can buy high-quality pre-made sweet tea and fresh lemonade from the grocery store. Simply mix them 50/50 over ice. However, making it from scratch yields a much fresher, more authentic flavor.


    How long does homemade Sunjoy last in the fridge? 

    If you store the sweet tea and the lemonade in separate, airtight pitchers in the refrigerator, they will stay fresh for up to 5 days. It is best to keep them separate and only mix them together in individual glasses right before you drink them.


    What is the difference between a Sunjoy and an Arnold Palmer? 

    They are essentially the same concept! “Arnold Palmer” is the universal name for an iced tea and lemonade mix. Chick-fil-A simply branded their specific version made with their proprietary Southern sweet tea and freshly squeezed lemonade as the “Sunjoy” in 2021.

  • The Ultimate Sonic Twisted Flamingo Recipe (Viral Secret Menu Hack!)

    The Ultimate Sonic Twisted Flamingo Recipe (Viral Secret Menu Hack!)


    Editor’s Note


    Ordering off the secret menu can sometimes lead to awkward moments at the drive-thru. Not every employee knows the exact flavor ratios for the famous Twisted Flamingo. Sometimes it comes out too sweet, and other times it just tastes like plain soda. At Sip Drafts Lab, we wanted a consistent, perfect drink every single time. After running multiple tests in our kitchen with different syrups, we found the ultimate golden ratio. By perfectly balancing sweet cherry, smooth vanilla, and a squeeze of fresh lime, we created the ultimate refreshing summer beverage. Follow our easy guide to mix this gorgeous pink drink at home without the drive-thru hassle!

    Sonic Drive-In is famous around the world for having millions of different drink combinations. While their regular menu is great, their secret menu is where the real magic happens. Right now, the “Sonic Twisted Flamingo” is one of the most highly searched secret drinks on the internet. It is bright pink, incredibly refreshing, and has a unique flavor profile that screams summer vacation.


    Unfortunately, buying custom sodas every single day can quickly empty your wallet. The good news is that you can easily recreate this beautiful, sweet, and tangy drink right in your own kitchen for just a few cents. Let us show you exactly how to become your own master flavor mixer!


    What Exactly is the Sonic Twisted Flamingo?


    If you are new to the world of custom sodas, you might be wondering what flavors are actually inside this famous pink cup.


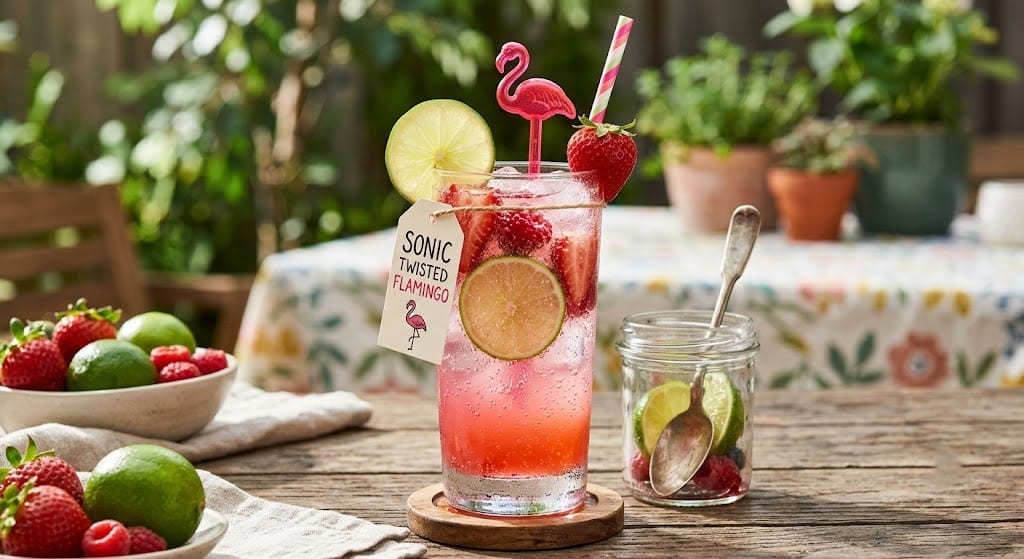
    The Twisted Flamingo is a beautiful twist on a classic cherry limeade. It uses a crisp lemon-lime soda base (like Sprite). Then, it is mixed with a generous splash of sweet cherry syrup, a pump of smooth vanilla syrup, and a squeeze of real, fresh lime juice.


    The vanilla completely transforms the drink. It softens the sharp bite of the lime and blends with the cherry to create a flavor that tastes exactly like a melted popsicle. It is sweet, tart, bubbly, and absolutely delicious.


    Why Making It at Home is the Best Option


    There are two major problems with ordering secret menu items at a fast-food restaurant.


    First, not every worker knows the recipe. If you ask for a “Twisted Flamingo,” you might get a blank stare. You usually have to explain the exact syrups to them. Second, large custom drinks can cost over four dollars!


    By buying a few basic syrups at your local grocery store, you can make dozens of these drinks at home. You can also control the exact amount of sugar, ensuring your drink is never too sweet or too sour.


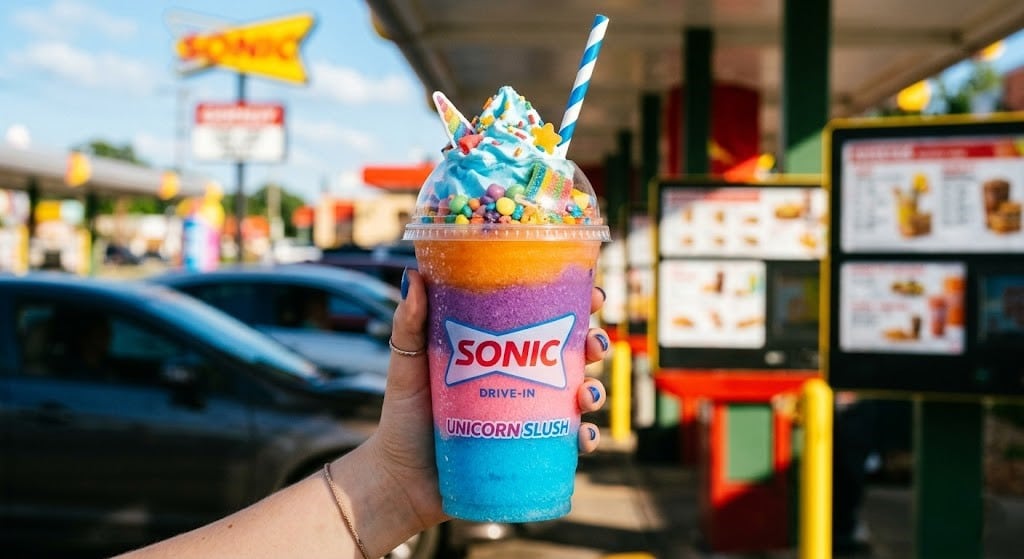
    If you love making magical, colorful Sonic drinks at home, you have to try our viral Sonic Unicorn Slush Copycat Recipe next!


    Simple Ingredients You Will Need


    You do not need any fancy bartender equipment to make this bubbly treat. Just grab these simple items from your pantry or local supermarket:

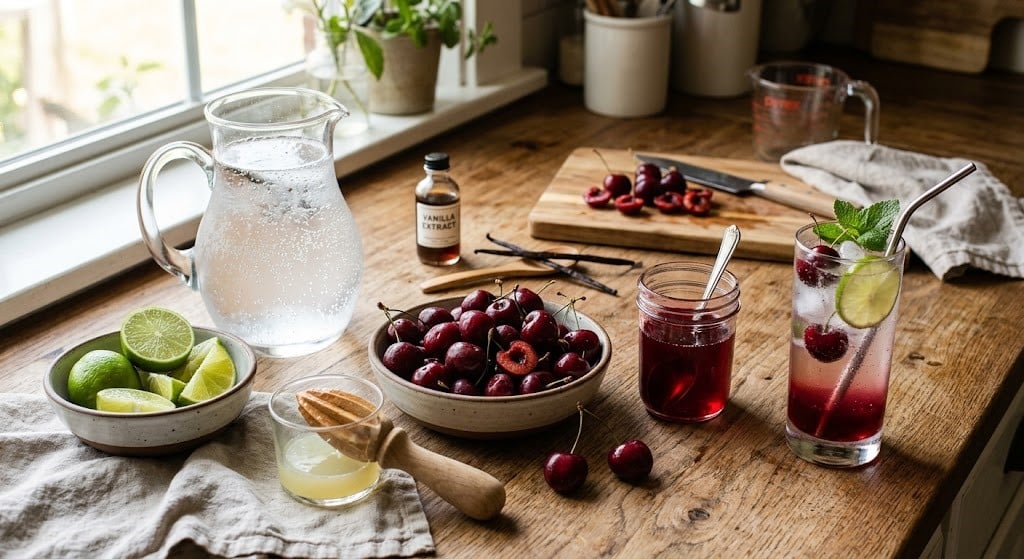
    Ingredients for making a homemade cherry vanilla lime soda.


    Lemon-Lime Soda: 1.5 cups of cold Sprite, 7-Up, or Starry. This provides the crisp, fizzy base.


    Cherry Syrup: 2 tablespoons of high-quality cherry flavoring syrup (Torani or Monin brand works best).


    Vanilla Syrup: 1 tablespoon of classic vanilla coffee syrup. This is the secret ingredient that makes it “twisted.”


    Fresh Lime: 1 wedge of a fresh lime for squeezing, plus an extra slice for garnish.


    Ice: 2 cups of special pebble ice or crushed ice.


    Step-by-Step Instructions: The Perfect Mix


    Mixing a custom soda is all about the order of ingredients. Follow these exact steps to make sure your syrups blend perfectly with the soda without losing all the bubbles.


    Step 1: Prepare the Perfect Ice


    The ice you use actually matters! Sonic is famous for its soft, chewable “pebble ice.” If you do not have a pebble ice maker, simply put regular ice cubes in a zip-top bag and gently smash them with a rolling pin. Fill a tall, clear serving glass completely to the top with this crushed ice.


    Step 2: Add the Flavor Syrups


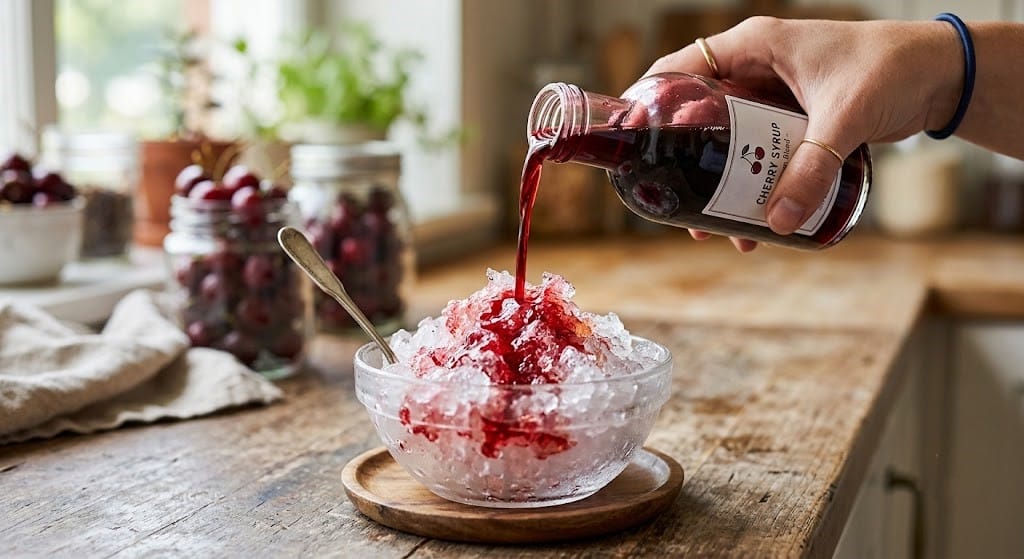
    Pour your 2 tablespoons of cherry syrup and 1 tablespoon of vanilla syrup directly over the crushed ice. Pouring the heavy syrups first helps them distribute evenly when the soda is added later.

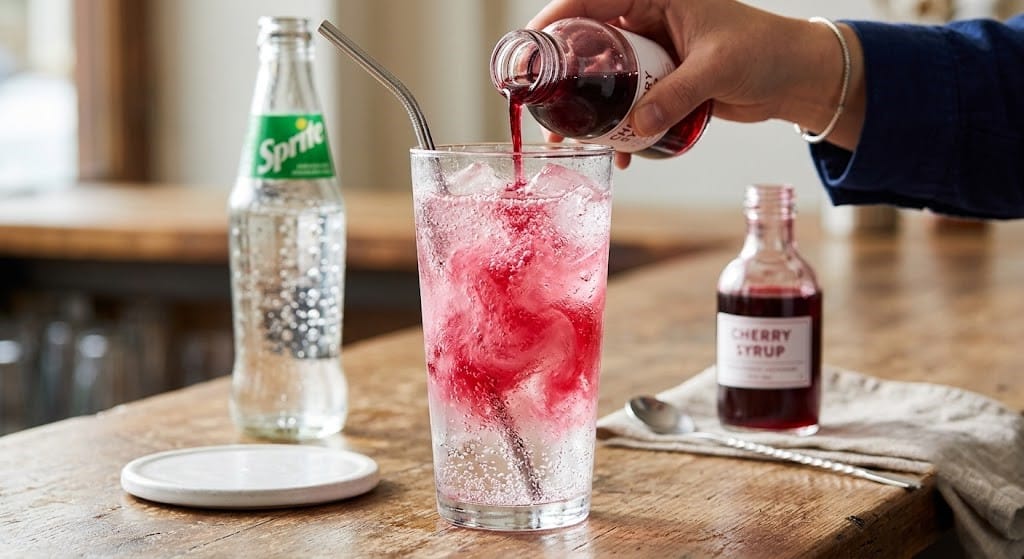
    Pouring cherry syrup over crushed ice.


    Step 3: Squeeze the Fresh Lime


    Take your fresh lime wedge and squeeze the sour juice right on top of the syrups. The fresh citrus juice is crucial because it cuts through the heavy sweetness of the cherry and vanilla.


    Step 4: Pour the Fizzy Base


    Take your ice-cold lemon-lime soda and slowly pour it into the glass. Watch as the clear soda hits the red cherry syrup and turns the entire drink into a gorgeous, vibrant pink color!

    Fizzy Sprite mixing with cherry syrup to make pink soda.


    Step 5: The Gentle Stir


    Do not shake the drink! Shaking will instantly destroy all the carbonation. Instead, take a long spoon or a straw and gently stir the drink from the bottom up two or three times. Garnish the rim of your glass with a fresh lime wheel and serve immediately.


    The “Dirty Soda” Upgrade: A 2026 Trending Hack


    If you want to take your Twisted Flamingo to the absolute next level, you need to try the viral “Dirty Soda” trend that is exploding across TikTok and Pinterest right now.


    A dirty soda is a regular flavored soda that has a splash of heavy cream or coconut creamer added to it.

    To upgrade your Twisted Flamingo, simply pour 2 tablespoons of sweet cream or coconut milk over the top of your finished drink right before serving. The rich, white cream slowly swirls down into the bright pink soda, creating a stunning visual effect and a taste that is just like a creamy fruit float!

    Looking for more energy and wild flavor combinations? Check out our ultimate guide to the Best Dutch Bros Rebel Flavors to make at home!


    Troubleshooting Common Soda Mistakes


    If your homemade drink does not taste quite like the fast-food version, check these quick expert fixes:


    Problem: The drink is entirely flat and has no fizz.

    • The Fix: You likely stirred it too aggressively or used warm soda. Always use ice-cold Sprite straight from the fridge, and only stir gently once or twice.


    Problem: It tastes way like cough medicine.

    • The Fix: Cheap cherry syrups can sometimes taste artificial. Always use premium brands like Torani, and make sure you do not skip the fresh lime juice. The lime is what makes it taste like a real fruit drink instead of medicine.


    Conclusion


    You do not need to deal with confusing drive-thru menus to enjoy a premium, refreshing summer beverage. By combining crisp lemon-lime soda, sweet cherry, smooth vanilla, and a hint of fresh lime, you can create the ultimate Sonic Twisted Flamingo right on your kitchen counter. It is bubbly, beautifully pink, and perfectly balanced. Grab your favorite glass, fill it with crushed ice, and mix up this delicious tropical treat today!


    FAQs


    Does the Twisted Flamingo have any caffeine?


    No! Because this recipe uses a lemon-lime soda base like Sprite or 7-Up, it is completely caffeine-free. This makes it a wonderfully safe and fun summer drink for children or for sipping late at night.


    Can I make a sugar-free or diet version of this drink?


    Yes, it is very easy to make this a low-calorie treat. Simply swap the regular soda for Diet Sprite or Zero Sugar Starry. Then, purchase the sugar-free versions of both the Torani cherry and vanilla syrups. It will look and taste identical but with zero guilt!


    How do I order this correctly at the Sonic drive-thru?


    If you are on a road trip and want to buy one at the restaurant, do not just ask for a “Twisted Flamingo.” Instead, clearly tell the speaker: “I would like a large Sprite with cherry syrup, vanilla syrup, and a squeeze of real lime.” They will get it right every single time!

  • The Ultimate Sonic Unicorn Slush Copycat Recipe (Secret Menu Revealed!)

    The Ultimate Sonic Unicorn Slush Copycat Recipe (Secret Menu Revealed!)


    Editor’s Note


    Navigating hidden fast-food menus often feels like a frustrating guessing game. If the drive-thru worker does not know the exact recipe, you end up with a confusing, expensive mess. The viral Sonic Unicorn Slush is one of the most requested secret drinks, famous for its magical pink and blue layers topped with crunchy rainbow candy. However, making it at home usually ends in disaster because the colors mix together into an ugly, muddy purple! At Sip Drafts Lab, we solved this exact problem. We discovered the perfect ice-to-syrup ratio to keep the vibrant neon colors completely separated. Follow our foolproof layering guide to create this stunning, Pinterest-perfect magical treat right in your own kitchen!


    Are you ready to bring a little bit of colorful magic into your day? Your search for the perfect recipe ends right here. Today, we are going to learn how to make the legendary, highly-searched Sonic Unicorn Slush right at home.


    Recently, the colorful “unicorn style” craze has absolutely dominated online food communities. From colorful coffees to sparkly cakes, everyone loves food that looks bright, fun, and totally magical. Sonic Drive-In is already famous for having the best icy slushies in the world. When fans started mixing different neon syrups together, the secret menu Unicorn Slush was born!


    What is the Secret Sonic Unicorn Slush?


    If you are new to the fast-food secret menu world, you might be wondering what exactly goes into a Unicorn Slush.


    Because it is not an official menu item, the recipe can change depending on who makes it. However, the most viral, highly-rated version on TikTok features two distinct layers:

    1. A bright neon blue layer made from tart Blue Coconut or Blue Raspberry syrup.
    2. A vibrant pink layer made from sweet Strawberry or Cherry syrup.
    3. A generous topping of crunchy Rainbow Nerds candy that provides an amazing texture contrast to the smooth ice.


    When you sip it, you get a rush of sweet berry flavors, a hint of tropical coconut, and a fun, sour candy crunch. It is the absolute ultimate summer cooling drink!


    The Science of Slush: How to Stop Colors from Mixing


    The biggest problem people face when making this drink at home is that the beautiful pink and blue colors instantly melt together and turn brown or dark purple. This completely ruins the fun unicorn aesthetic!


    The Sip Drafts Lab Pro Trick: The secret to keeping the layers separate is the thickness of the ice. You cannot just pour liquid syrups over regular ice cubes. You must blend the ice and the flavors into a thick, snow-like consistency before putting them in the glass. Thick frozen slush acts like a wall, preventing the two colors from bleeding into each other.


    If you love mixing bright, beautiful colored drinks at home, you absolutely have to check out our complete guide on The Best Dutch Bros Rebel Flavors right now!


    Simple Ingredients to Create the Magic


    You only need a few cheap, easy-to-find ingredients to set up your own magical slushie station at home.

    Ingredients needed for a homemade unicorn slushie.


    Lemon-Lime Soda: 1 cup of cold Sprite or 7-Up. This provides the sweet, fizzy liquid base that makes the slush taste authentic.


    Neon Blue Flavoring: Two tablespoons of either blue raspberry or blue coconut syrup (the Torani brand is an excellent choice). 


    Pink Strawberry Syrup:
    2 tablespoons of pink strawberry or cherry syrup.


    Crushed Ice: 4 cups of clean, fresh ice cubes.


    Rainbow Nerds Candy: 2 tablespoons of colorful Nerds candy for the ultimate magical topping.


    Step-by-Step Instructions: The Layering Masterclass


    Since we are making two different colored layers, we need to do this in two quick batches. Follow these exact steps to get that perfect, Instagram-worthy separation.


    Step 1: Chill Your Glass


    Before you start blending, take a tall, clear glass and put it directly into the freezer. A frosty glass keeps the slush from melting while you build the layers.


    Step 2: Blend the Neon Blue Layer


    In your blender jar, add 2 cups of ice, 1/2 cup of cold Sprite, and the 2 tablespoons of Blue Raspberry syrup. Blend this on high speed for 30 seconds until it looks exactly like smooth, thick blue snow. Pour this blue slush into a bowl and place it in the freezer for a minute while you make the next color.

    Blending bright blue raspberry slush in a blender.


    Step 3: Clean and Blend the Pink Layer


    Rinse your blender pitcher quickly with water so the colors do not mix. Now, add the remaining 2 cups of ice, 1/2 cup of Sprite, and the 2 tablespoons of Pink Strawberry syrup. Blend on high speed until you have a thick pink snow.


    Step 4: Build the Unicorn Layers


    Grab your ice-cold drinking glass from the freezer.  Spoon the blue slush into the bottom half of the glass. Use the back of your spoon to pack it down slightly and make it flat. Next, carefully spoon the pink slush directly on top of the blue layer. Because the slush is thick, the colors will sit beautifully on top of each other!


    Step 5: Add the Candy Crunch


    For the final magical touch, sprinkle a heavy handful of Rainbow Nerds candy all over the top of the pink slush. Serve immediately with a wide straw and a long spoon!

    Sprinkling rainbow candy on a pink and blue slush.


    Trending 2026 Customizations to Try at Home


    The best part about being your own at-home barista is that you can upgrade the recipe using the latest viral internet trends. Here are the most highly searched variations to try next:


    The Cotton Candy Cloud Twist


    Do you want your drink to look even more magical? Before adding the slush, use a spoon to smear a little bit of white marshmallow fluff around the inside walls of your glass. It creates beautiful white “clouds” floating in the colorful sky!


    The Popping Boba Upgrade


    Instead of using hard Nerds candy, drop a scoop of strawberry popping boba into the bottom of the glass before adding the blue slush. When you drink through a wide straw, the boba pearls burst in your mouth with fresh fruit juice.

    Looking for another amazing tropical fruit blend that uses real frozen fruit? Our famous Mango Monsoon Tropical Smoothie Recipe is the perfect healthy treat!


    The Galactic Sour Sparkle


    If you prefer sour flavors over sweet ones, swap the regular Sprite for a sour lemonade. Add a pinch of edible food glitter into the blender while making the layers. Your slush will literally sparkle in the sunlight like a galaxy!


    Conclusion


    You do not need to feel anxious at the drive-thru window or spend a lot of money to enjoy the internet’s most beautiful secret menu drink. By blending your ice and syrups into thick, separated layers, you can easily create the ultimate Sonic Unicorn Slush right in your own kitchen. It is incredibly refreshing, packed with sweet berry flavors, and finished with the perfect candy crunch. Grab your blender, mix up these magical neon colors, and treat yourself to a fast-food favorite today!


    FAQs


    Does the Sonic Unicorn Slush have caffeine in it?


    No! Because this copycat recipe uses caffeine-free lemon-lime soda (like Sprite or 7-Up) and fruit syrups, it is 100% caffeine-free. This makes it a fantastic, safe, and fun summer dessert for kids.


    Can I make a sugar-free version of this slush?


    Absolutely! You can easily make this a zero-sugar treat. Simply use Diet Sprite or Zero Sugar 7-Up as your liquid base, and purchase sugar-free versions of the blue raspberry and strawberry syrups. You can skip the Nerds candy or top it with fresh berries instead!